Outfit Editor
Use the Outfit Editor when you want to refine an outfit you already have and control every detail of it. Add clothes, text, pictures, backgrounds, color blocks, and virtual avatars, arrange everything freely on the canvas, and save your changes.
In this article:
- Opening the editor
- Adding elements
- Adding items
- Adding text
- Adding pictures
- Adding a background
- Adding color
- Adding a virtual avatar
- Editing elements
- Additional editor actions
- Outfit details
- Saving your changes
Opening the editor
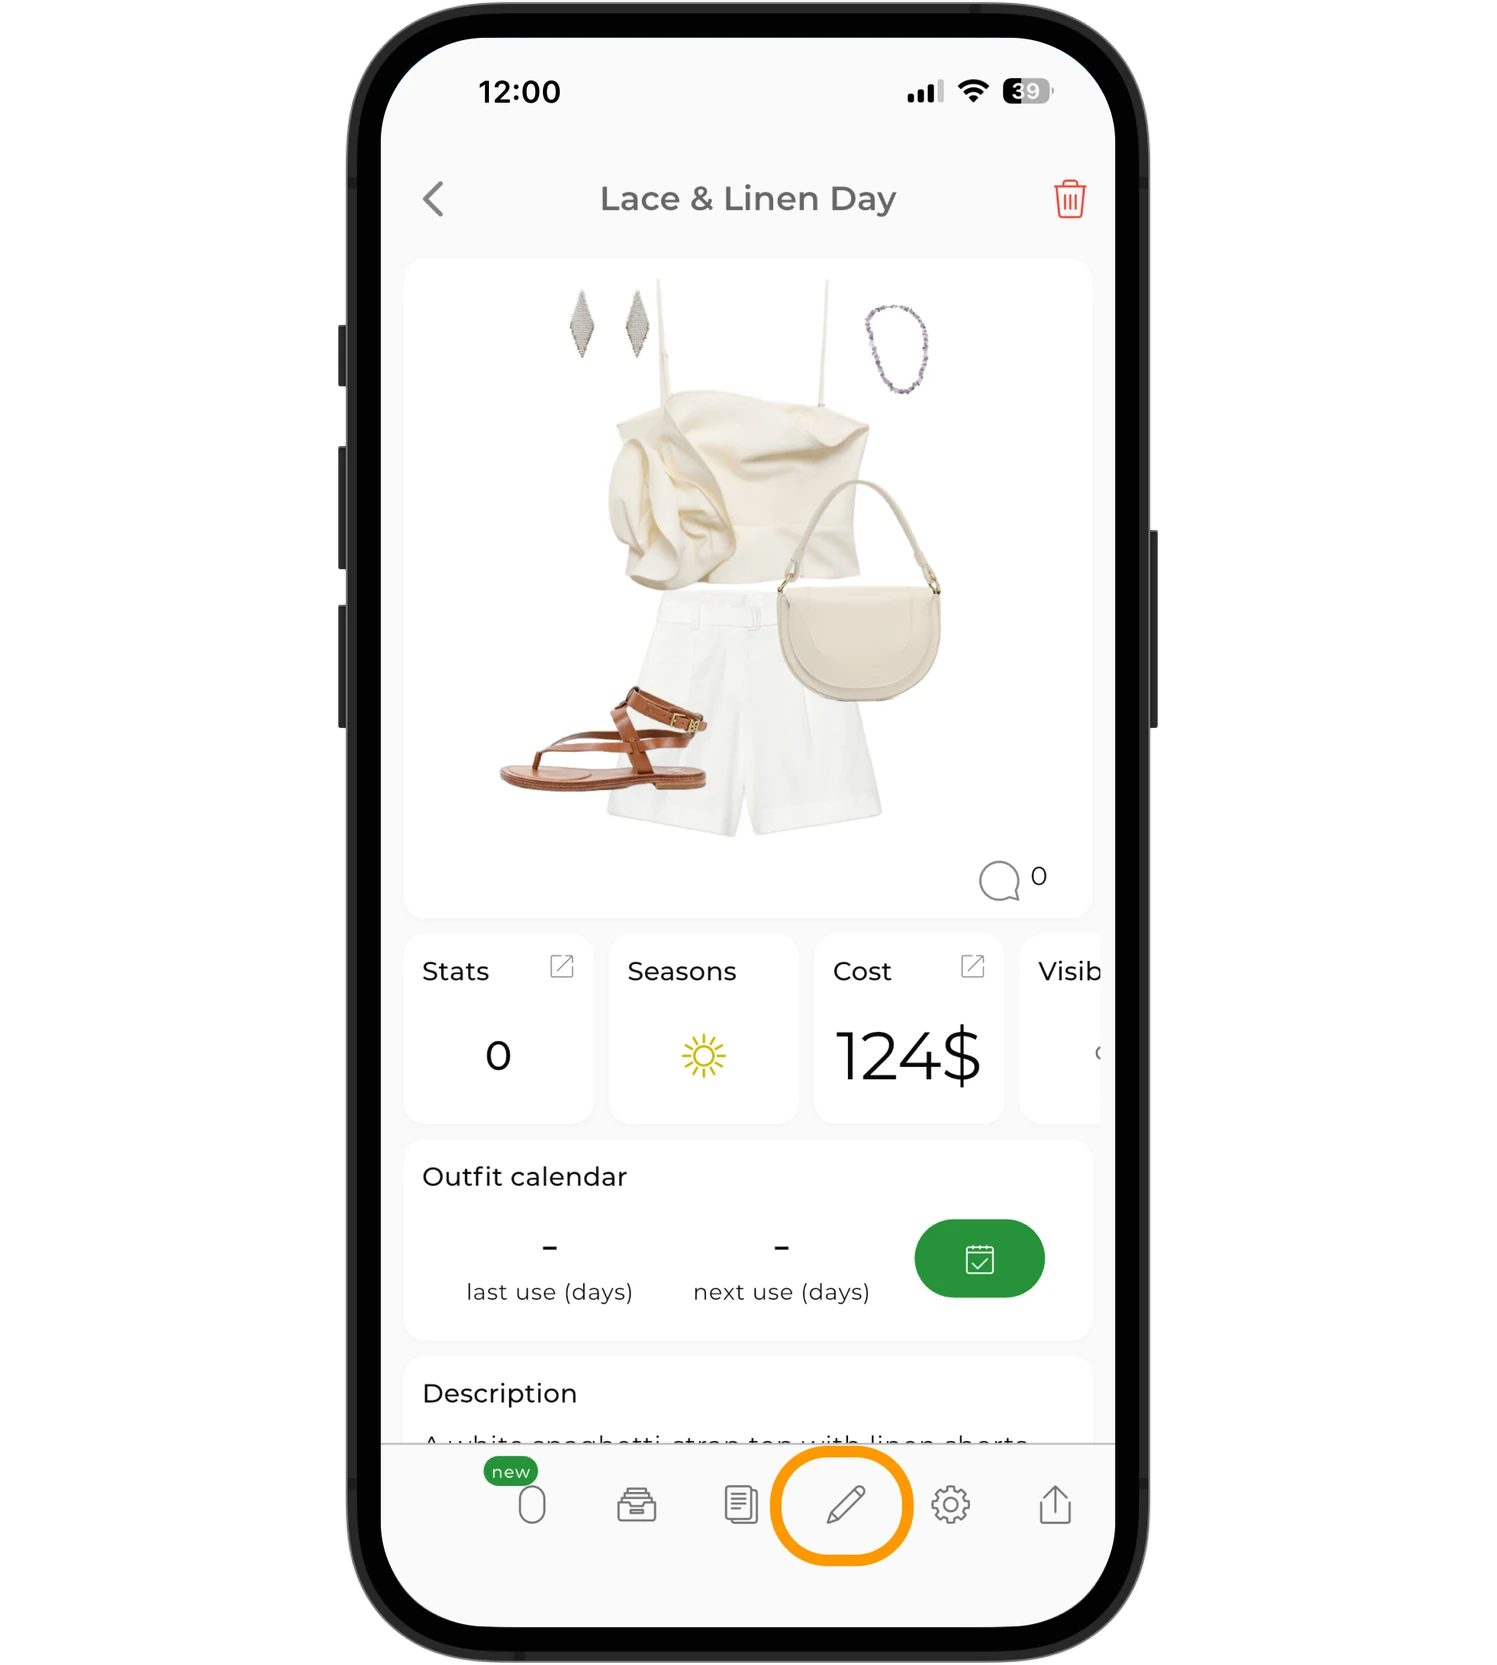
Open any outfit and tap the pencil icon to switch to editing mode.
Adding elements
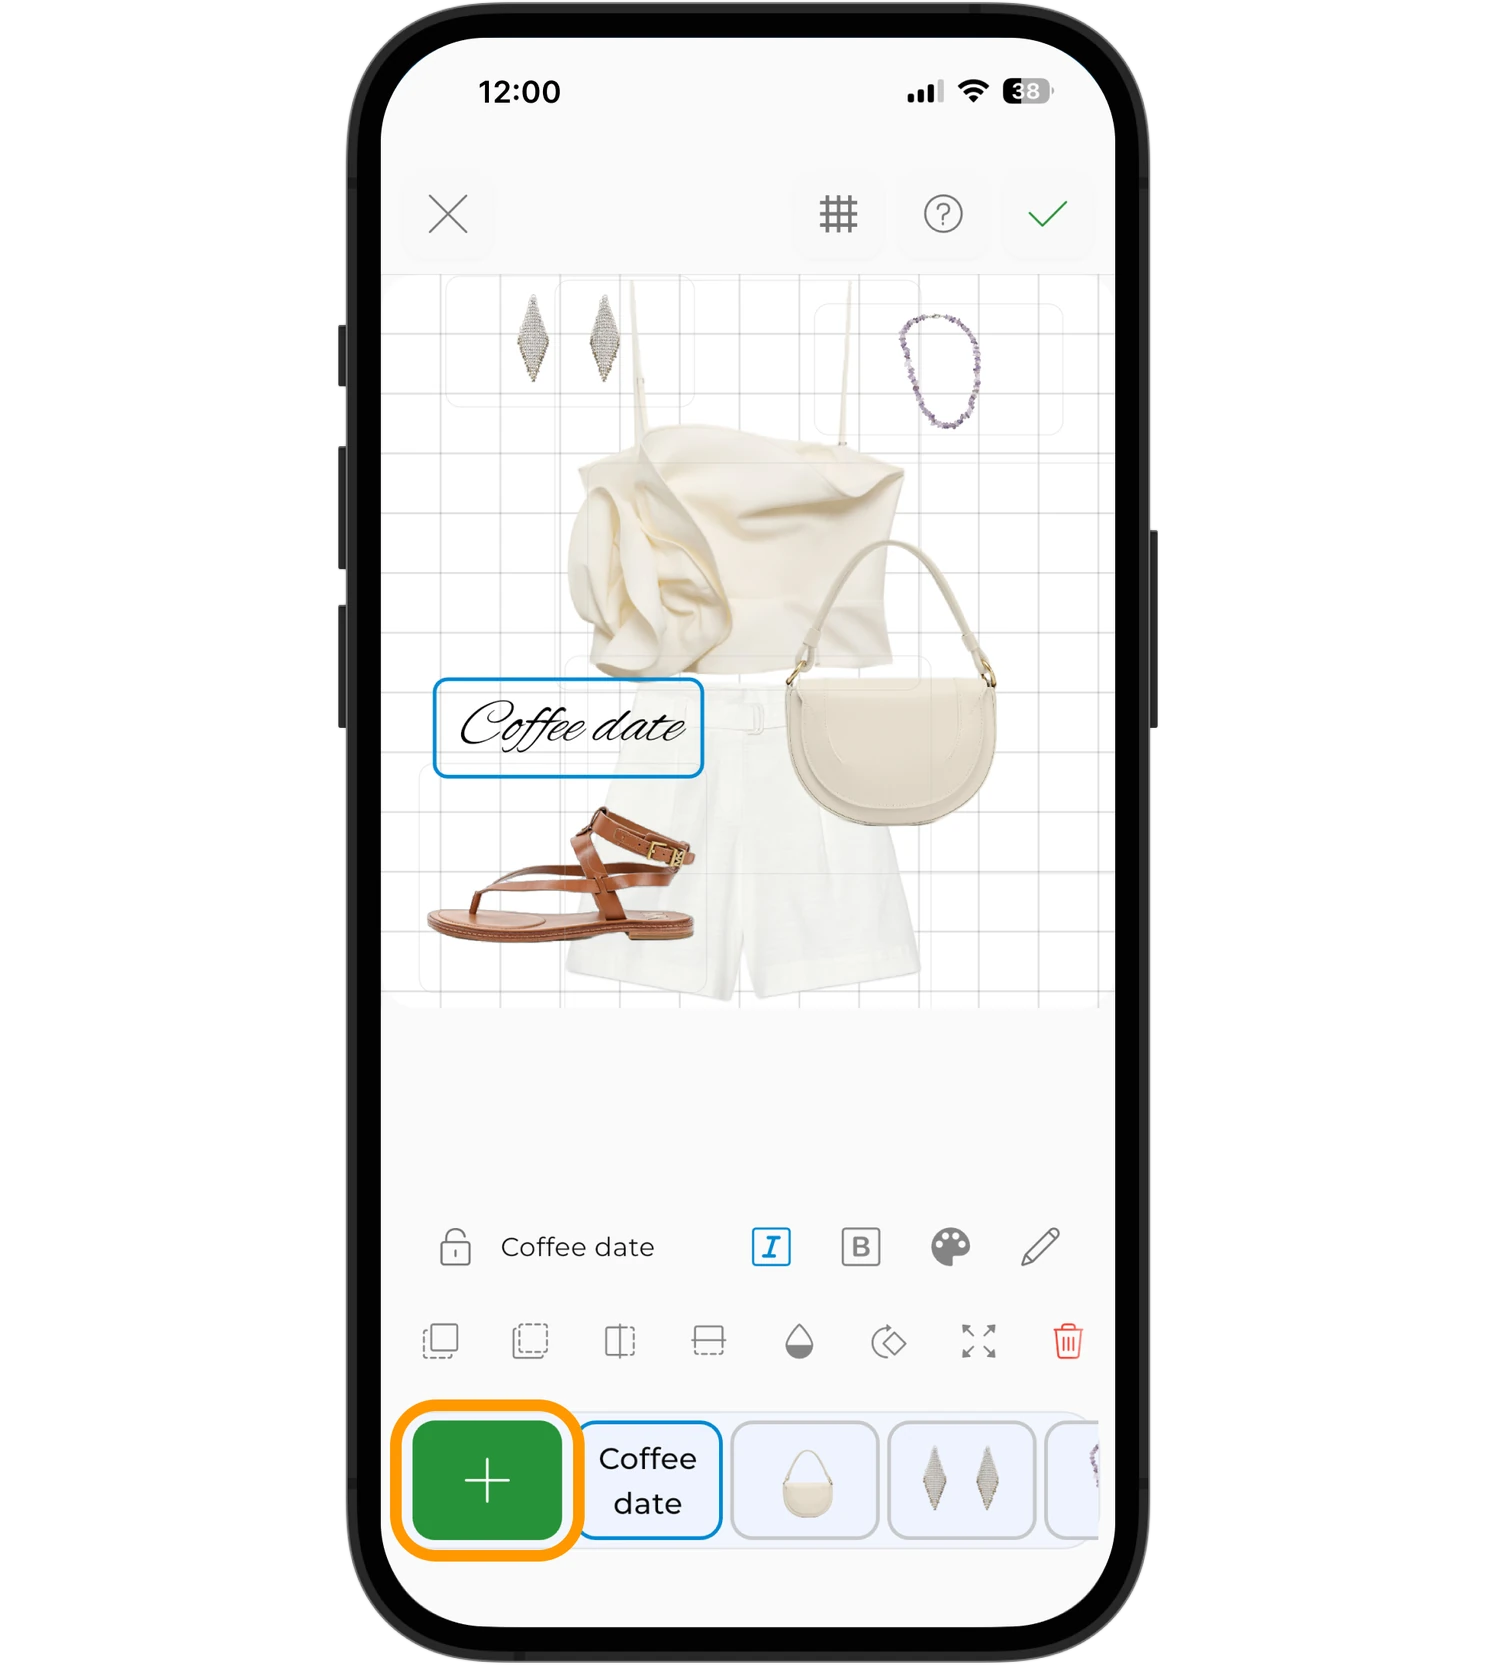
To add new elements to the outfit, tap the "+" icon.
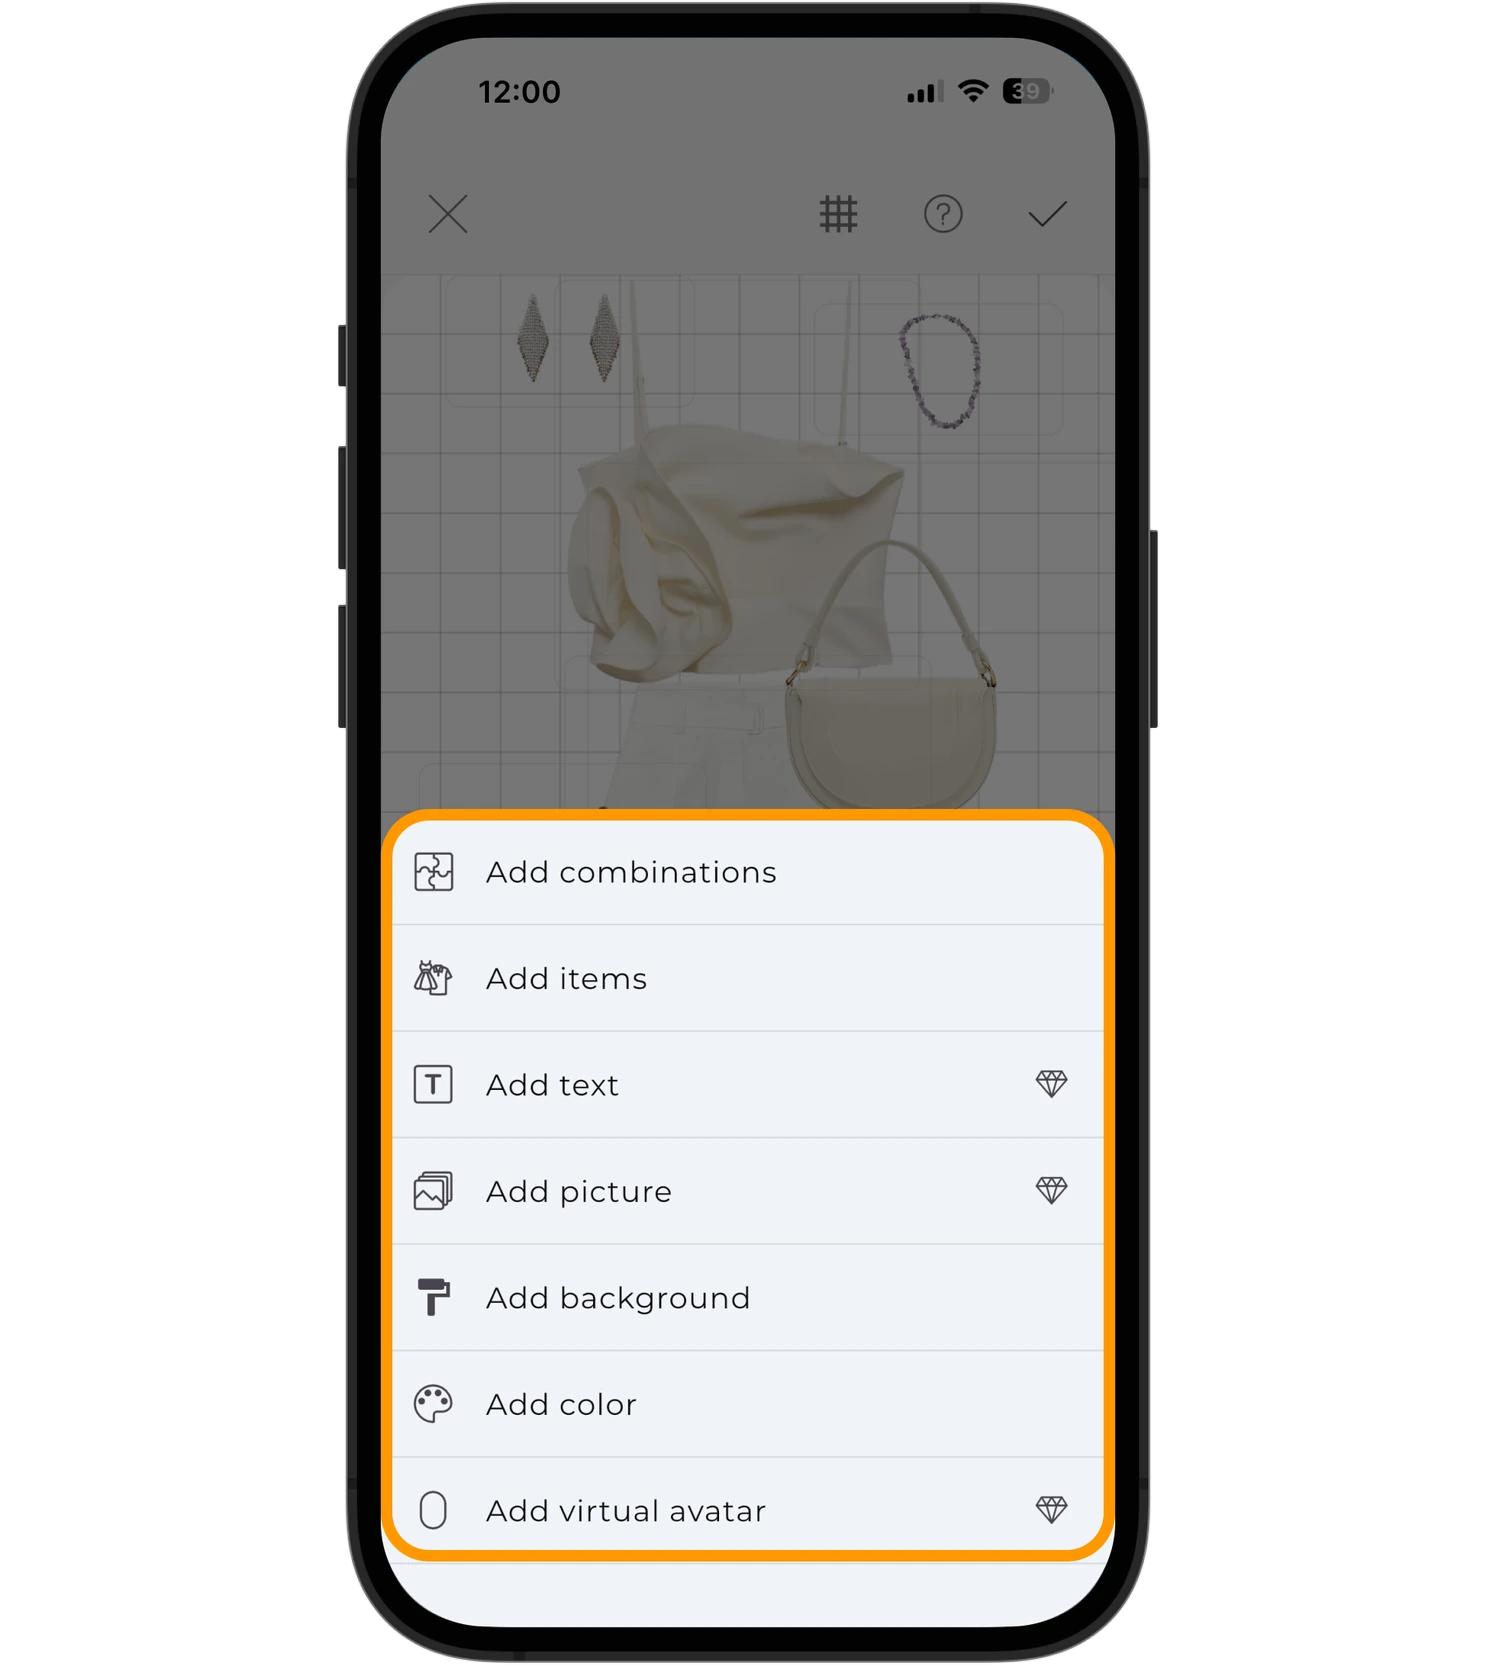
From here, you can add:
- combinations;
- items;
- text;
- pictures;
- background;
- color;
- virtual avatar.
Adding items
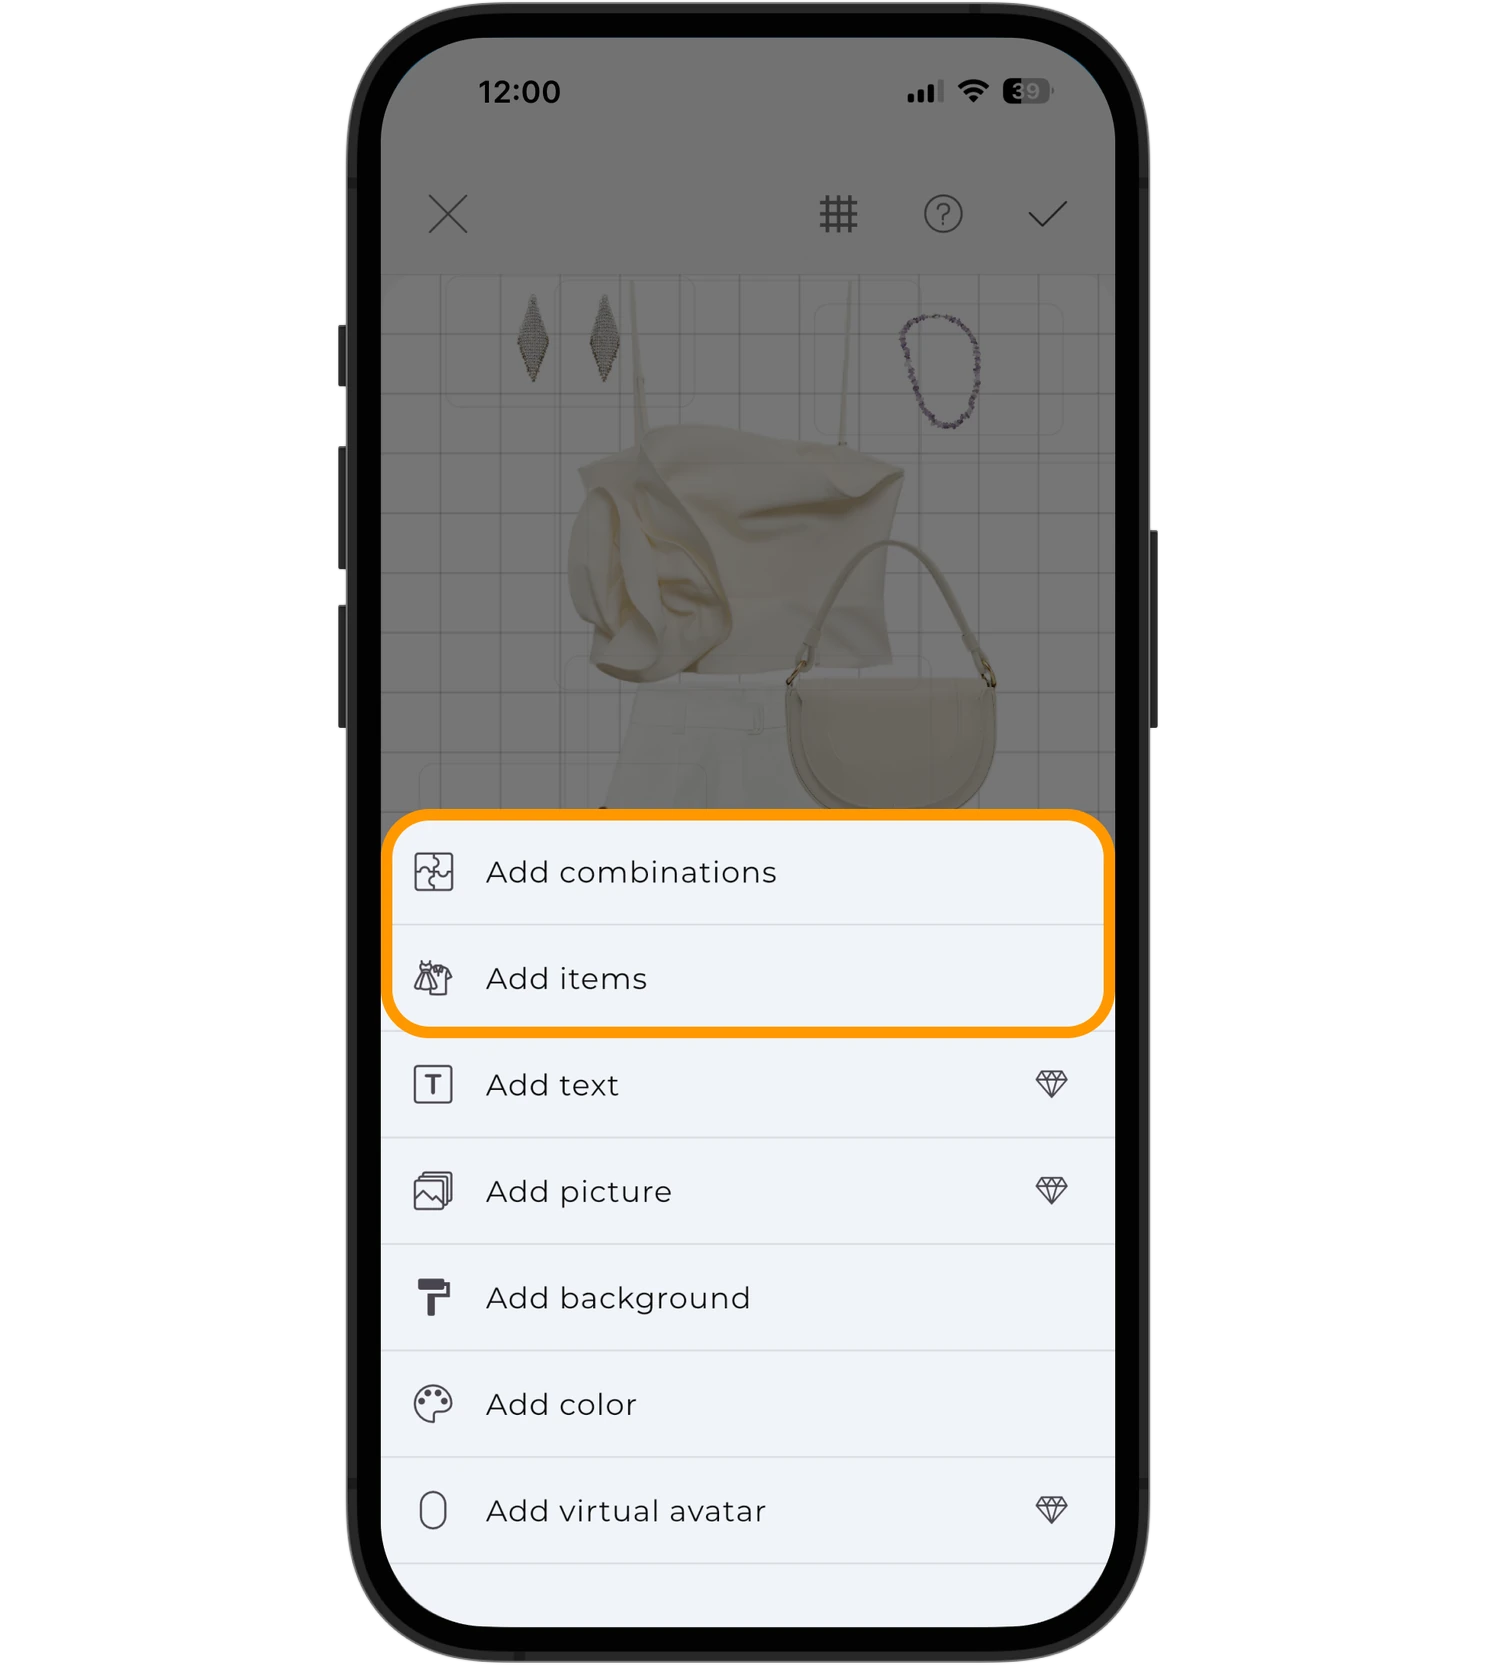
There are two ways to add clothes to an outfit.
Combinations — AI suggests items that match your current outfit.
Items — lets you pick any items from your wardrobe manually.
Adding text
Text is handy for notes, comments, captions, or collage styling.
To add text:
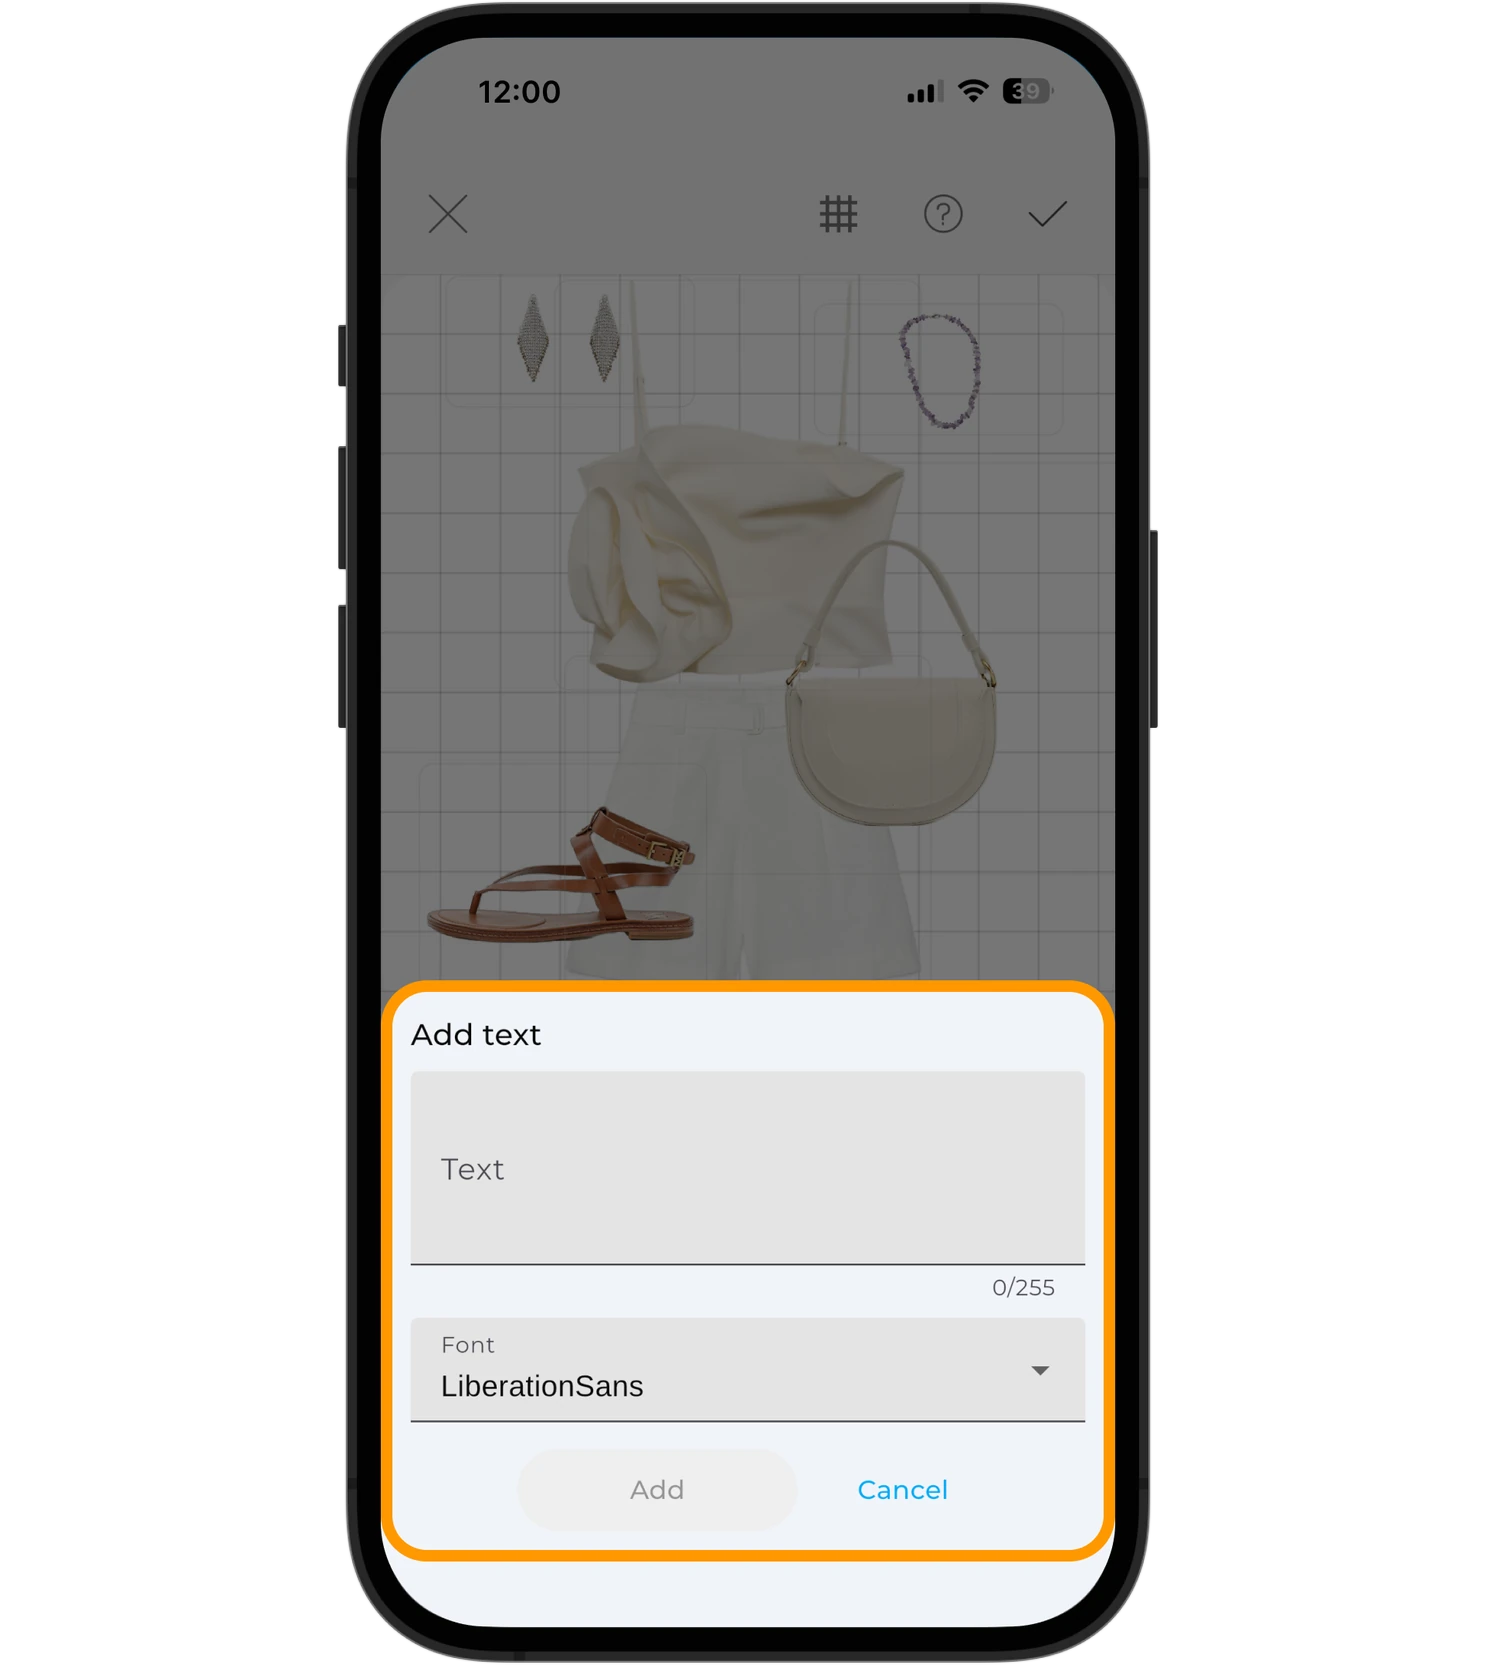
- Tap "Add Text".
- Enter your text.
- Choose a font.
- Tap "Add".
Info
Adding text is available with a Premium subscription.
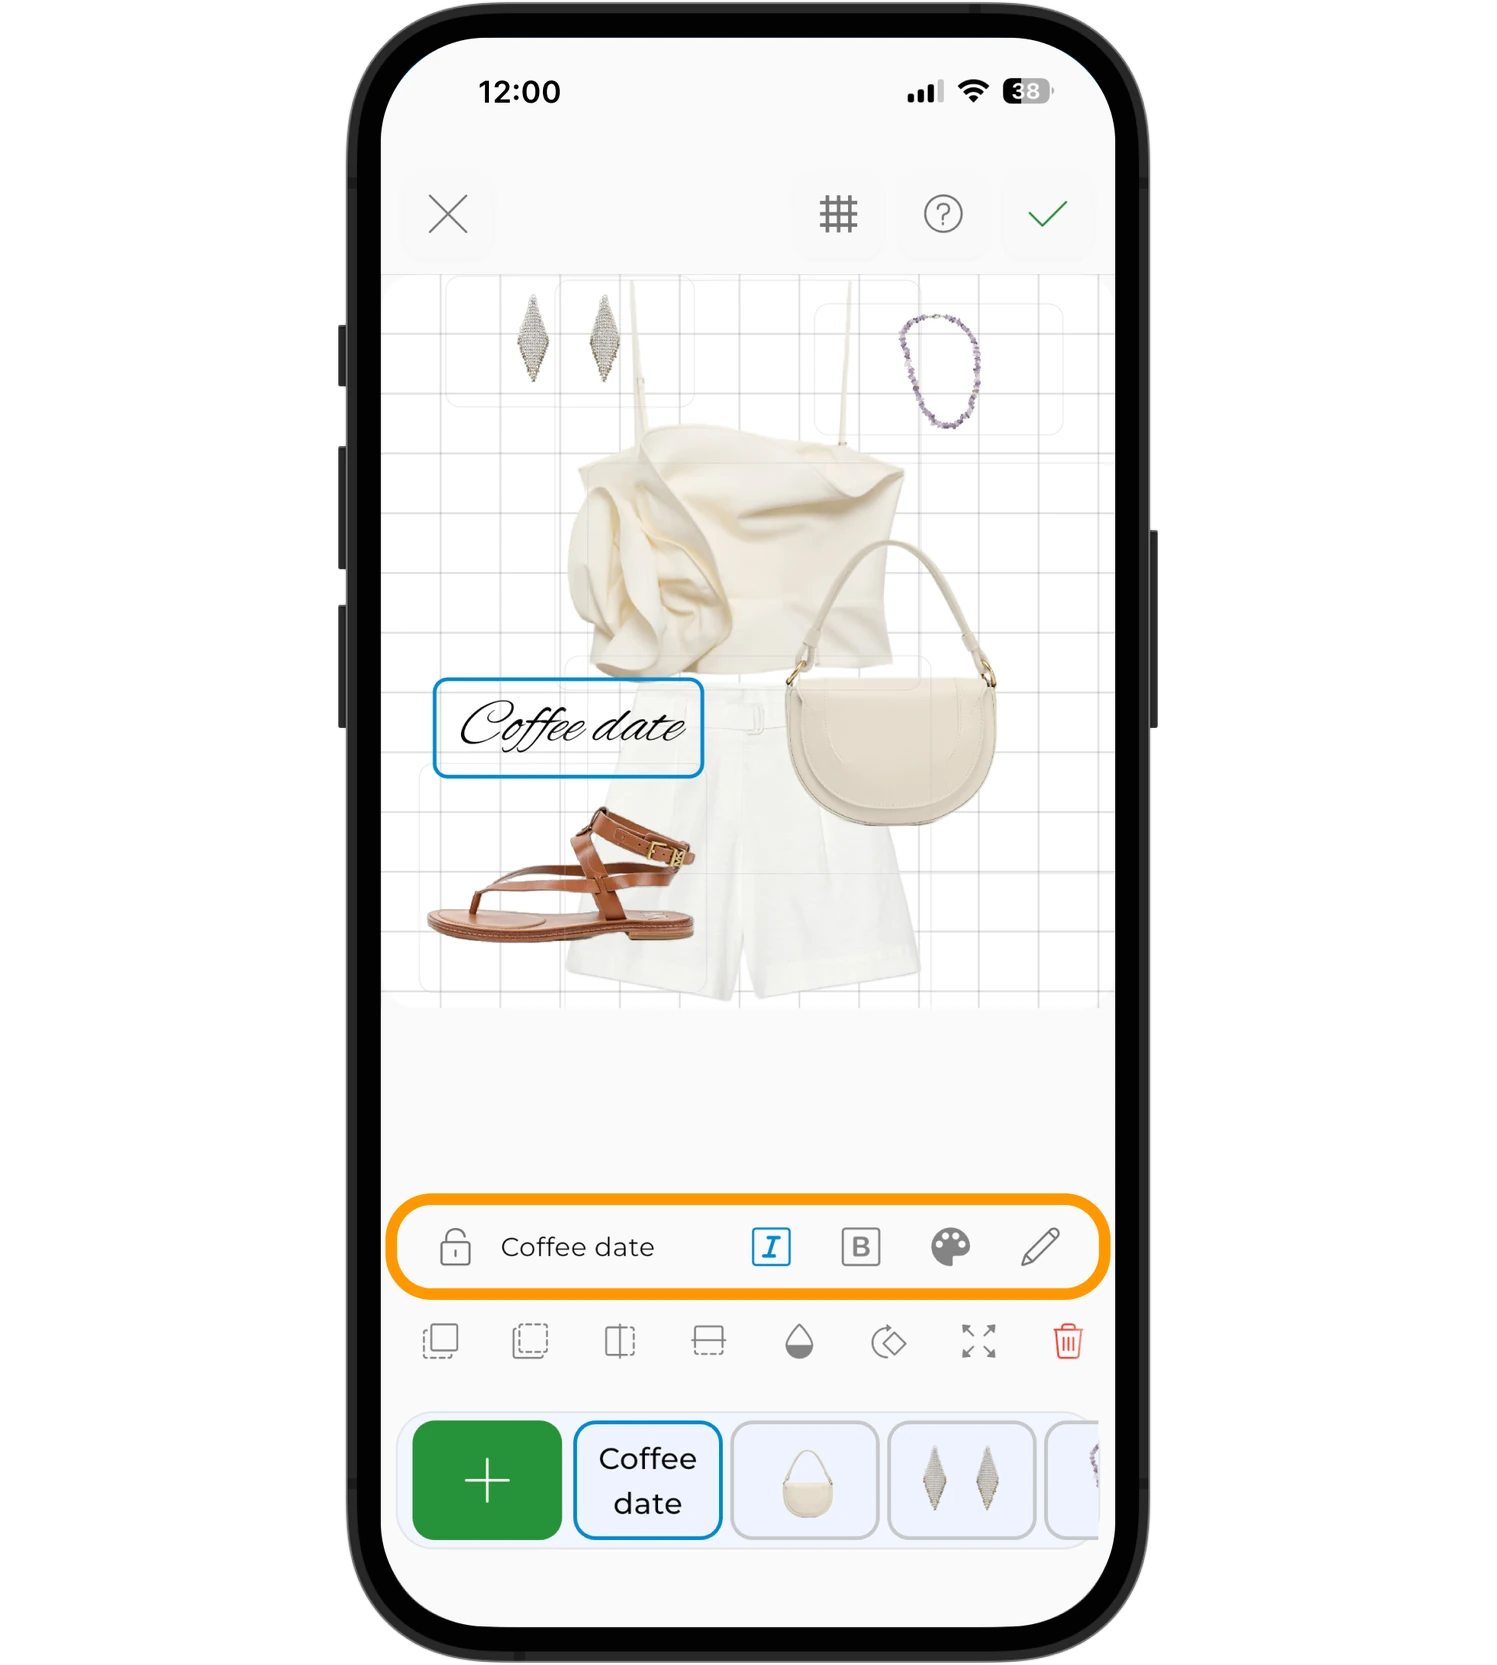
Once added, text can be:
- changed to another font;
- set to bold or italic;
- recolored;
- locked in place with the lock icon.
Adding pictures
Pictures can be used as references, accessories, interior details, or any other visual element in your outfit.
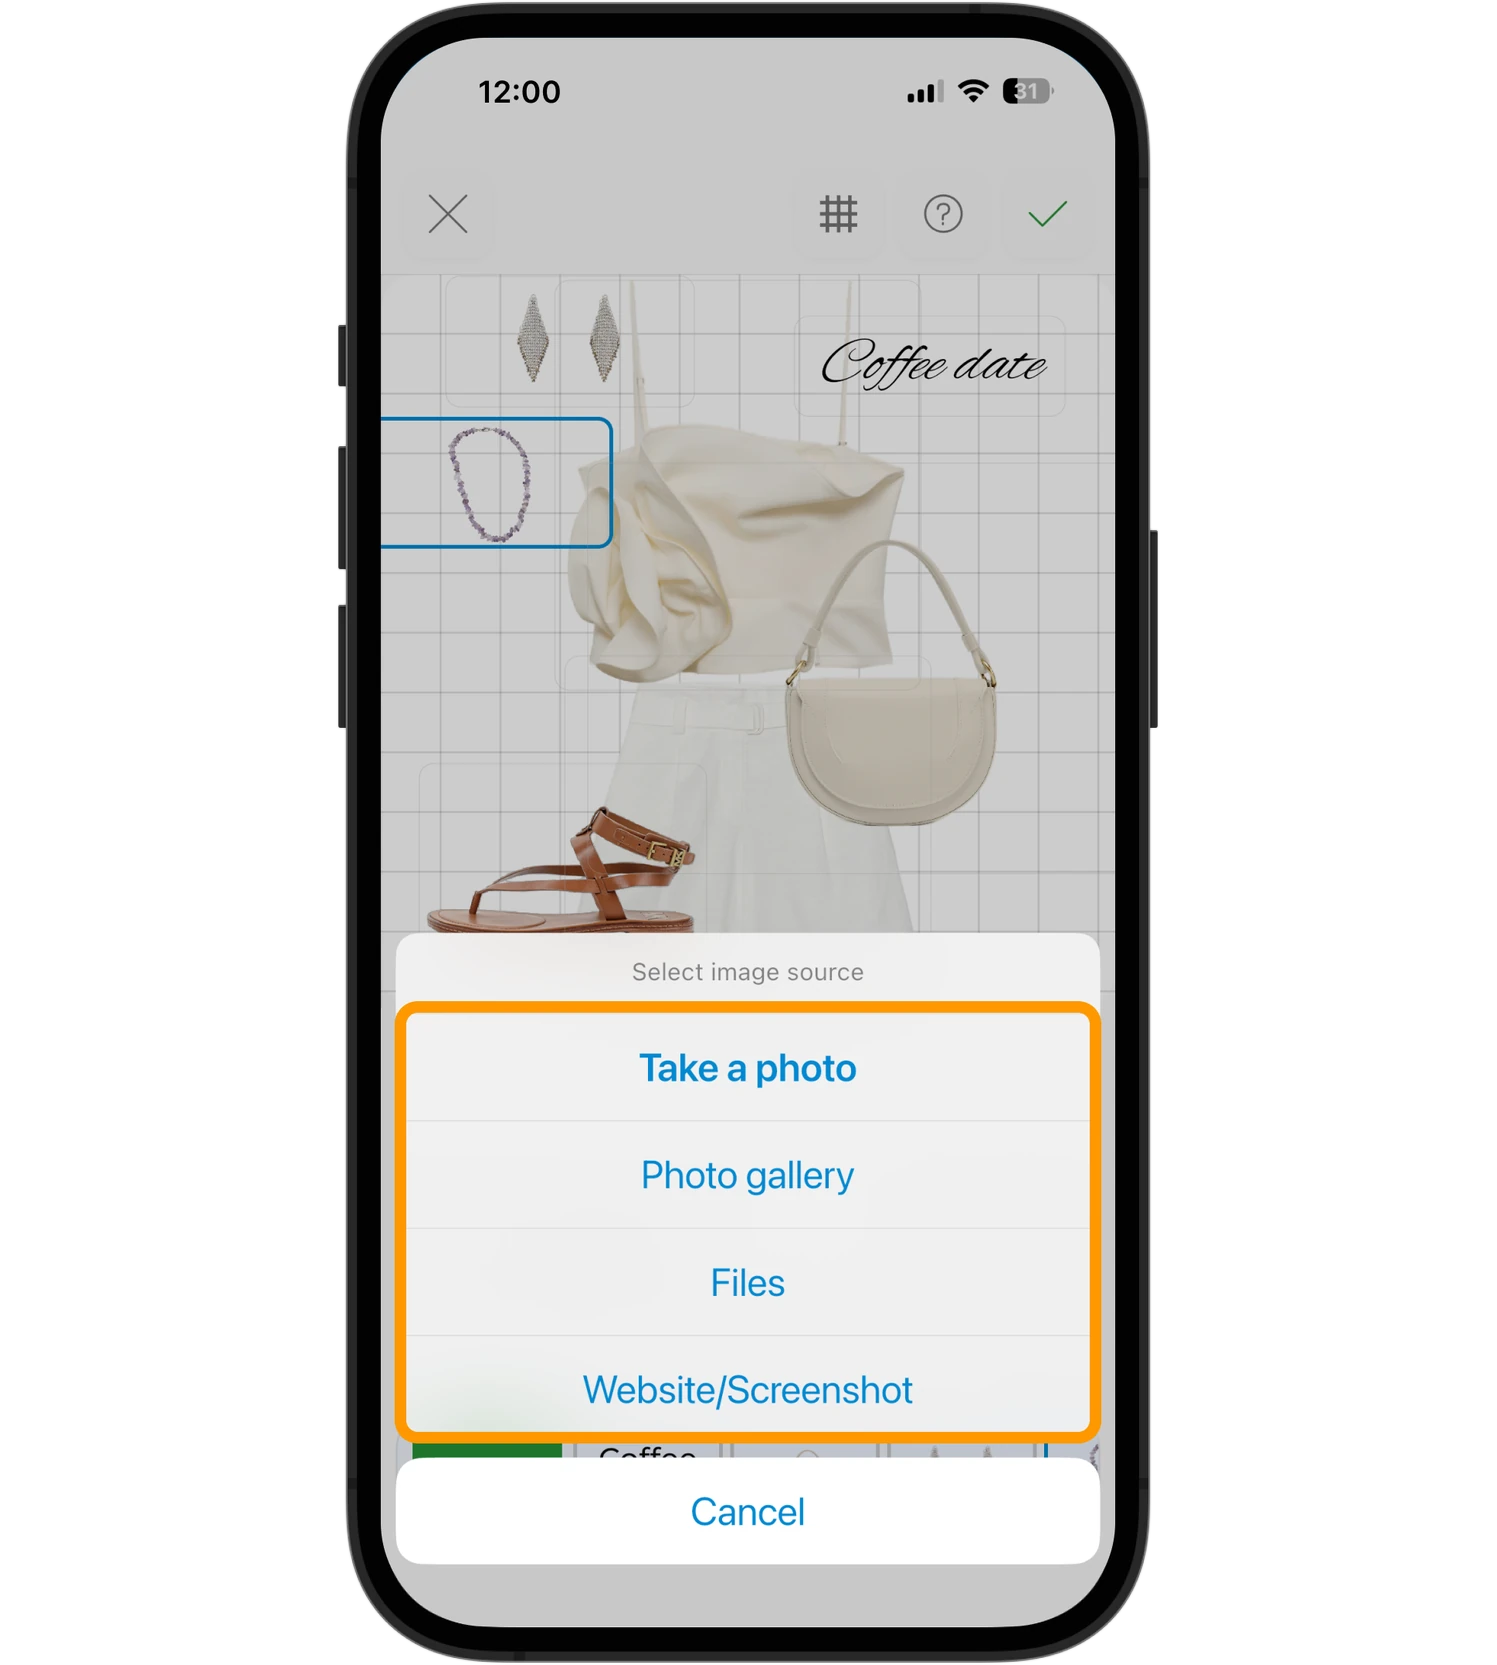
To add a picture, choose a source:
- take a photo with the camera;
- pick an image from your photo library;
- select a file;
- import an image from a website or a screenshot.
Info
Adding pictures is available with a Premium subscription.
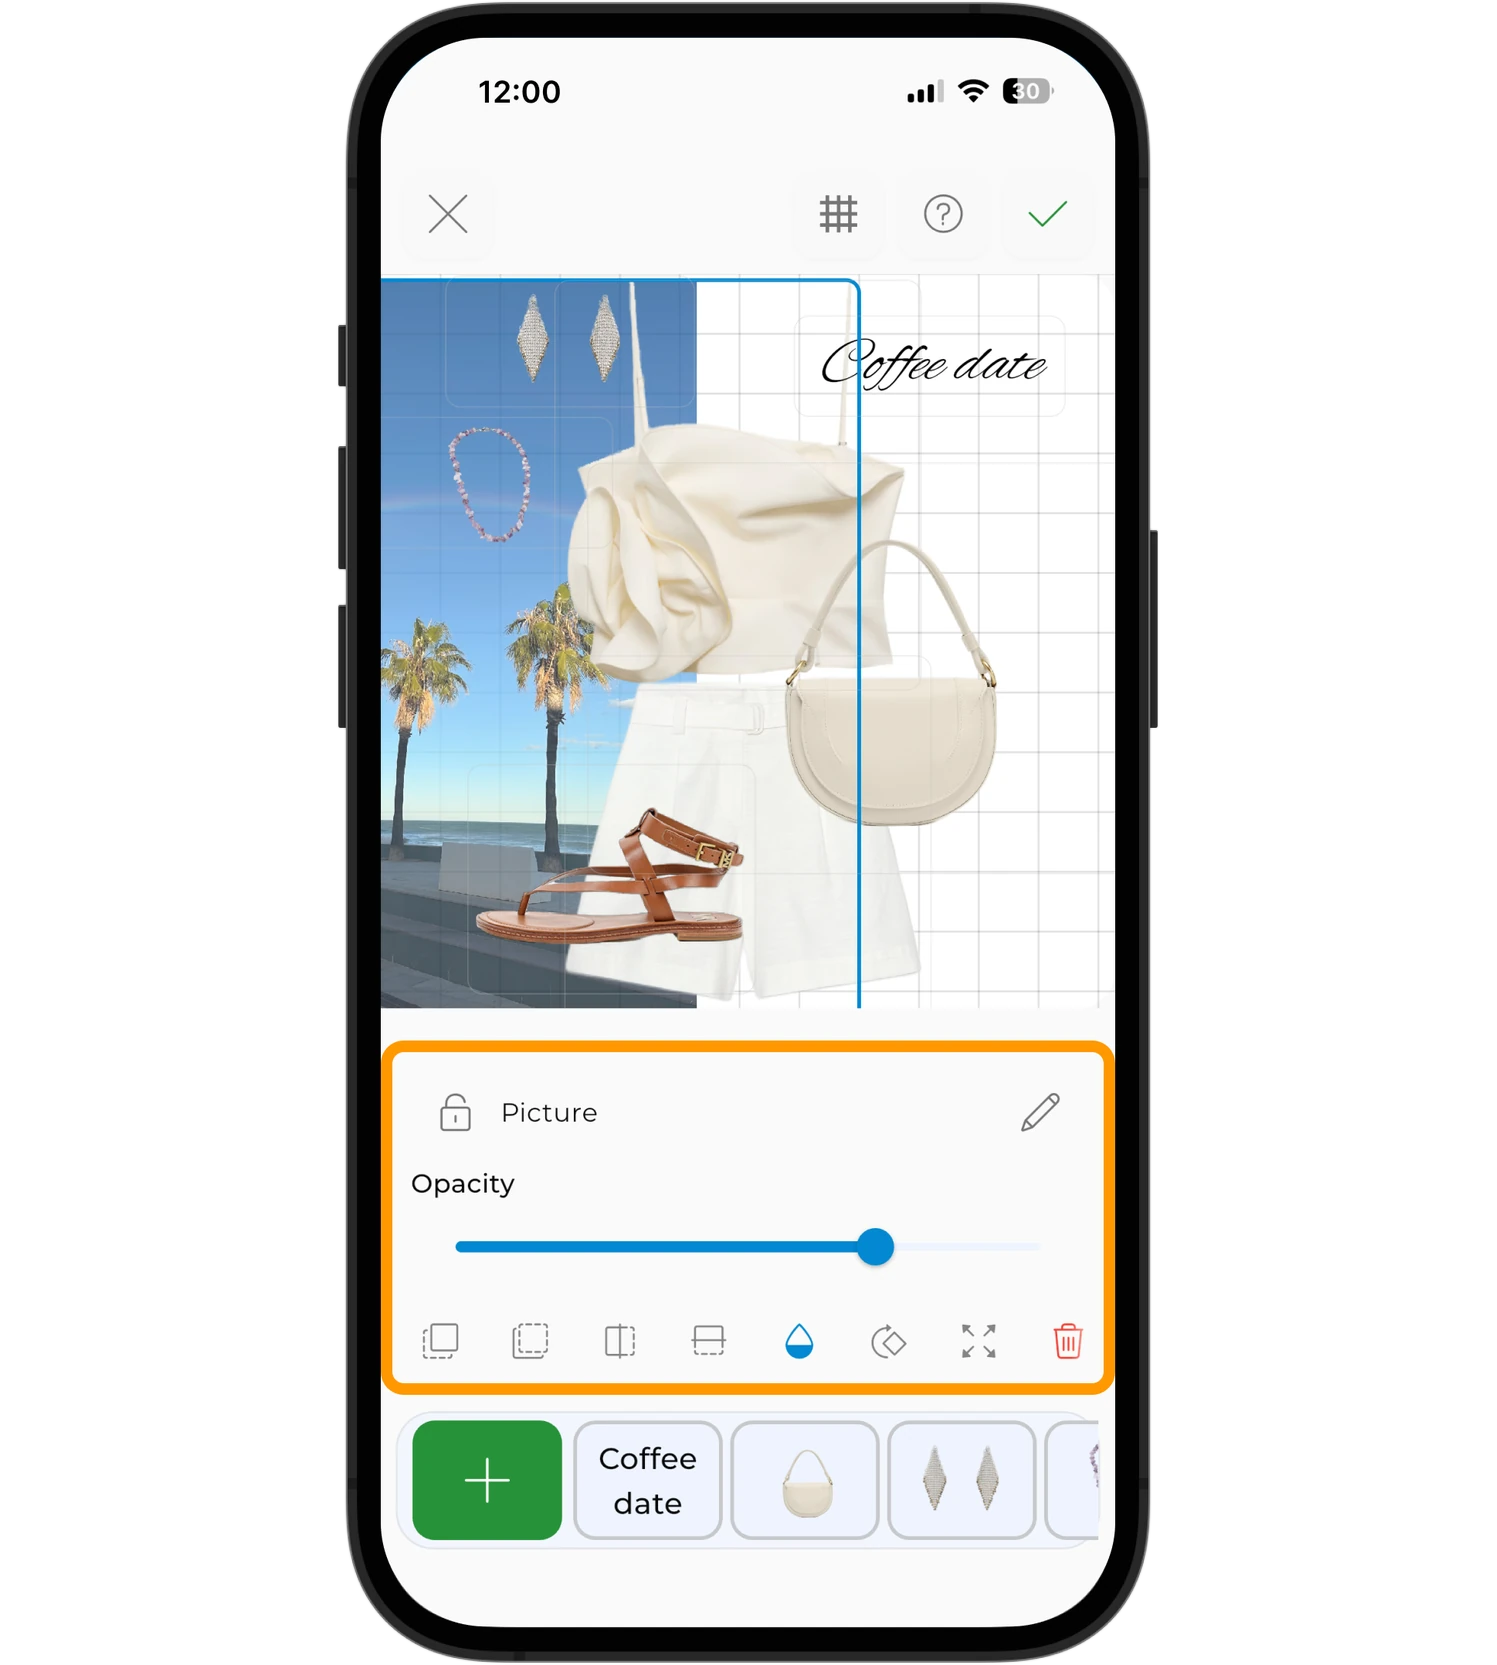
Once added, a picture becomes a regular outfit element. You can:
- edit it with the pencil icon, for example to remove the background;
- move it;
- resize it;
- rotate it;
- adjust its opacity;
- change its layer order;
- lock it;
- delete it.
Adding a background
The background changes the look of the whole canvas.
To add a background:
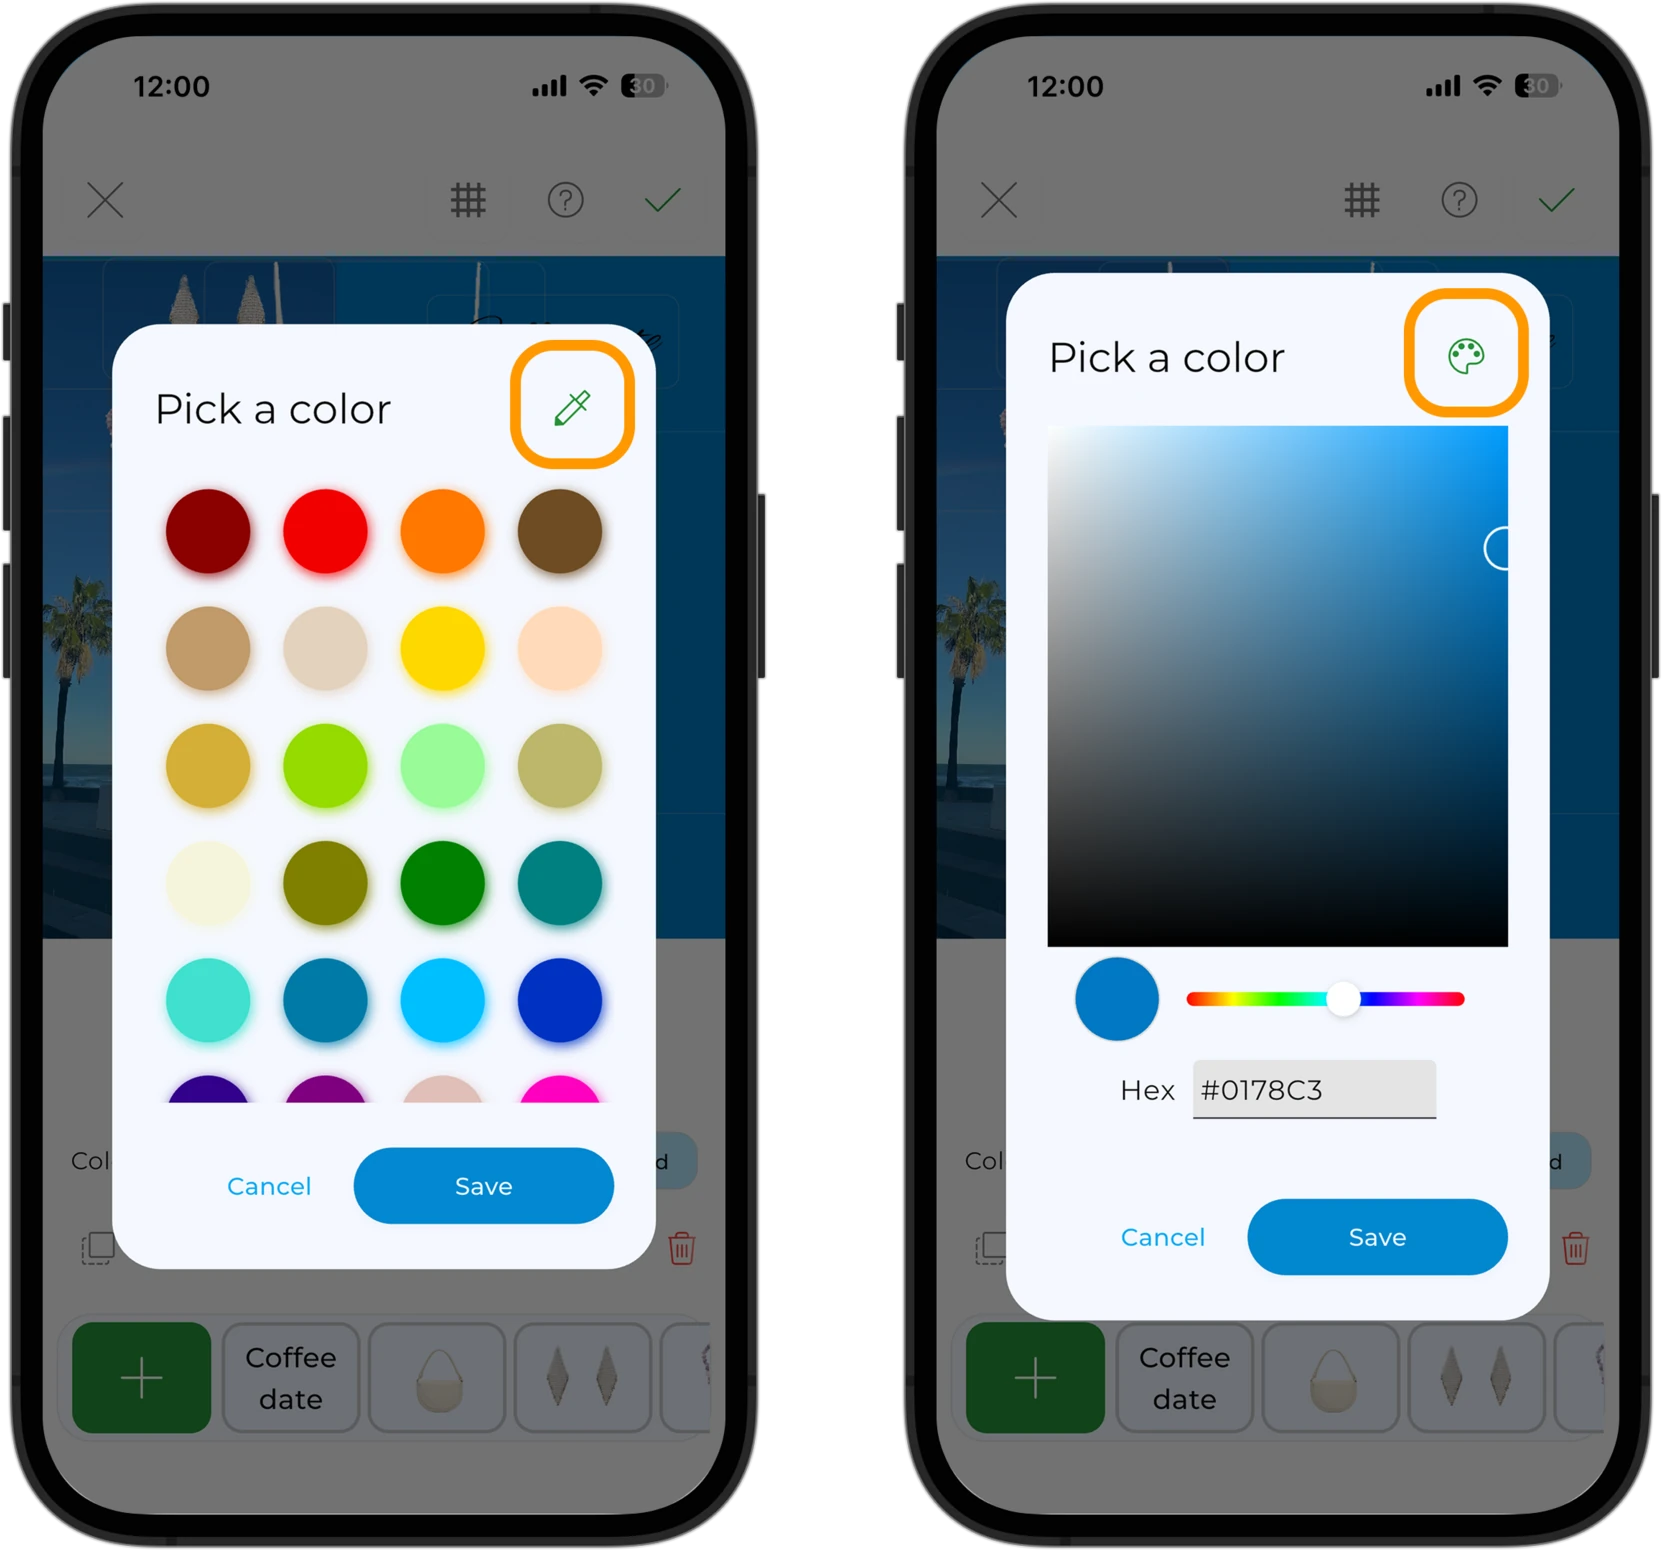
- Tap "Add Background".
- Pick one of the suggested colors.
Or tap the eyedropper icon to open the extended color picker. There you can:
- choose any shade;
- adjust brightness and saturation;
- enter a color as a HEX code.
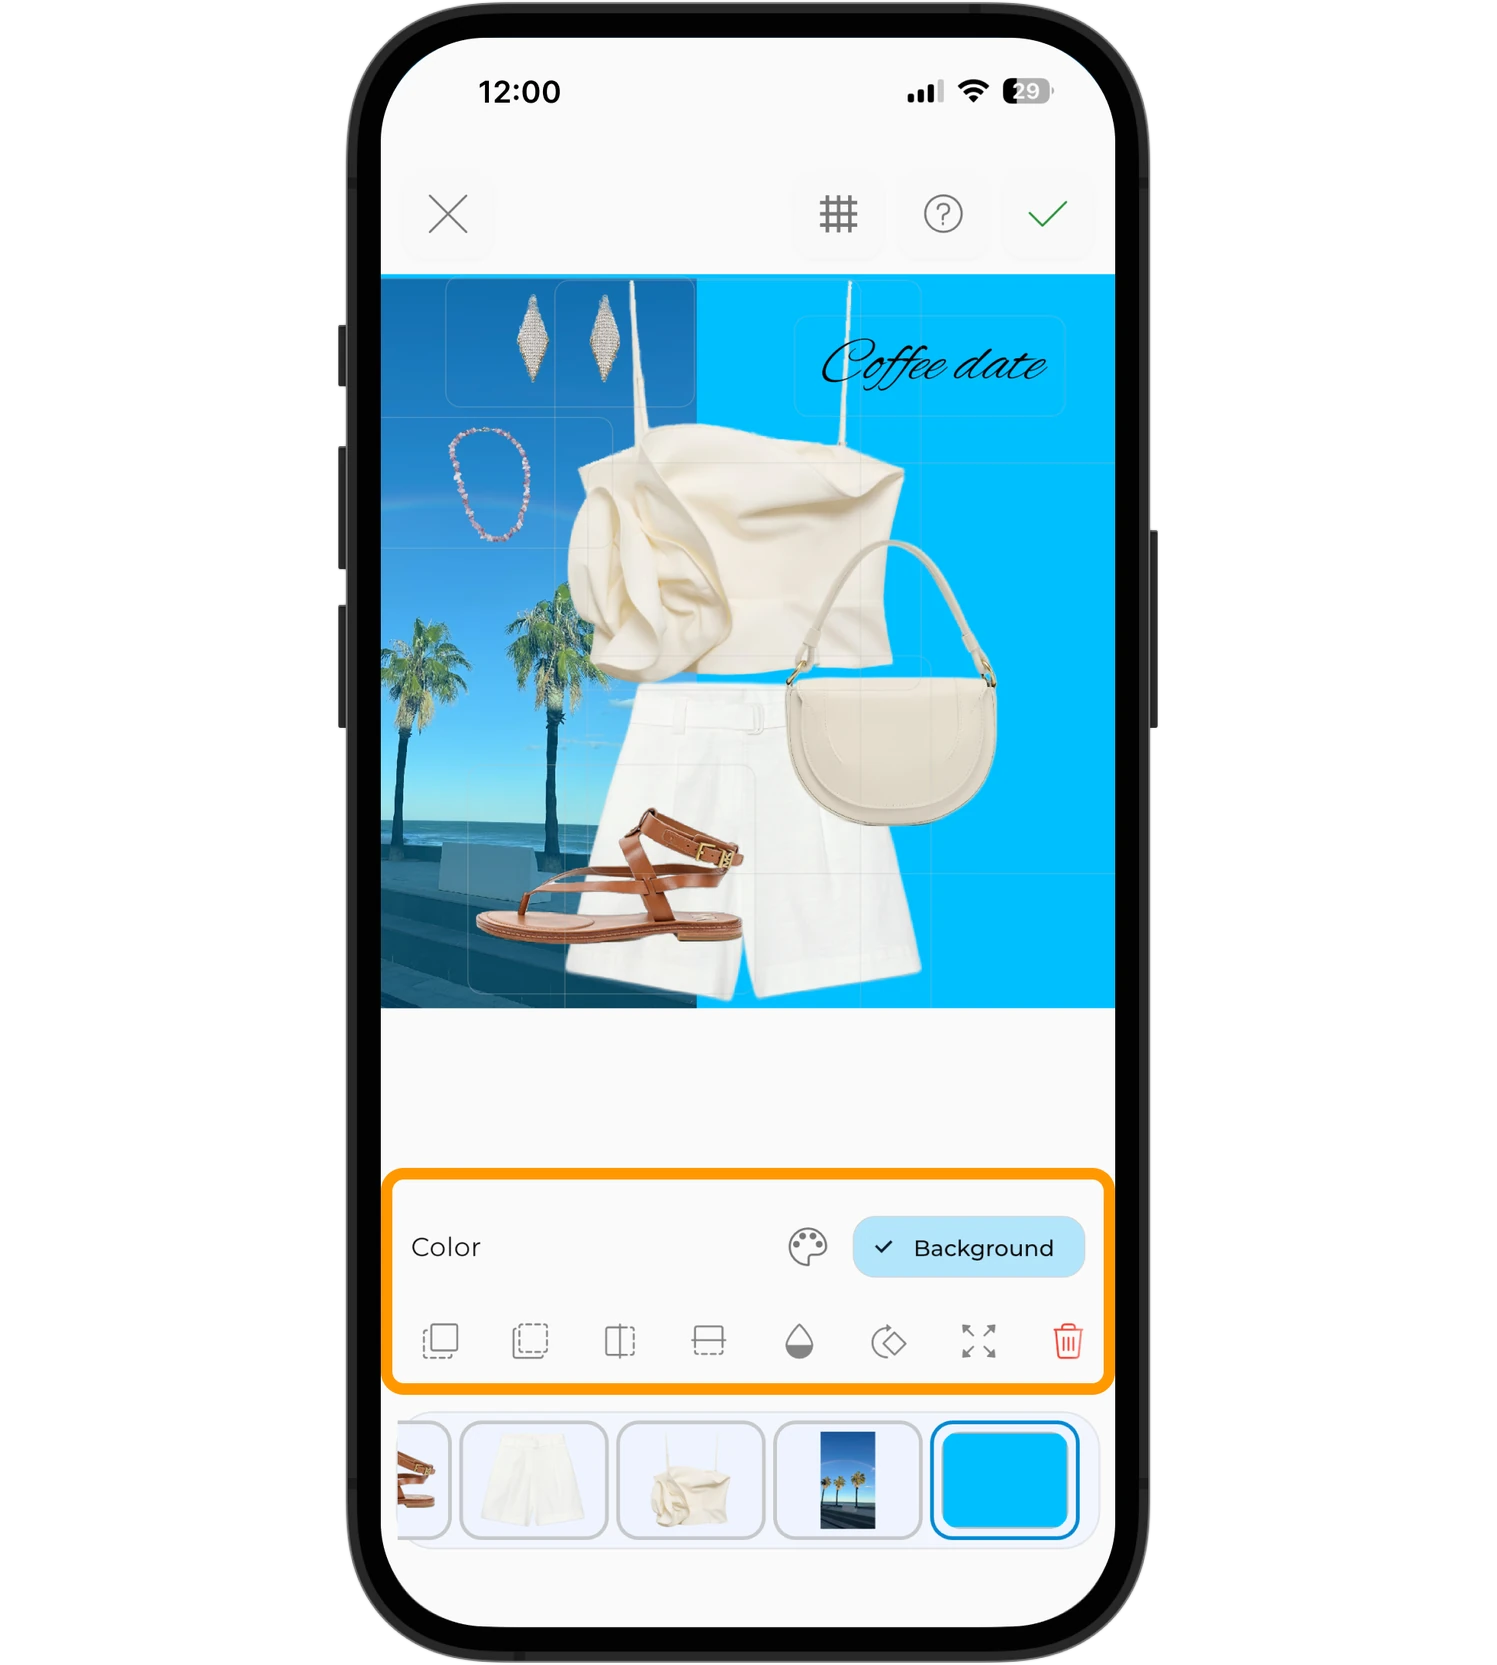
You can change the background at any time using the palette icon. Like any other outfit element, it also supports opacity and layer order adjustments.
Adding color
A color block works as a decorative element or a base layer.
To add color:
- Tap "Add Color".
- Choose a color or customize it in the picker.
- Tap "Save".
The color then appears on the canvas as a block.
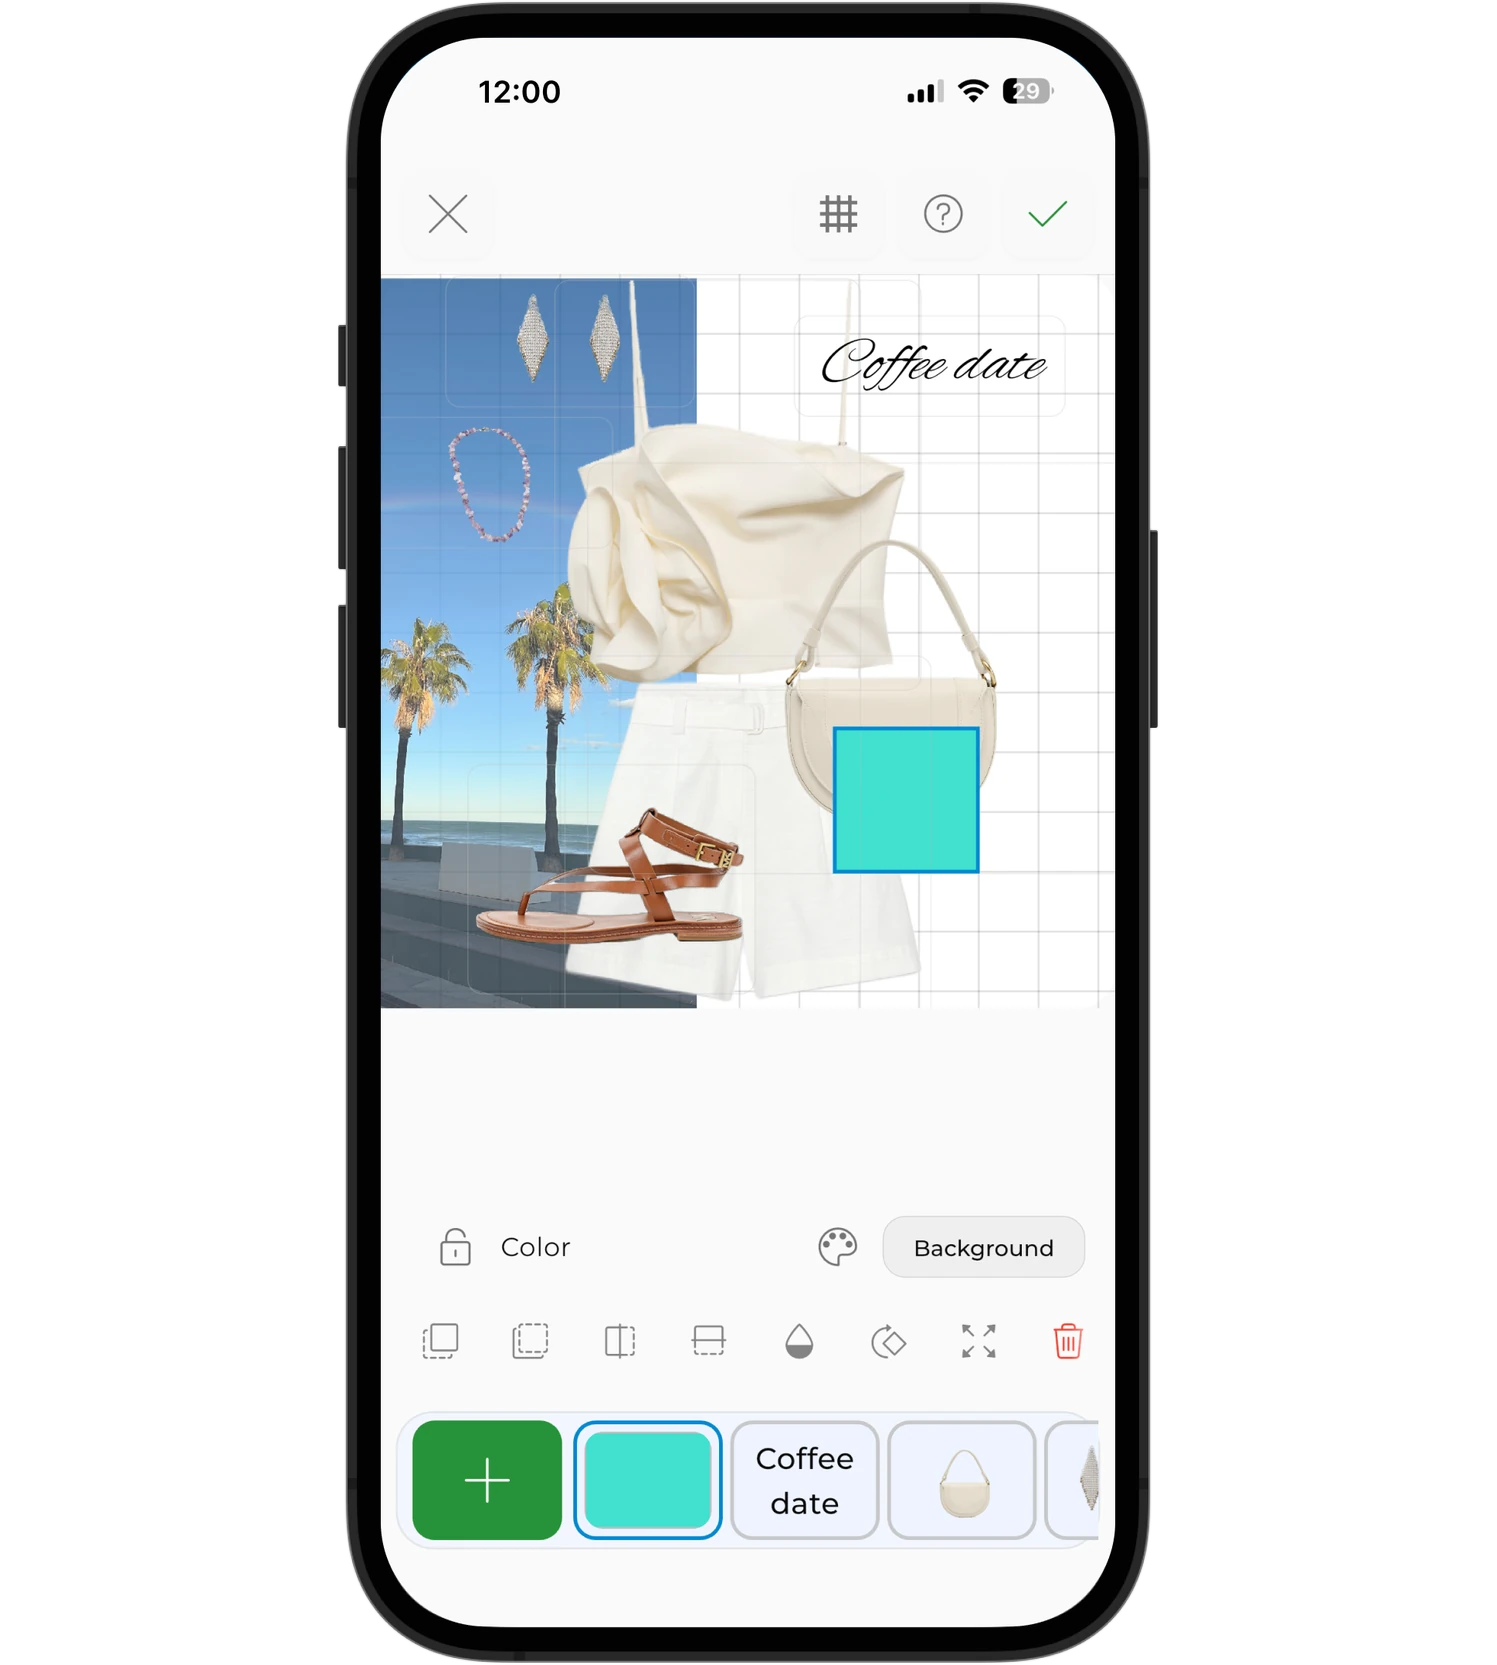
Unlike the background, a color block can be:
- resized;
- moved;
- used as an accent or a base layer.
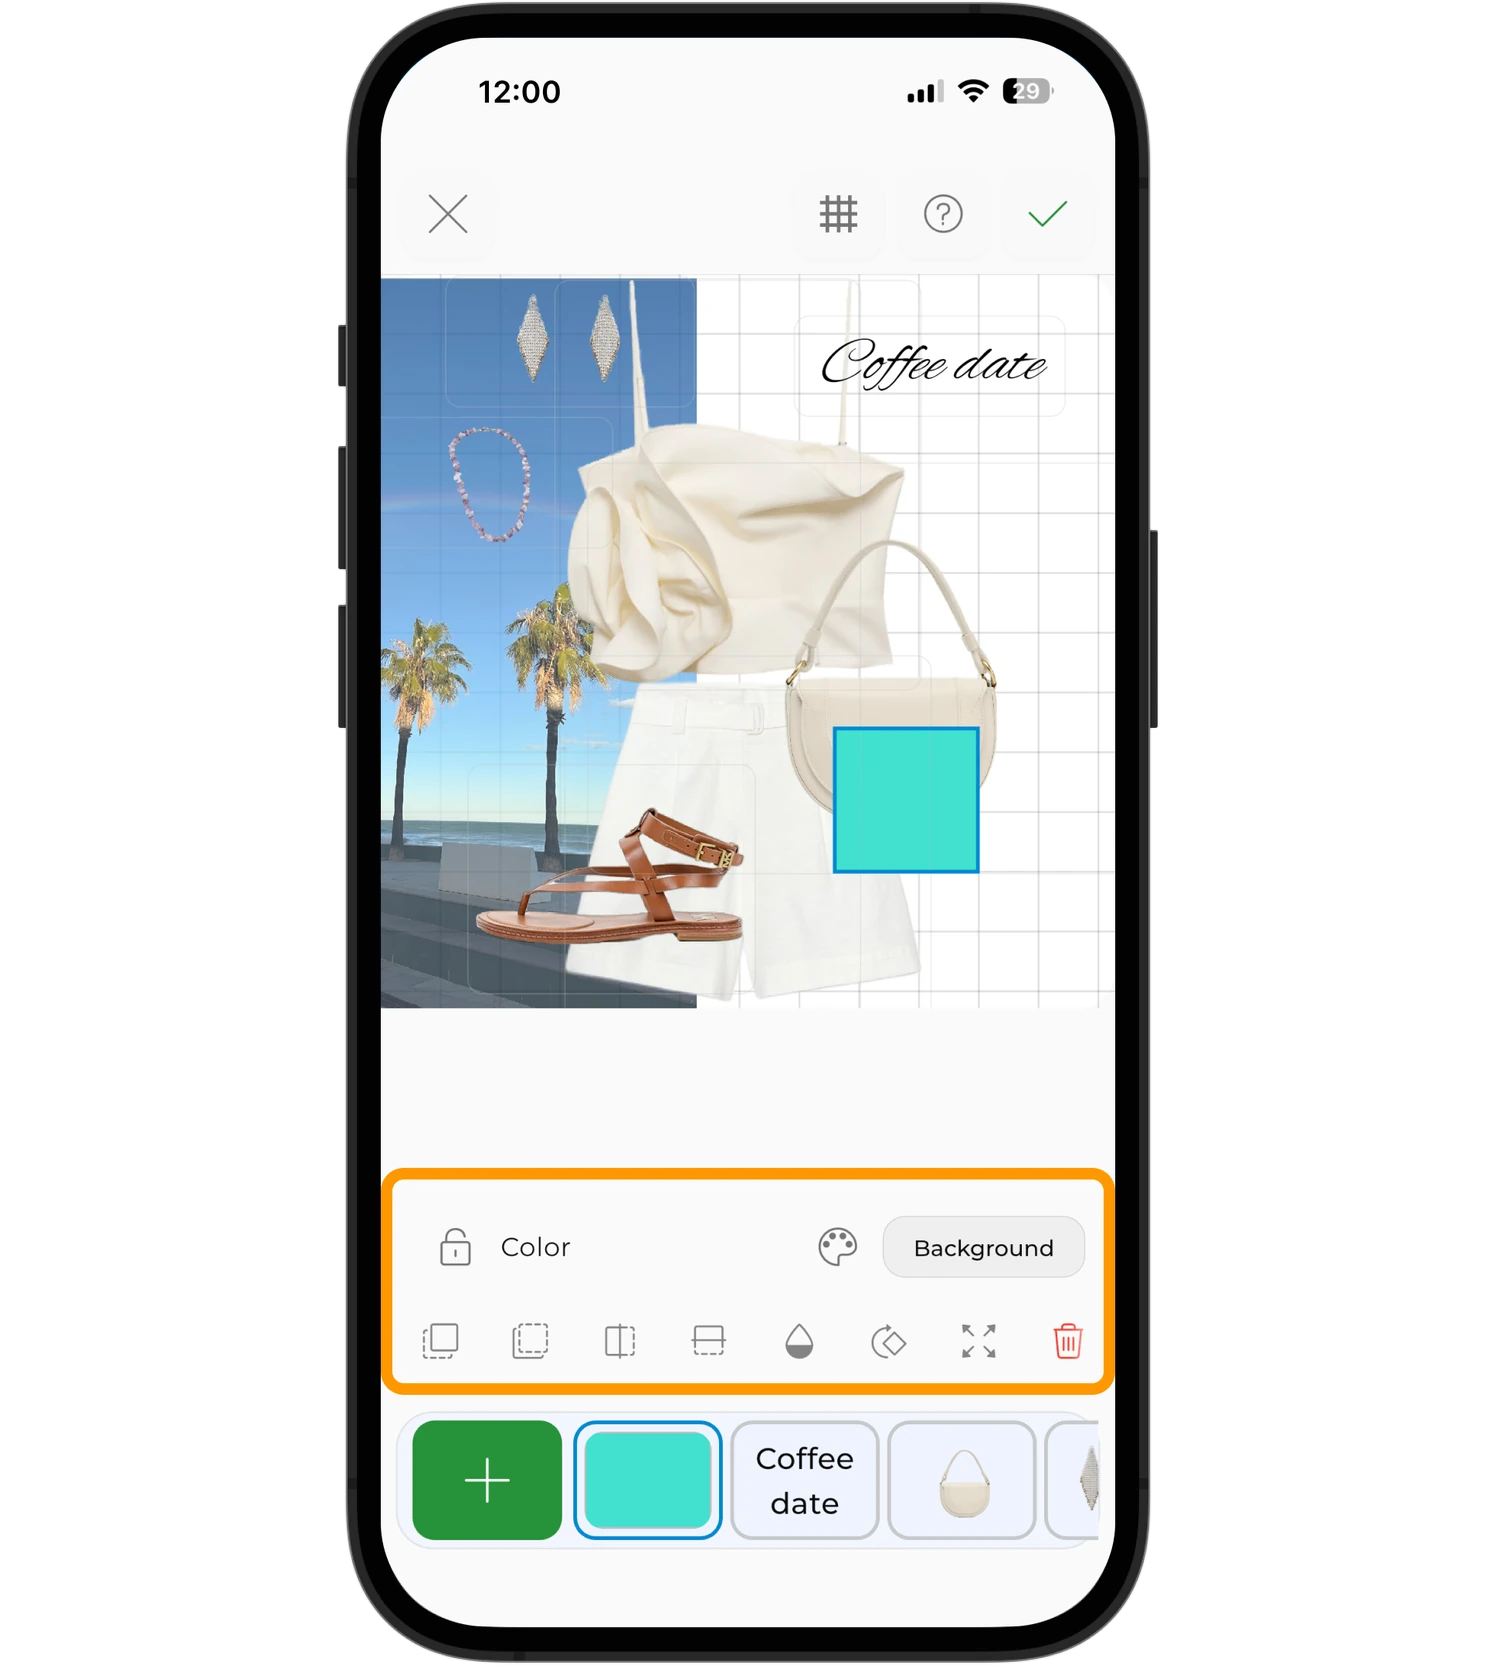
If you need to, you can turn it into a background by tapping "Background".
Adding a virtual avatar
A virtual avatar can serve as the base of the outfit or as one more element on the canvas.
To add an avatar:
- Tap "Add Virtual Avatar".
- Choose an existing avatar or create a new one.
Info
Adding a virtual avatar is available with a Premium subscription.
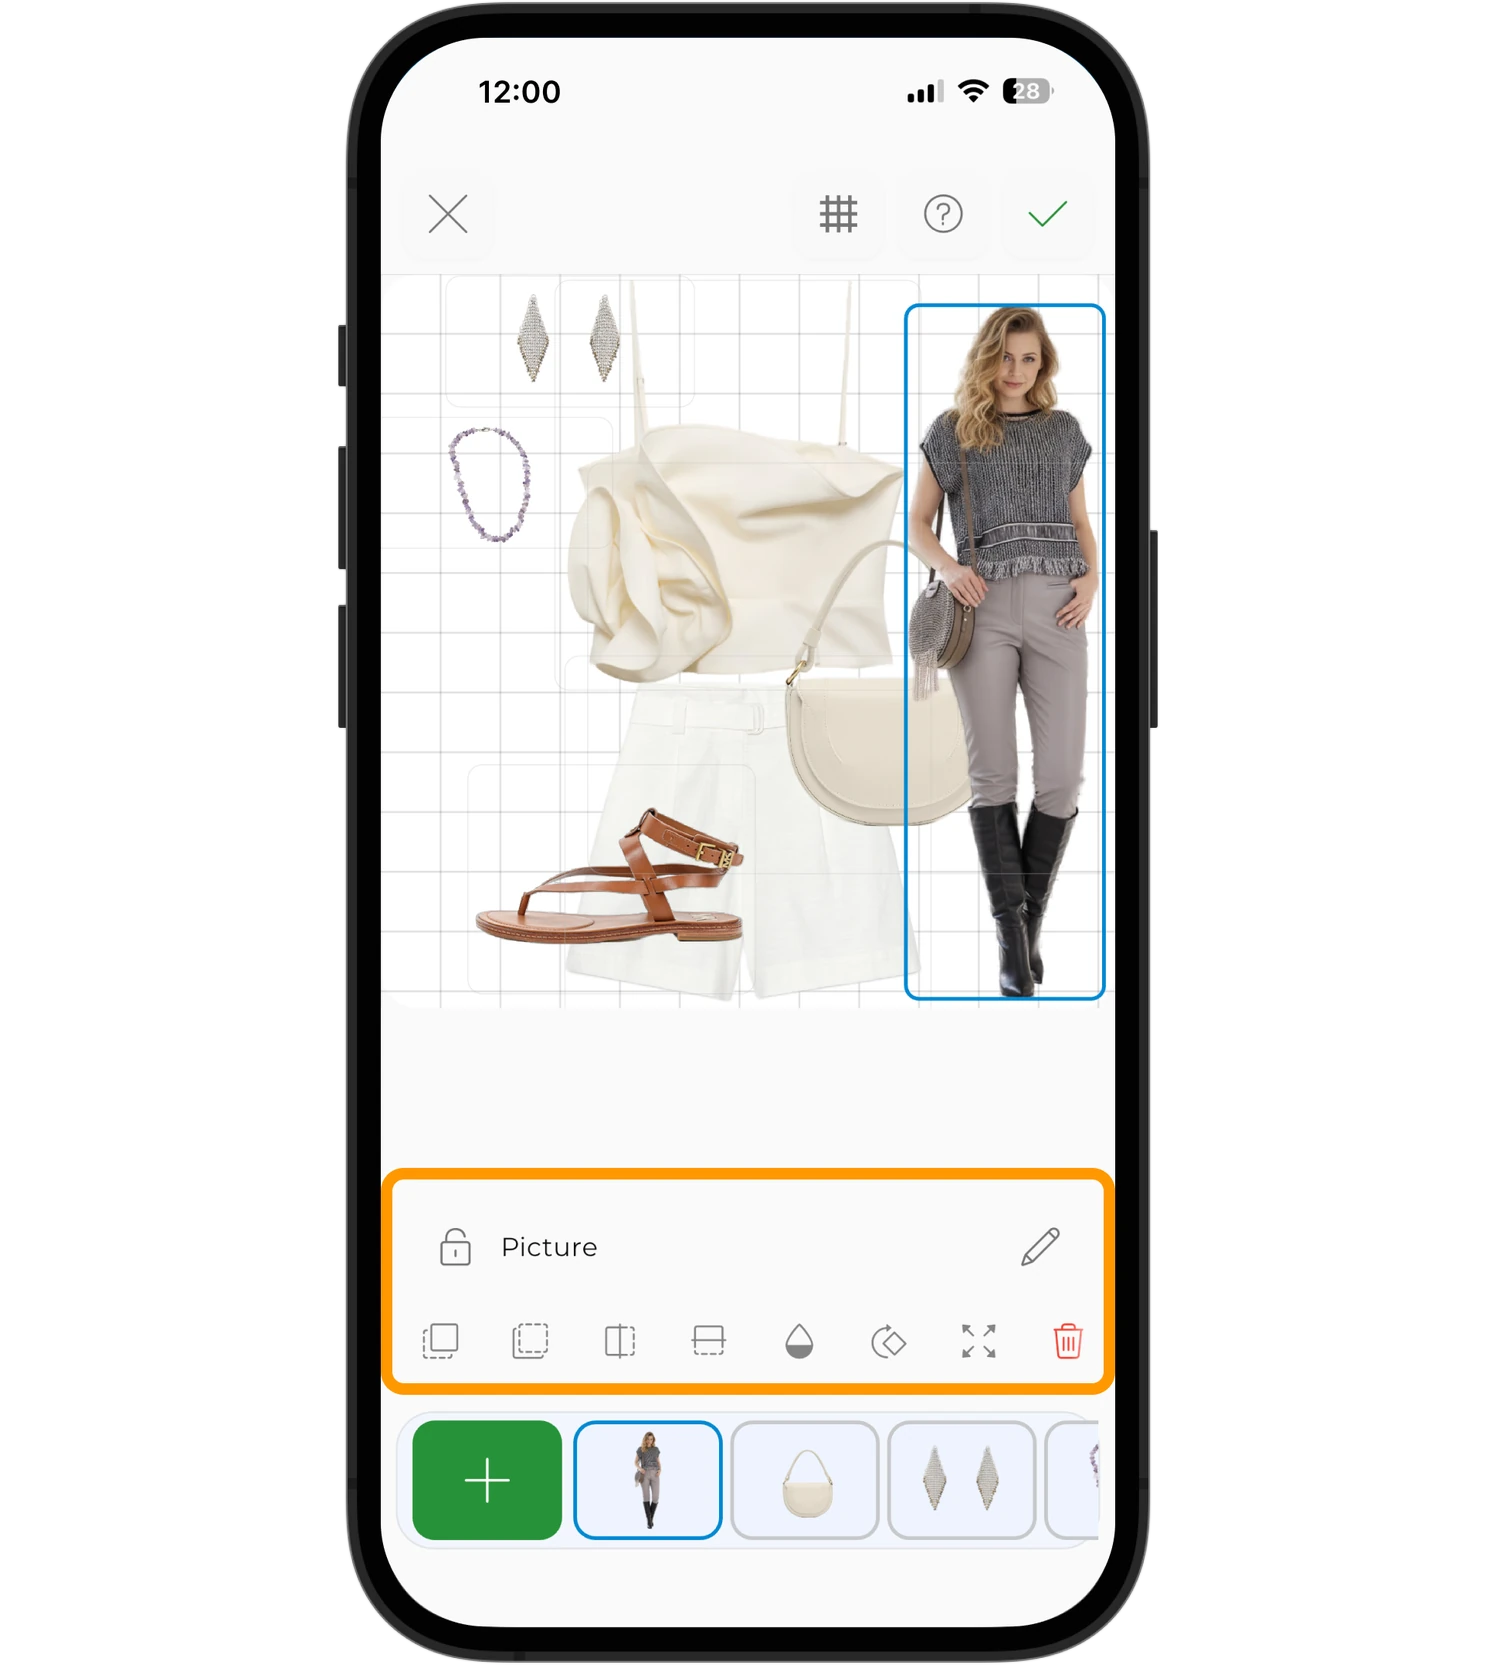
Once added, the avatar can be resized, moved, reordered between layers, made more or less opaque, locked, and deleted.
Editing elements
Any outfit element can be selected in two ways:
- tap it directly on the canvas;
- or pick it from the element panel at the bottom.
The selected element is highlighted with a blue outline.
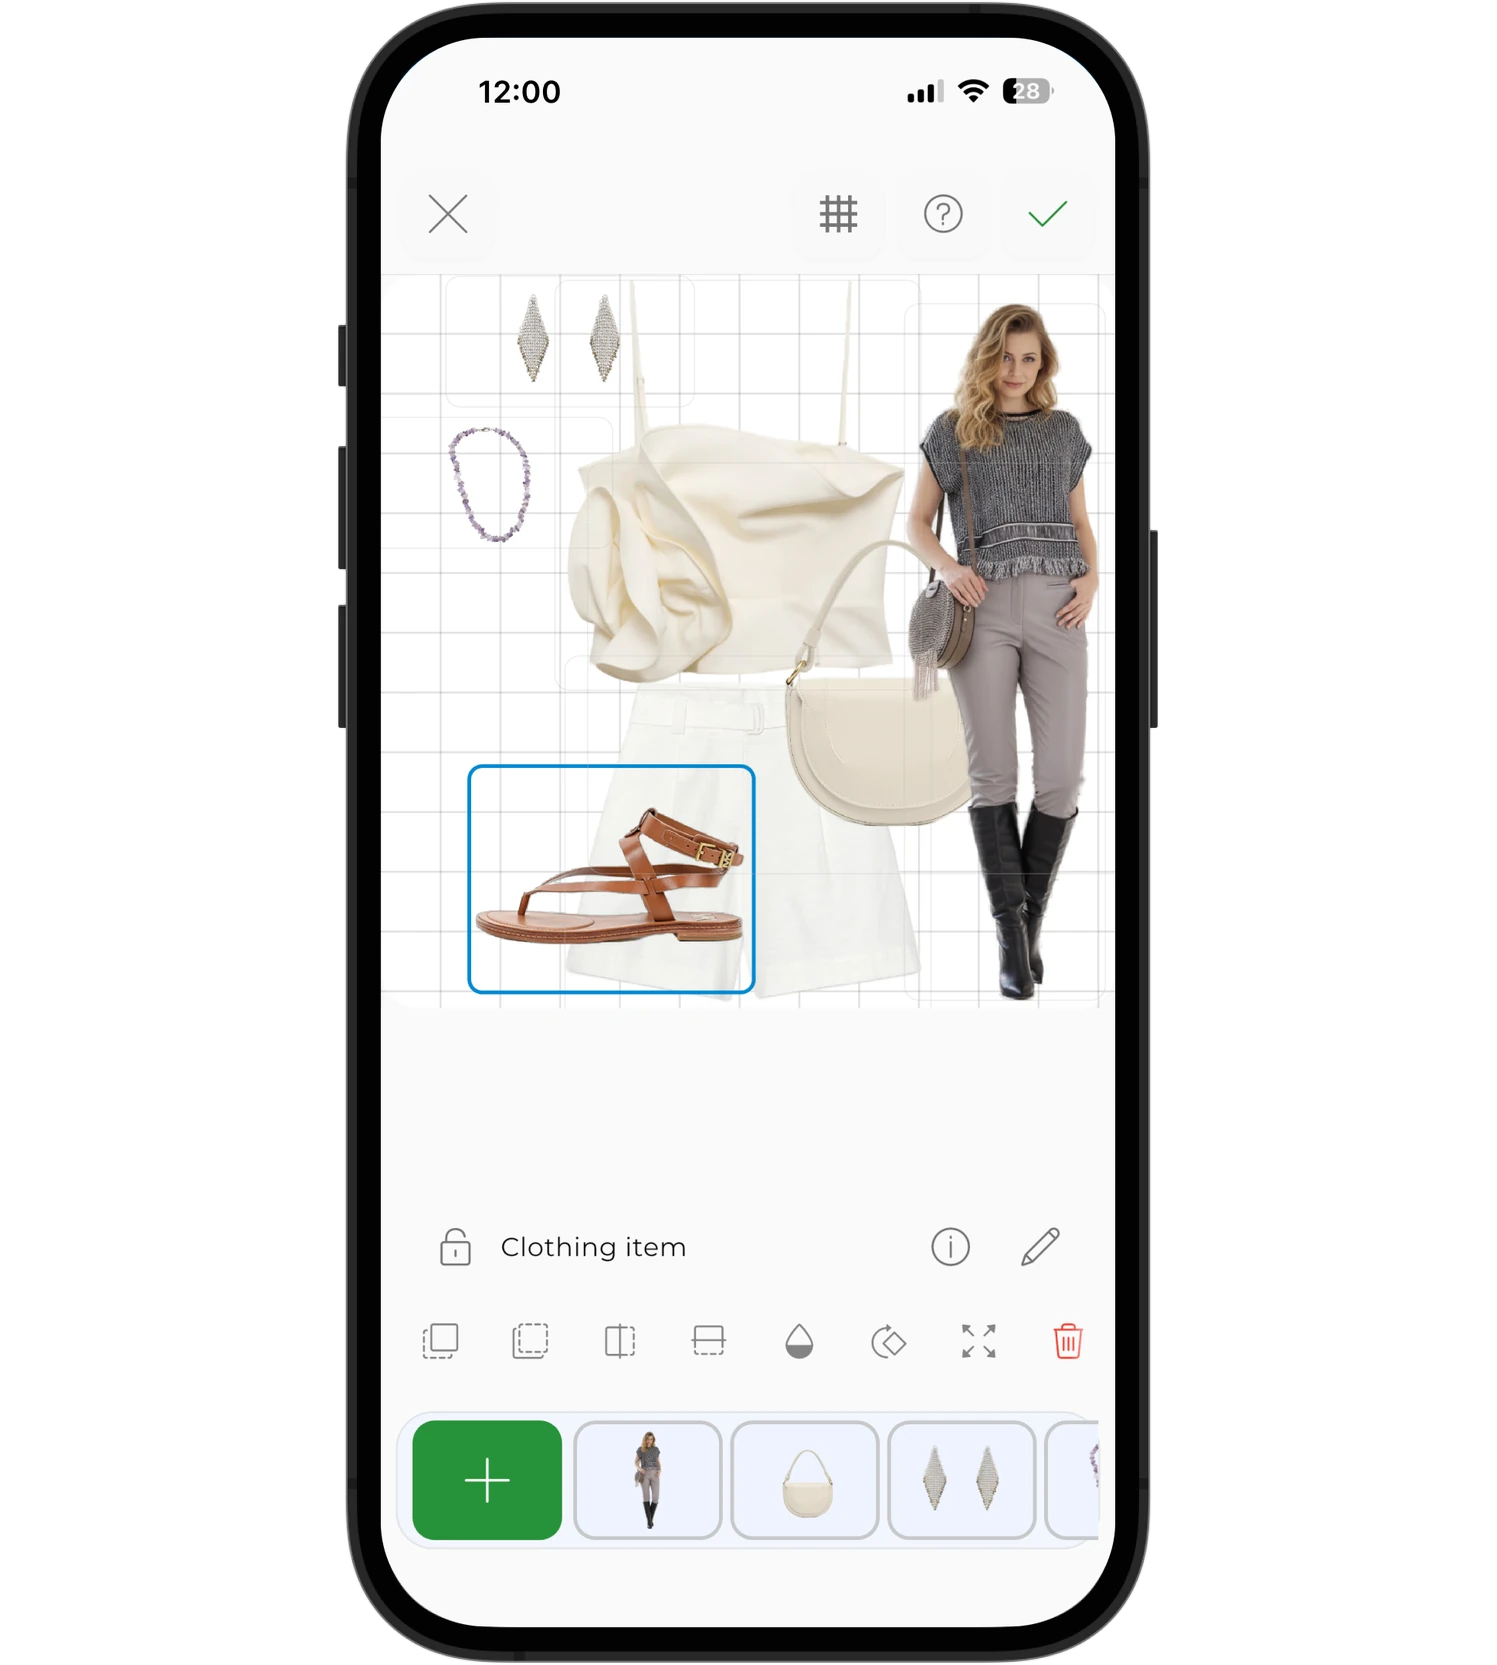
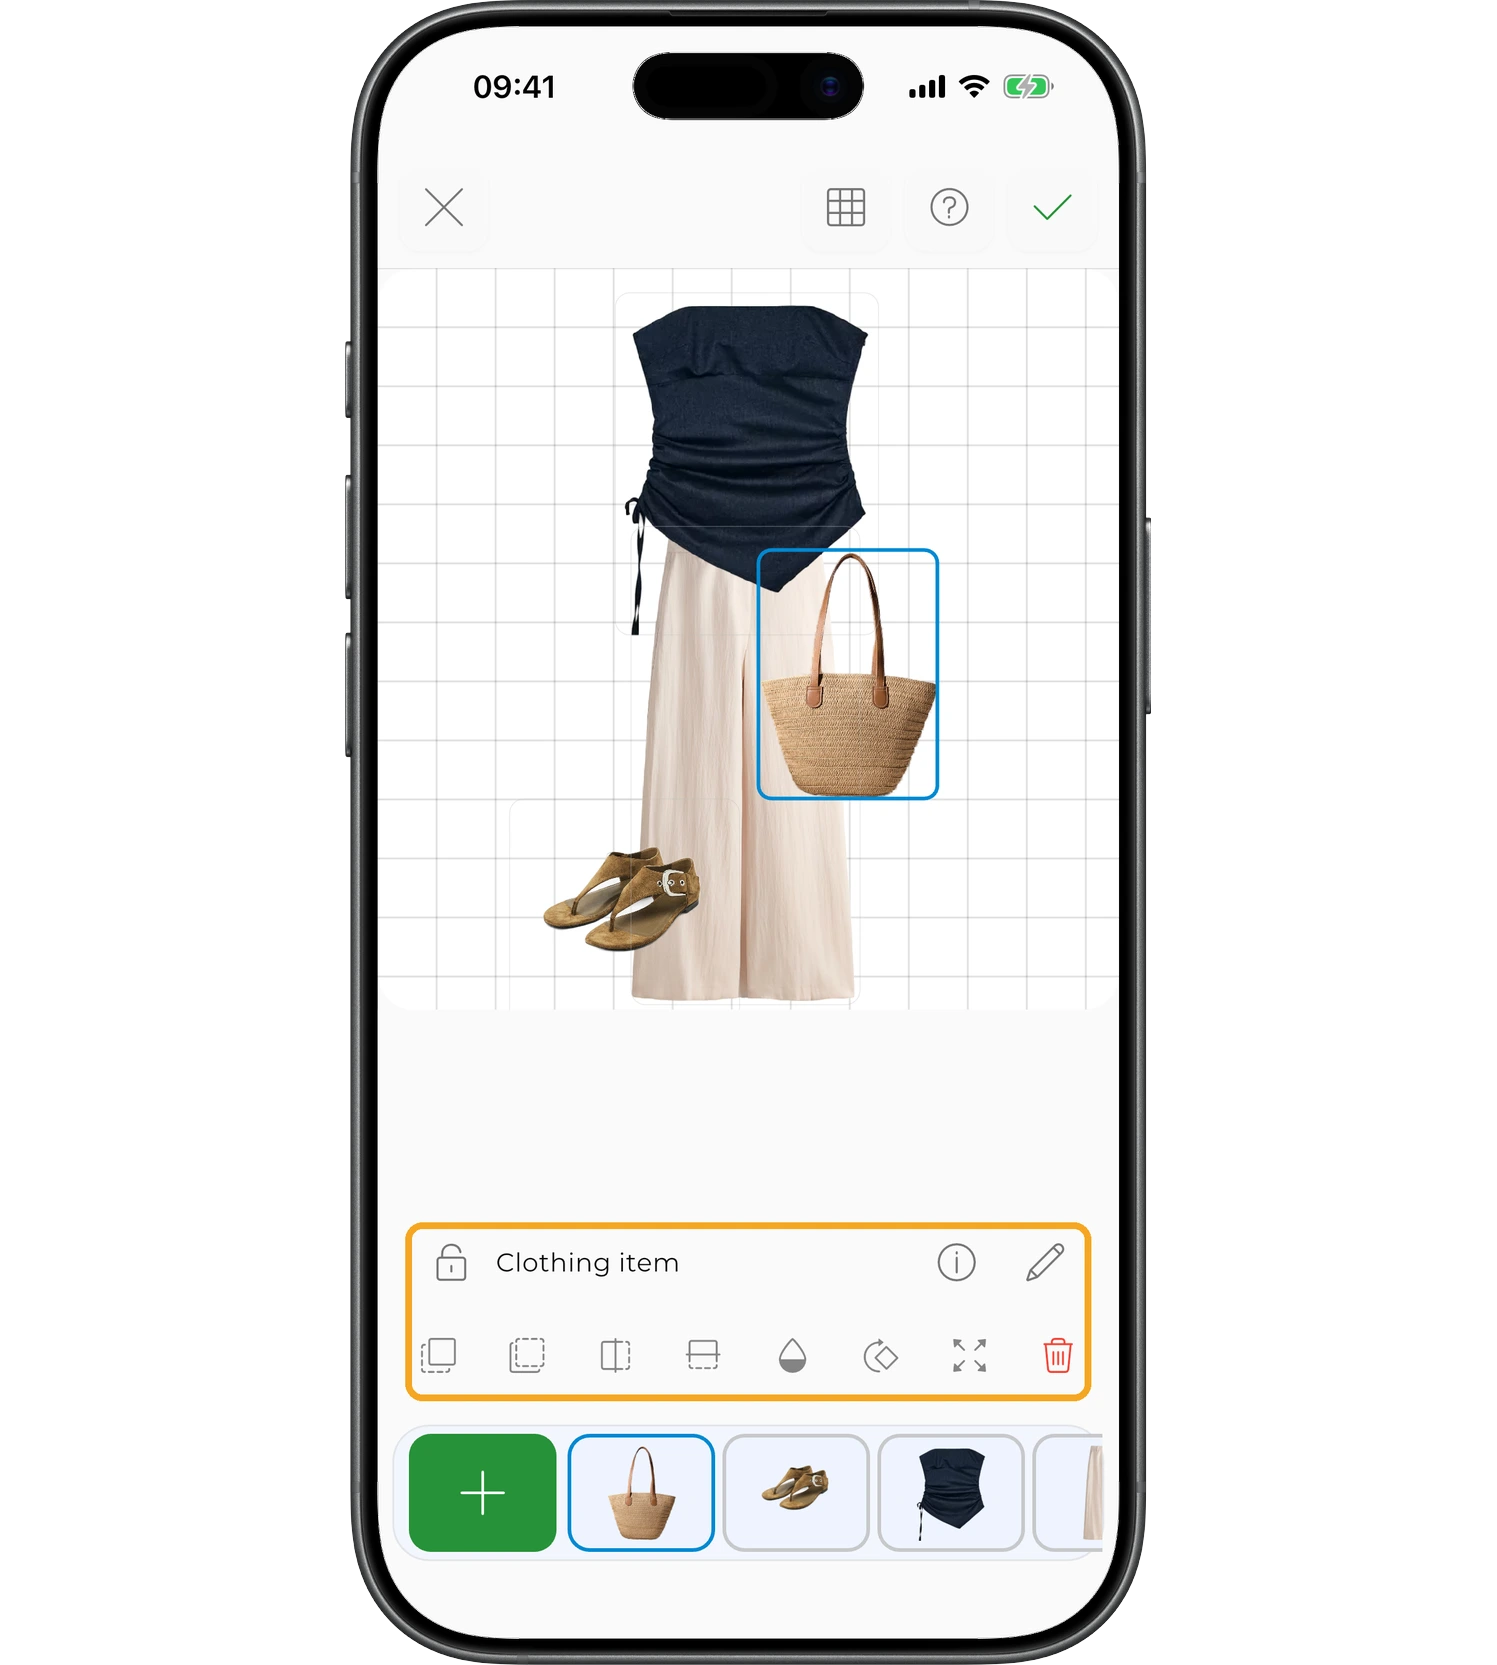
For every element, you can use:
- resizing;
- rotating;
- flipping horizontally and vertically;
- opacity adjustment;
- layer order changes;
- locking;
- deleting.
Additional editor actions
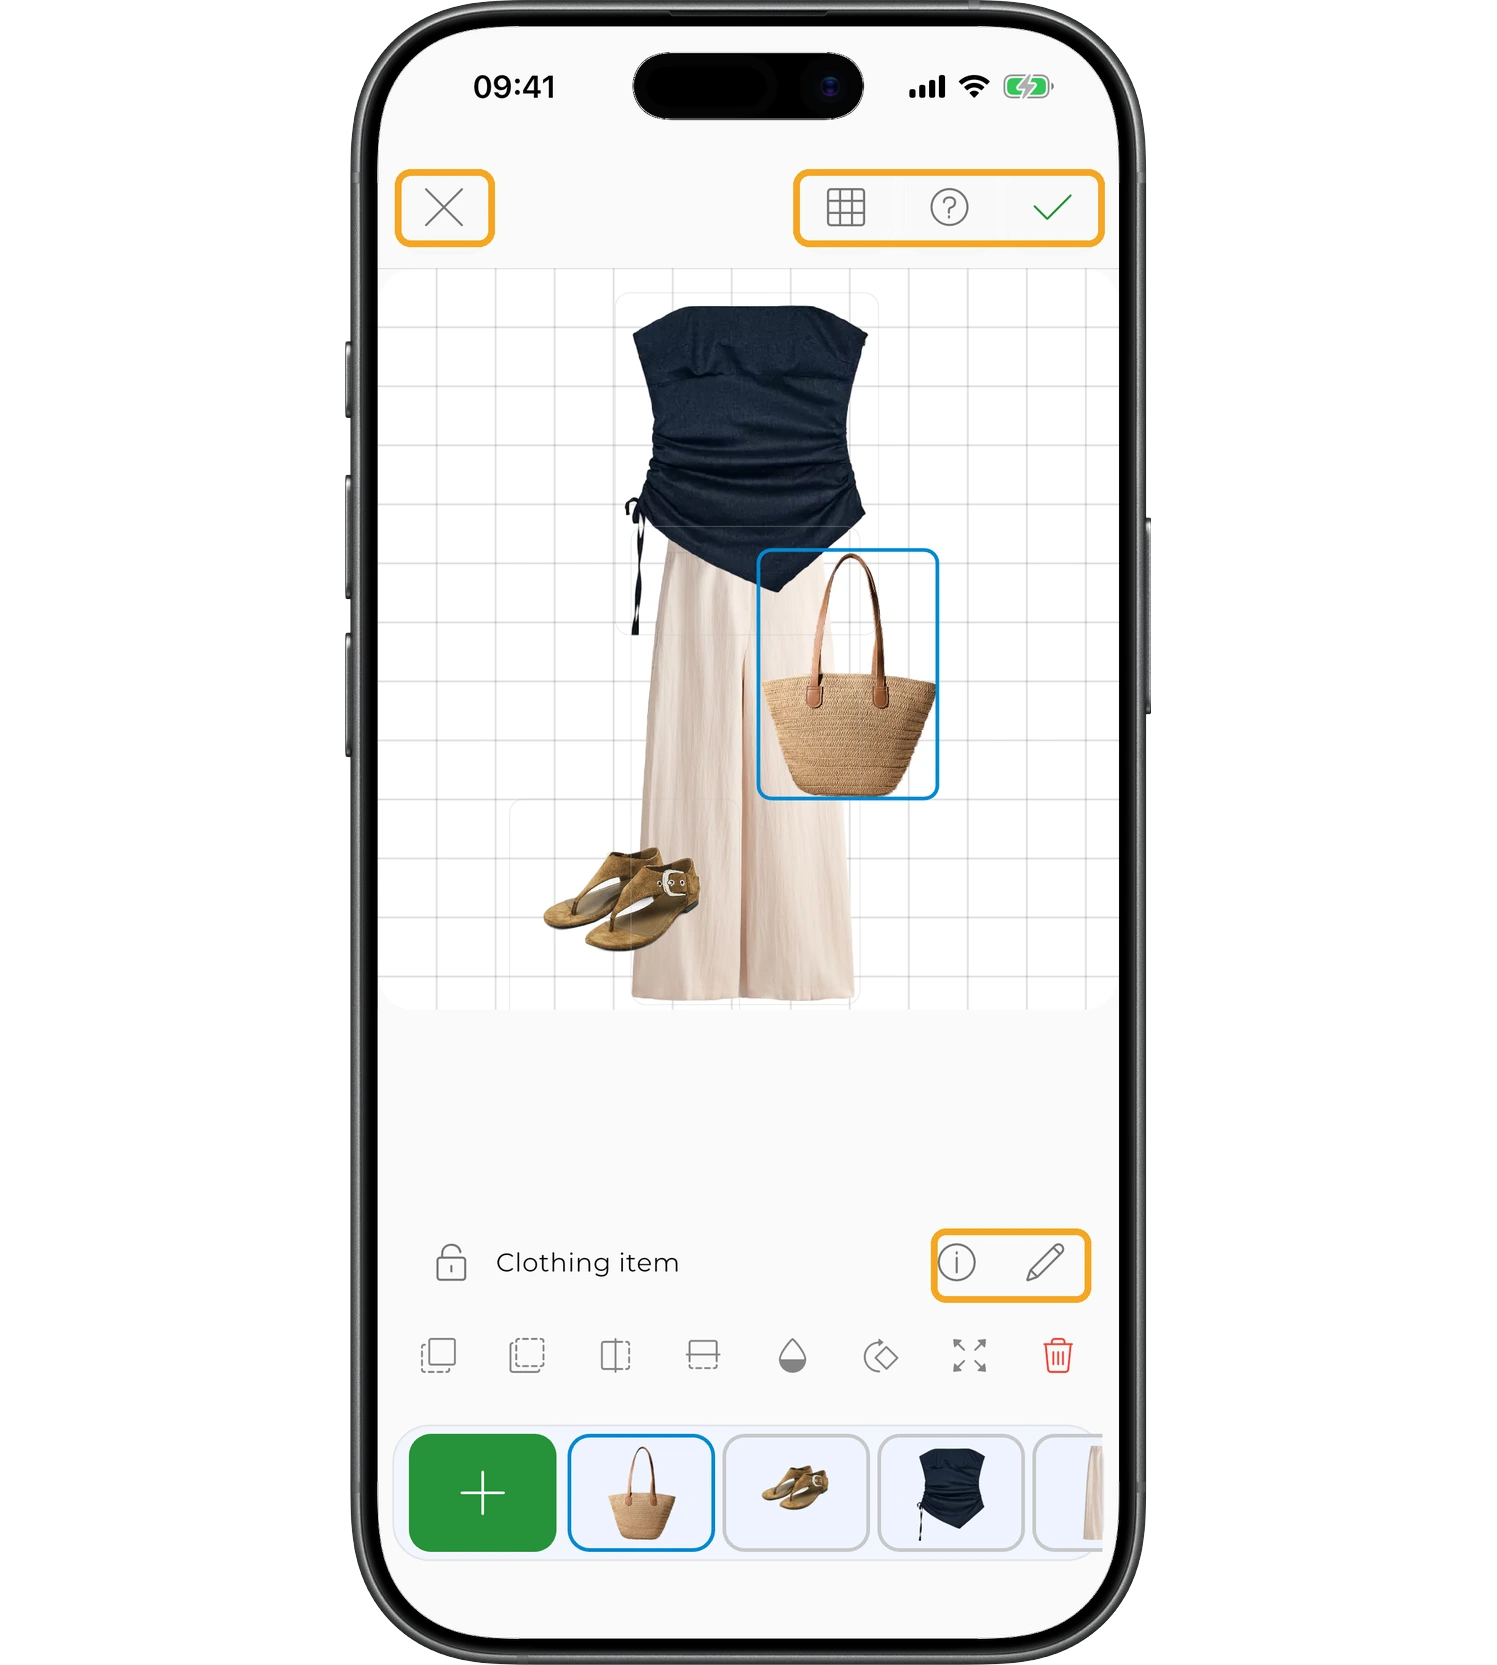
The editor also offers extra actions:
- "i" — open the item card;
- pencil icon — edit the item;
- grid icon — show or hide the layout grid;
- double tap — zoom the canvas;
- "?" — open help for the editor;
- "×" — exit without saving.
Outfit details
Beyond the canvas, you can describe the outfit so it is easier to find and plan later.
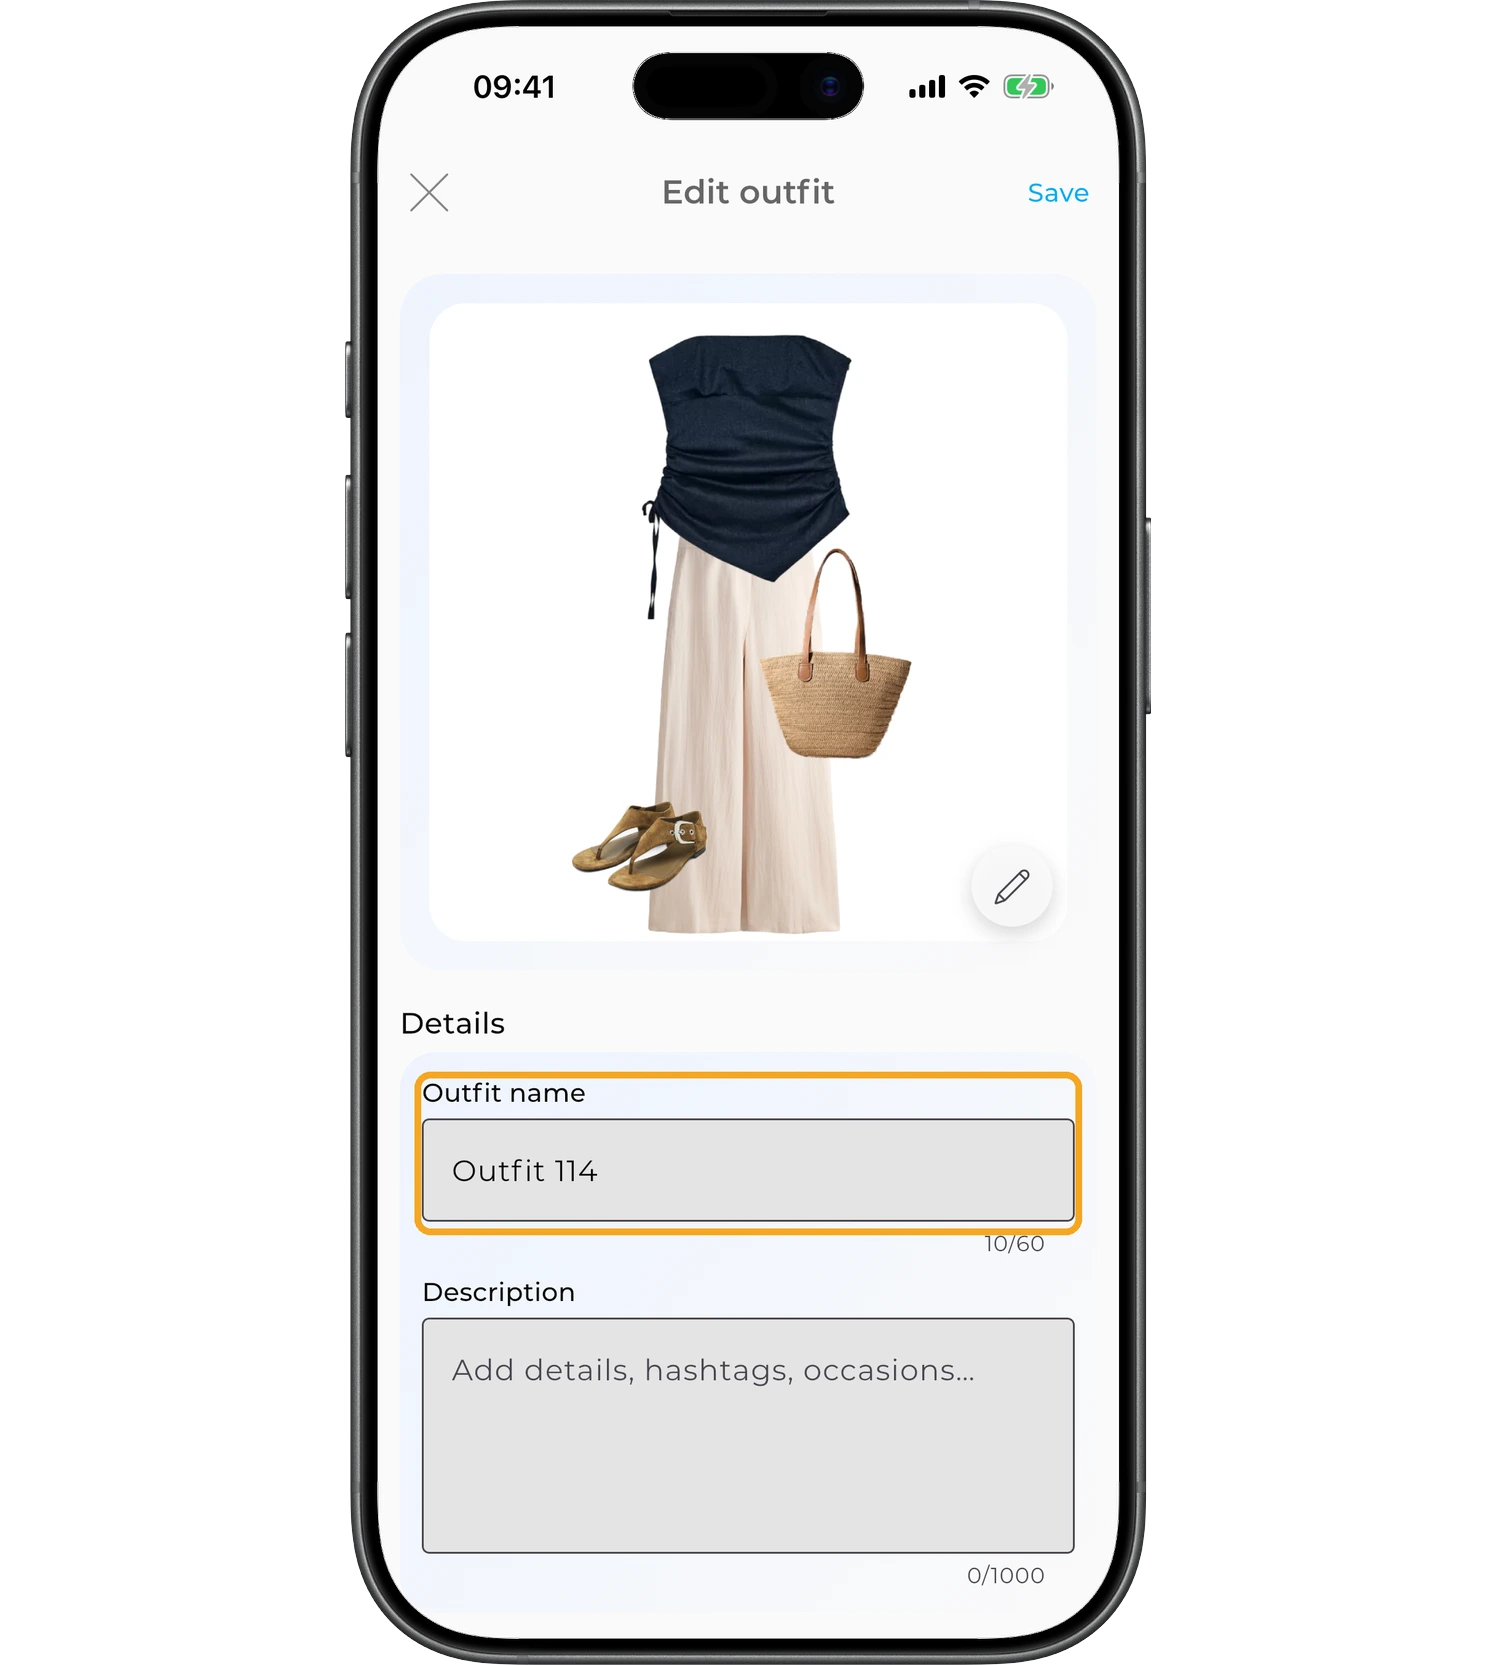
Outfit name
Rename the outfit to something meaningful.
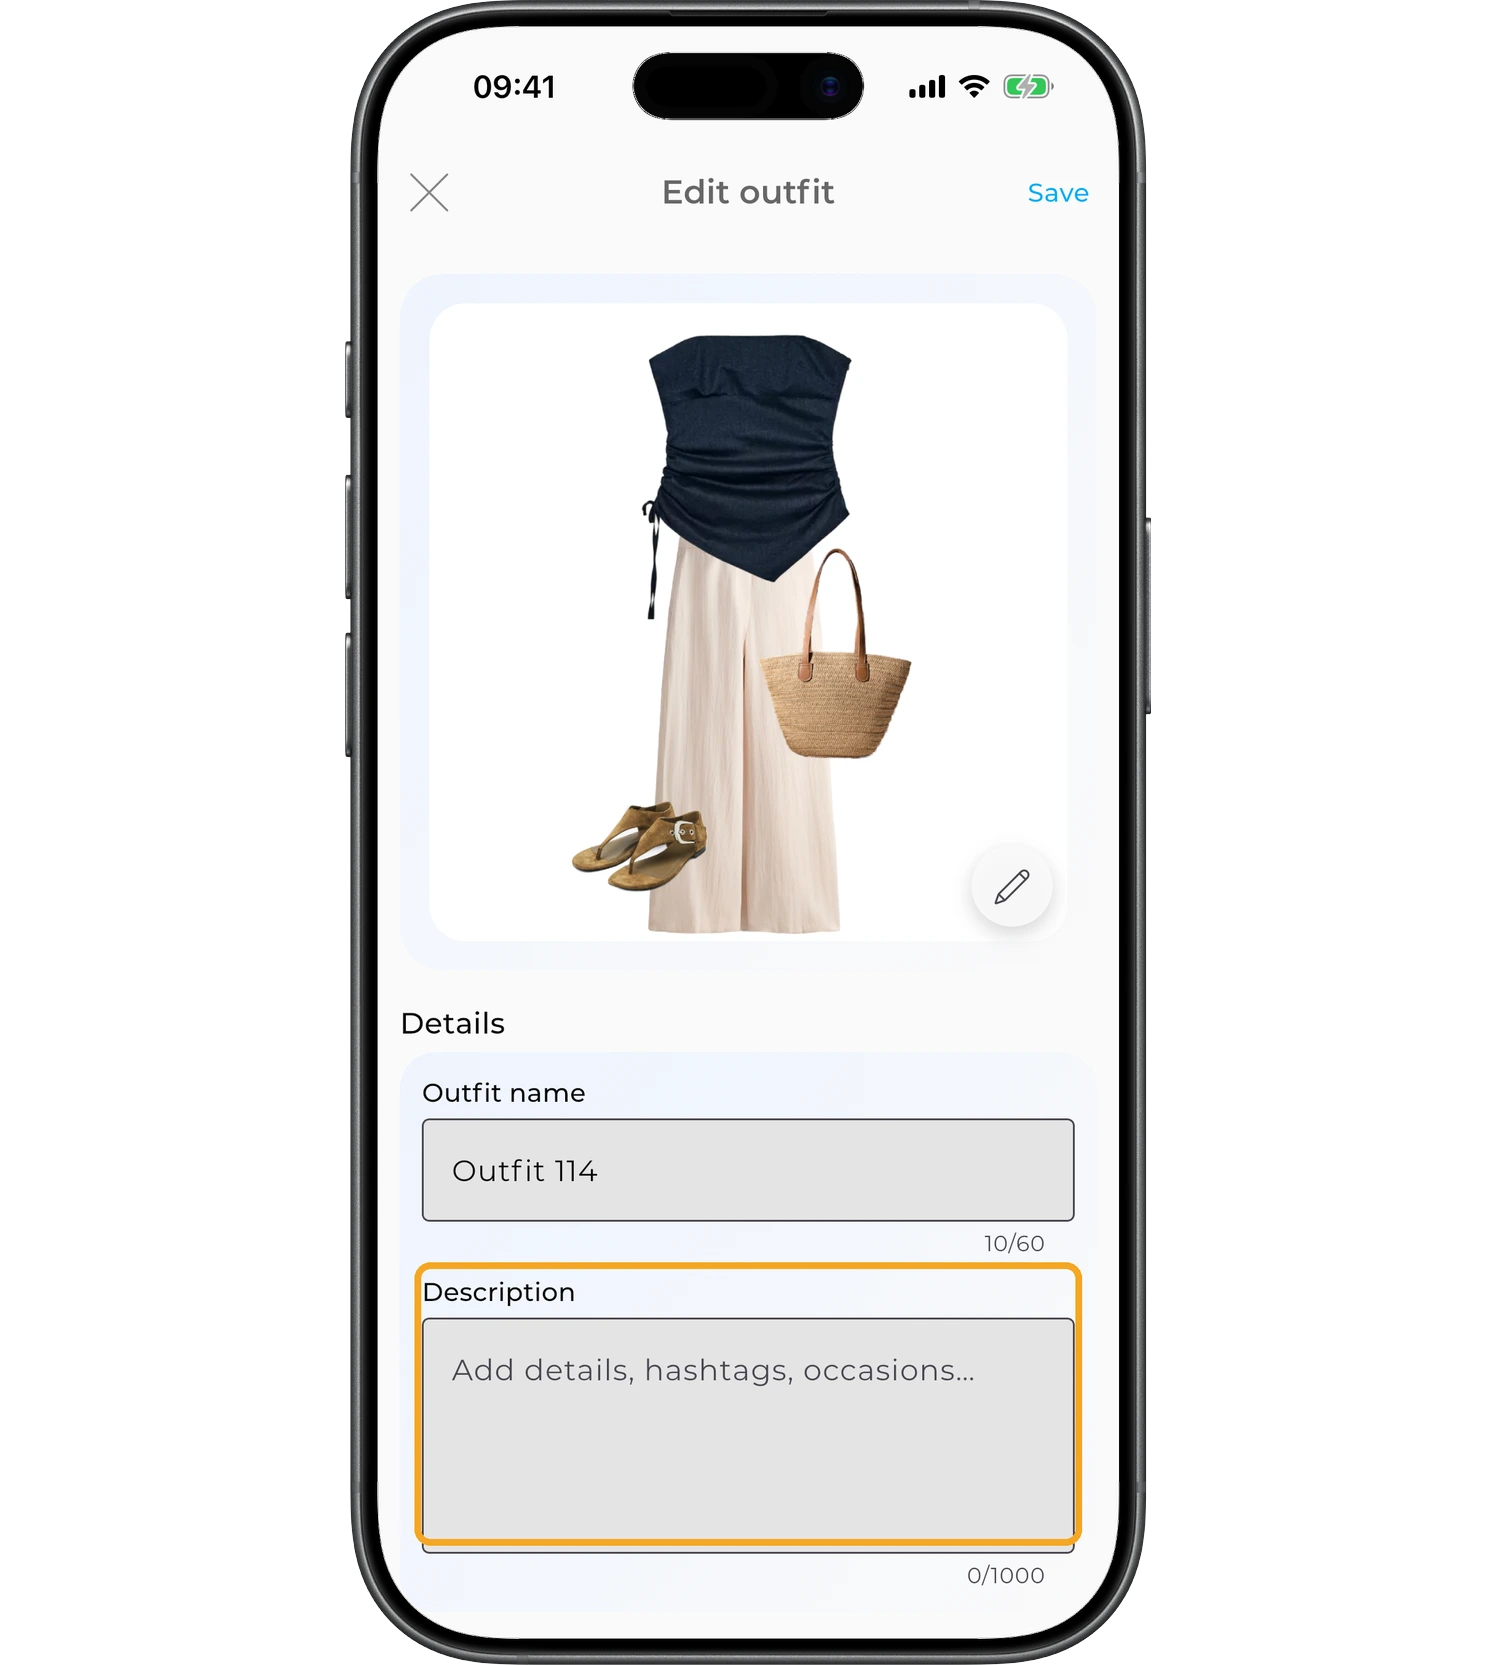
Description
Use the description field for notes, ideas, or context. Descriptions can include:
- hashtags, for example #summer #casual #vacation;
- styling notes or reminders;
- occasions or outfit details.
Hashtags help you organize outfits and make them easier to find later.
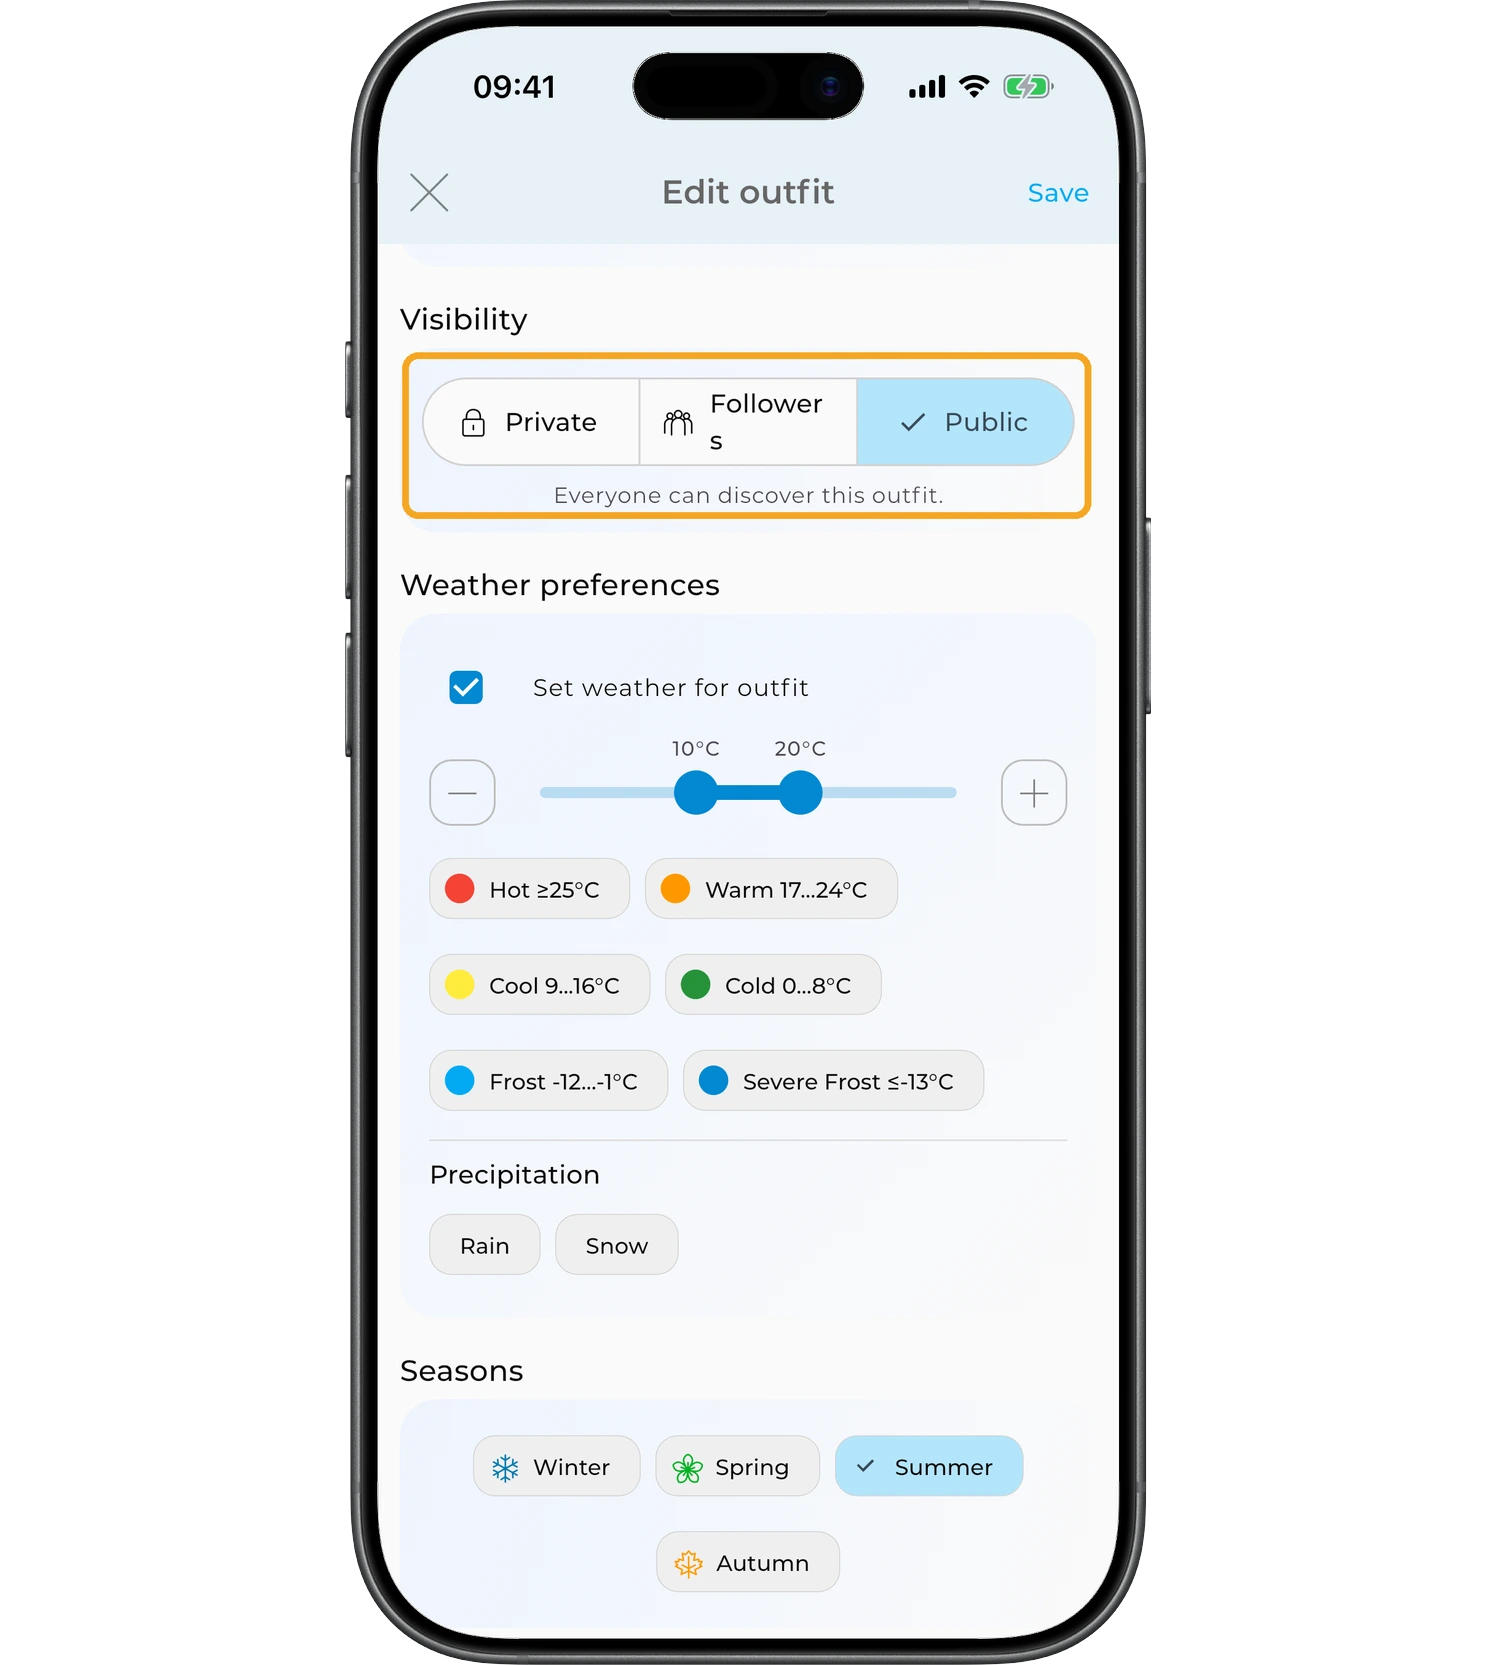
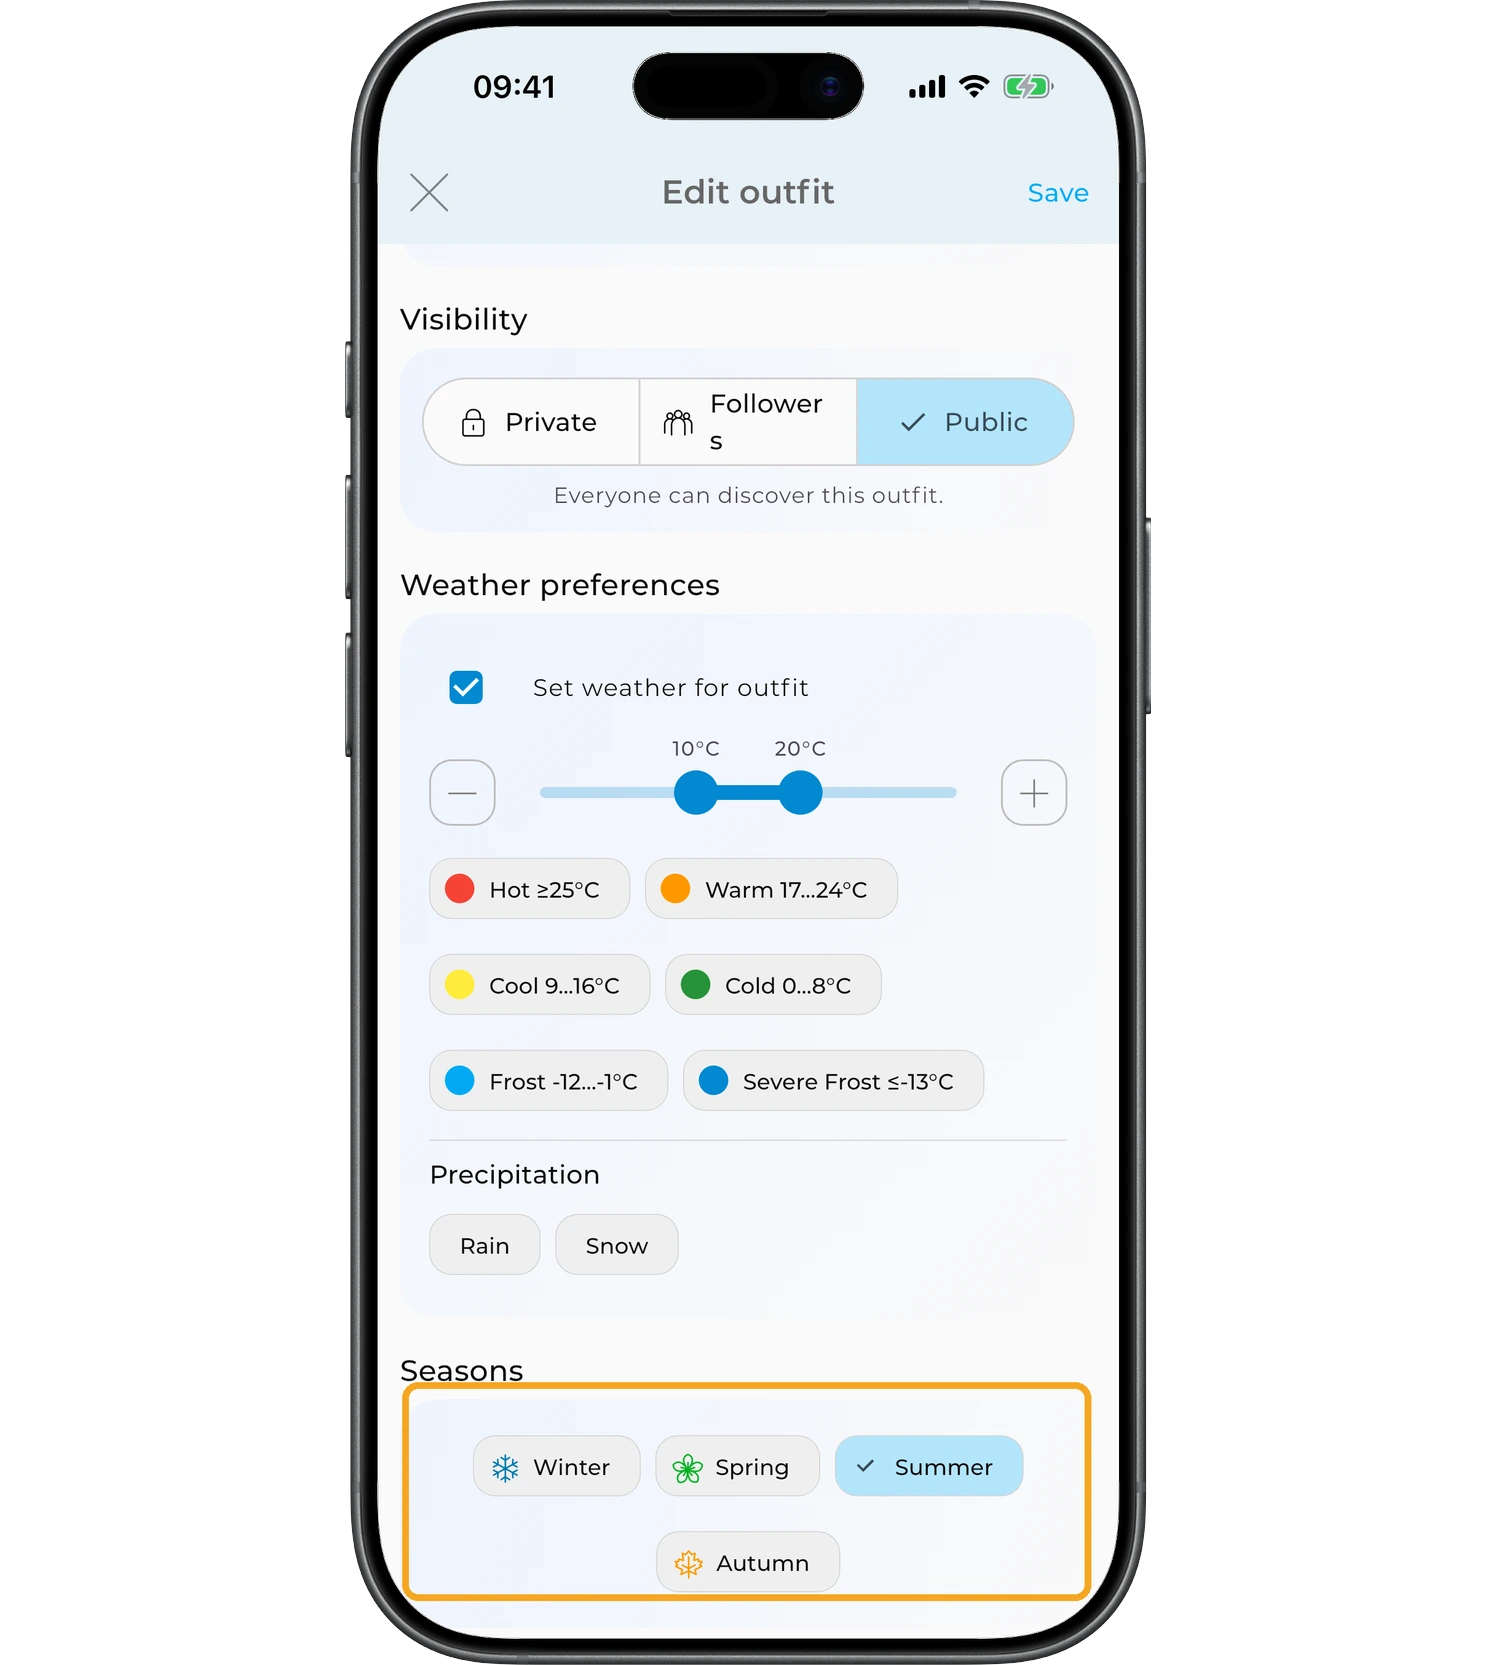
Visibility
Control who can see your outfit:
- Private — only visible to you;
- Followers — visible to your followers;
- Public — visible to everyone.
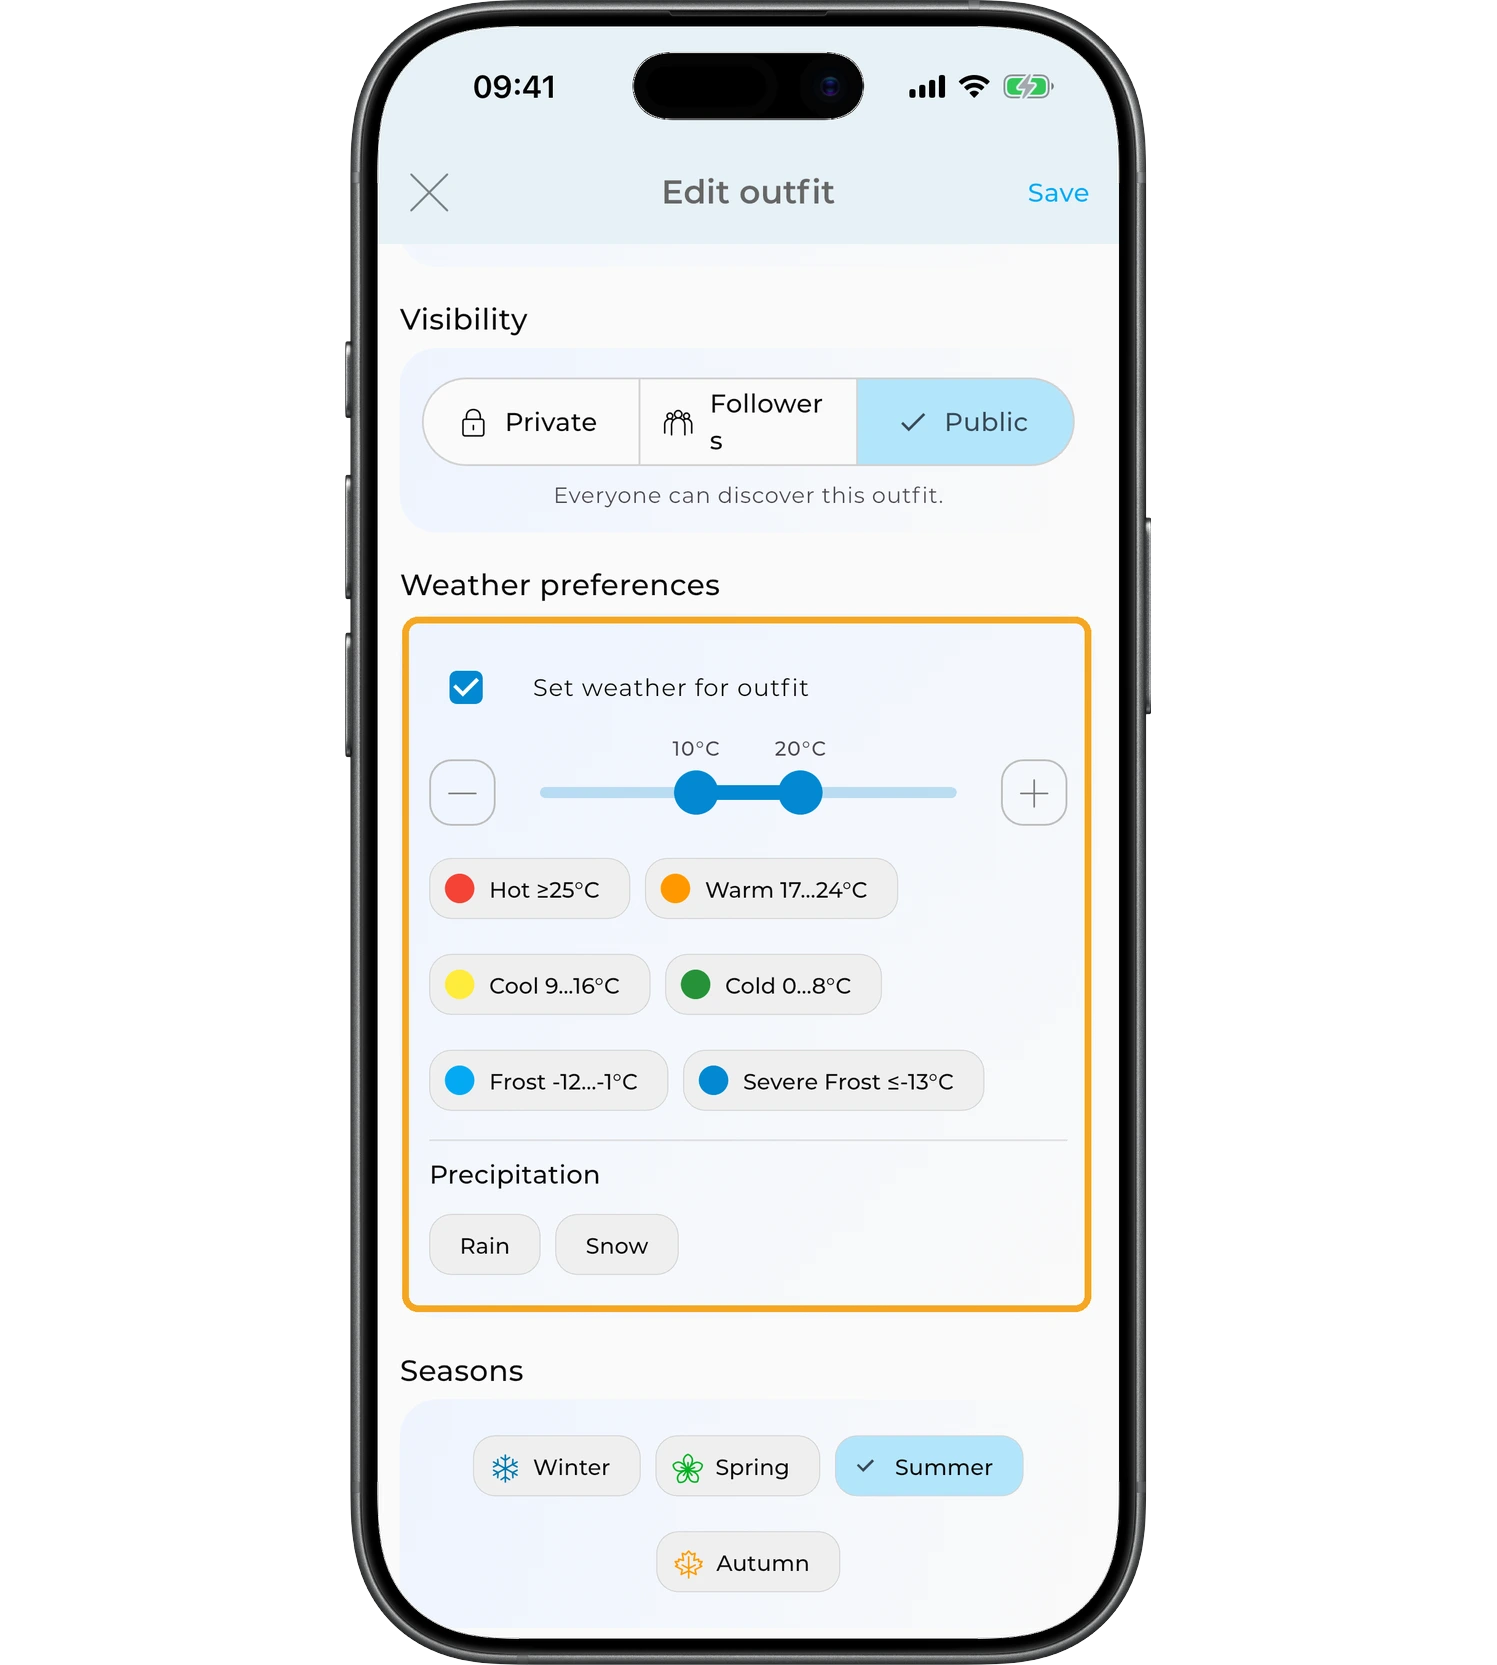
Weather preferences
Turn on "Set weather for outfit" to define when this outfit works. Here you can:
- set a temperature range with the slider;
- pick a ready preset: "Hot", "Warm", "Cool", "Cold", "Frost", or "Severe Frost";
- mark precipitation — "Rain" or "Snow".
These settings make outfit suggestions in your calendar more accurate.
Seasons
Select one or more seasons the outfit suits. This helps filter and organize your outfits.
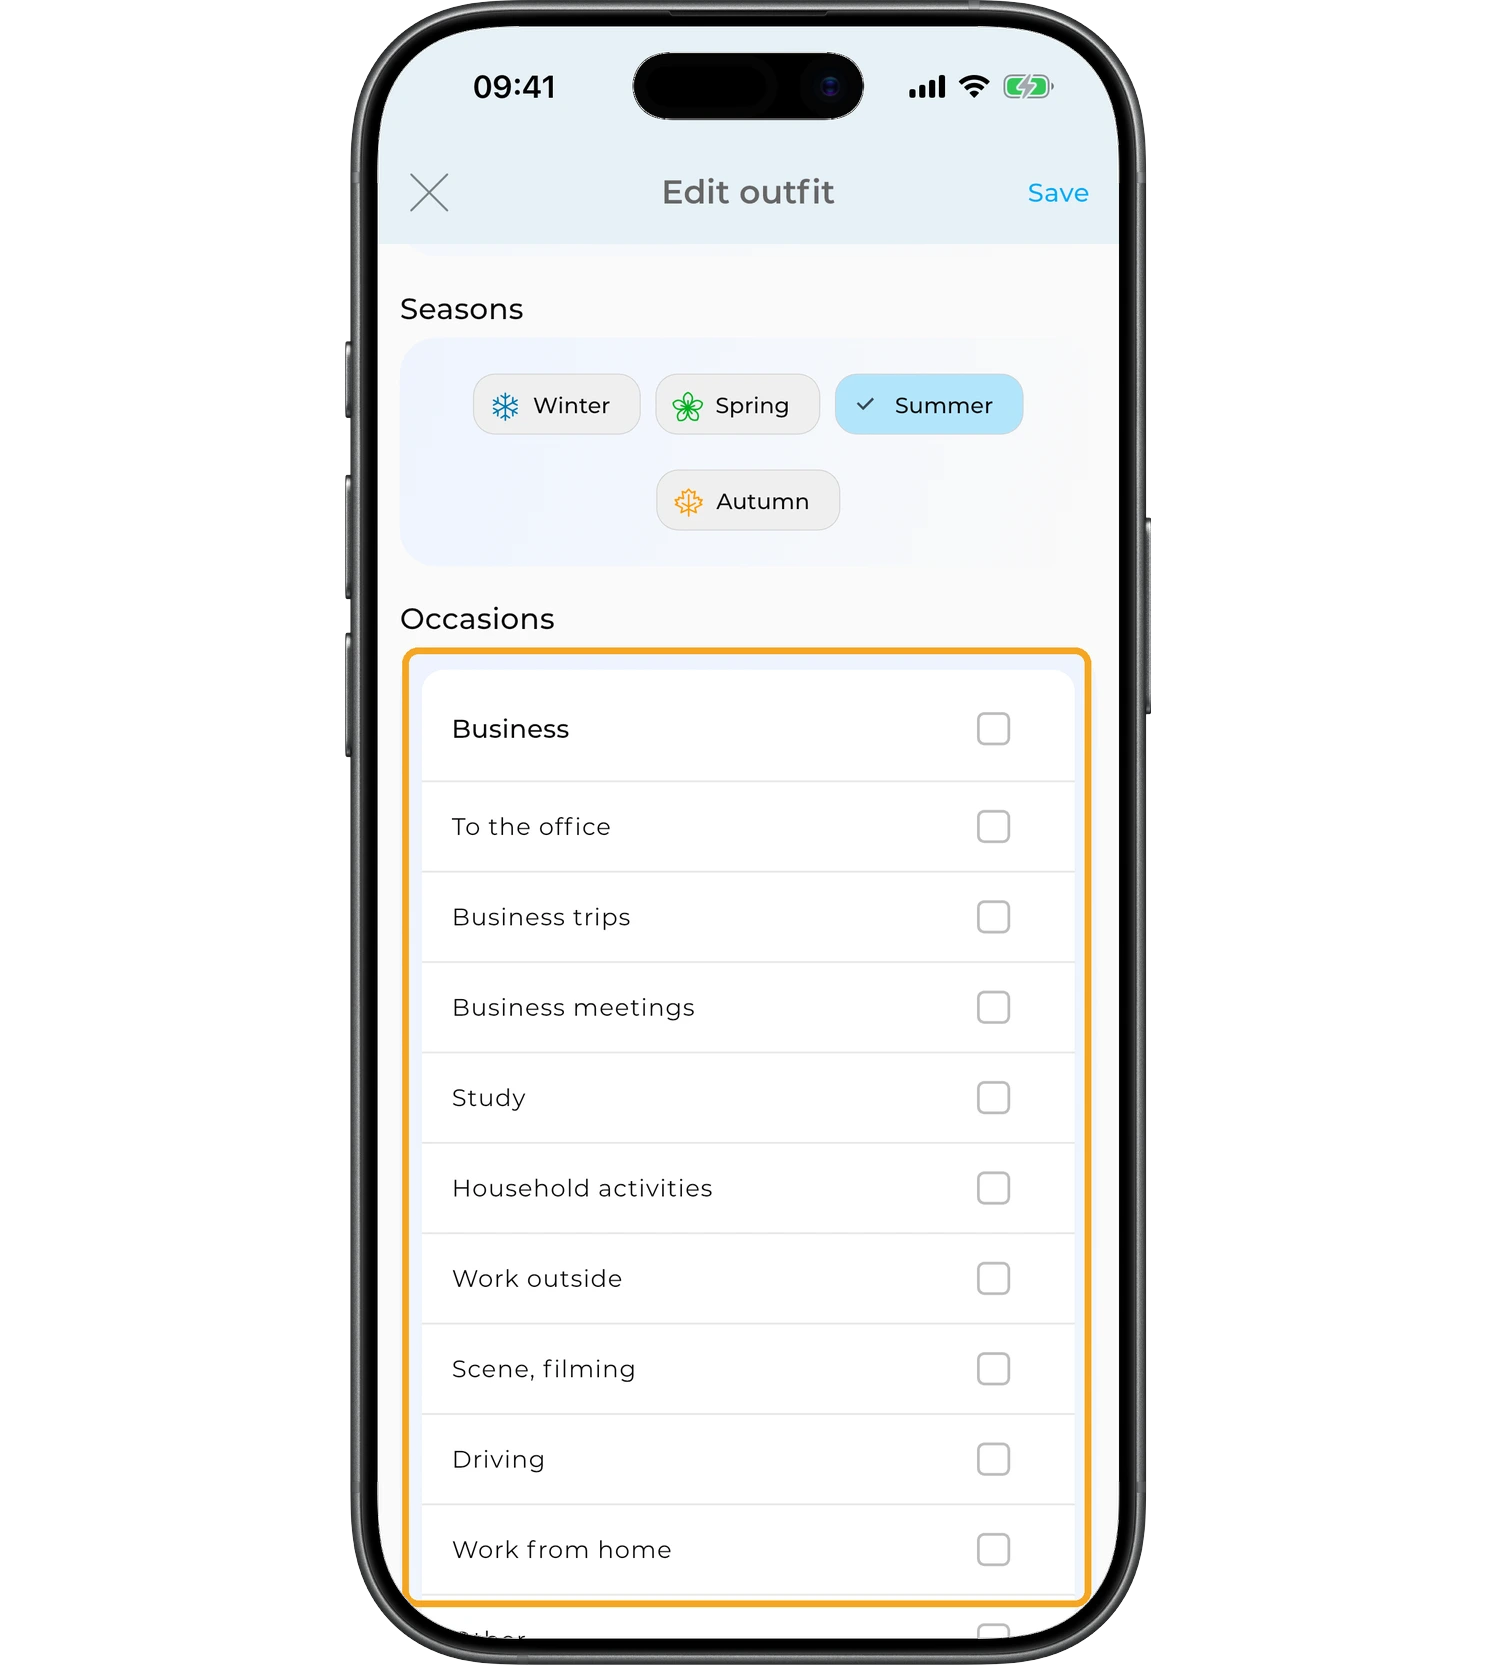
Occasions
Choose the occasions the outfit fits best: "Business", "To the office", "Business trips", "Business meetings", "Study", "Household activities", "Work outside", "Scene, filming", "Driving", "Work from home", or "Other". You can select several options to categorize the outfit more precisely.
Saving your changes
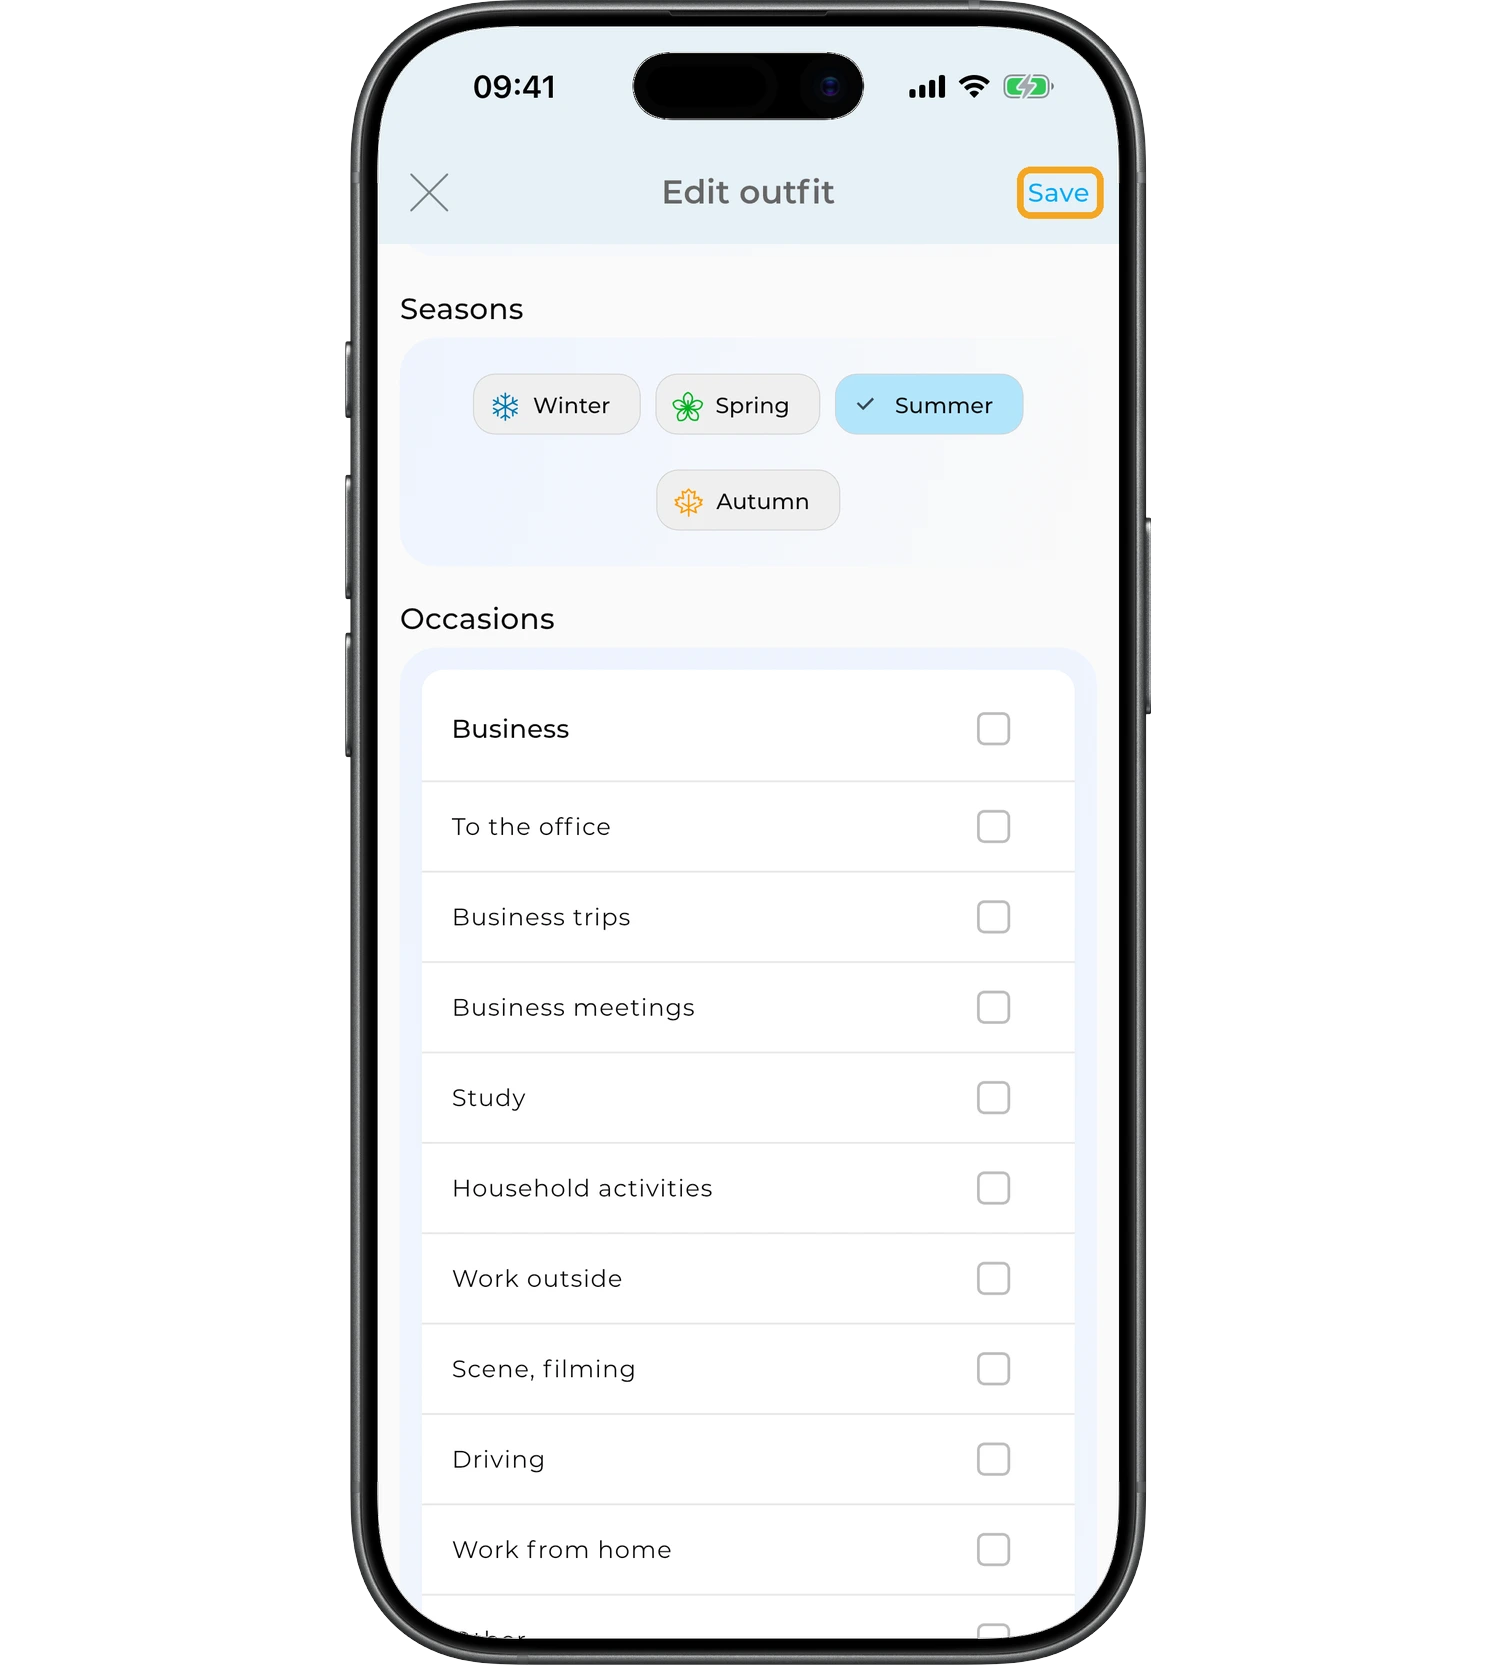
Tap the checkmark in the top-right corner to save your changes. To exit without saving, tap "×" and confirm "Discard changes".
See also
- AI Studio — build and refine one outfit step by step.
- AI Generator — get several ready outfits from your wardrobe at once.
- Explore Combinations — find items that match a chosen piece of clothing.
- Virtual try-on — see how the finished outfit looks on your avatar.
FAQ
Do you need Premium for text, pictures, and virtual avatars?
Yes. Adding text, pictures, and virtual avatars requires a Premium subscription. Adding items, colors, and backgrounds is available to all users.
Can you lock an element so it doesn't move?
Yes. Select an element and tap the lock icon. It will stay in place while you edit other elements.
How do you change the layer order?
Select an element and use the "Bring forward" and "Send backward" buttons to change its position relative to other elements.
Need help?
Contact us at support@getwardrobe.com