AI Studio
AI Studio helps you create one outfit at a time and refine it step by step. You can start with a specific item, limit the selection to part of your wardrobe, keep the items you like in the outfit, and change only the ones you don't.
To use AI Studio you need just 15 items, so it's just as useful for large wardrobes as it is for seasonal collections, capsule wardrobes, or clothes packed for a trip.
When to use AI Studio
AI Studio is especially handy when you want to:
- build an outfit around one or several specific items;
- find combinations for a new purchase;
- use only a small collection, for example items with the "Summer 2026" tag;
- create outfits from items already added to a packing list;
- work with a seasonal or capsule selection of 15–30 items;
- gradually refine a single outfit by swapping individual elements;
- keep the items you like and change only the rest.
How AI Studio differs from AI Generator
| AI Generator | AI Studio | |
|---|---|---|
| Result | 10, 20, or 30 ready outfits per generation | One outfit at a time |
| When to use | When you want several new ideas quickly | When you need to build or refine a specific outfit |
| Working with a chosen item | Creates a set of outfits based on the conditions you set | Lets you build an outfit around a chosen item and change the rest |
| Working with a small collection | Good for generating multiple outfit options | Ideal for capsule wardrobes, seasonal collections, tags, and packing lists |
| Editing the result | Ready outfits can be viewed, saved, and edited | You can keep, replace, and remove individual items right during generation |
| Minimum number of items | 30 items | 15 items |
How to open AI Studio
On the home screen tap: "+" → "Outfit" → "AI Studio".
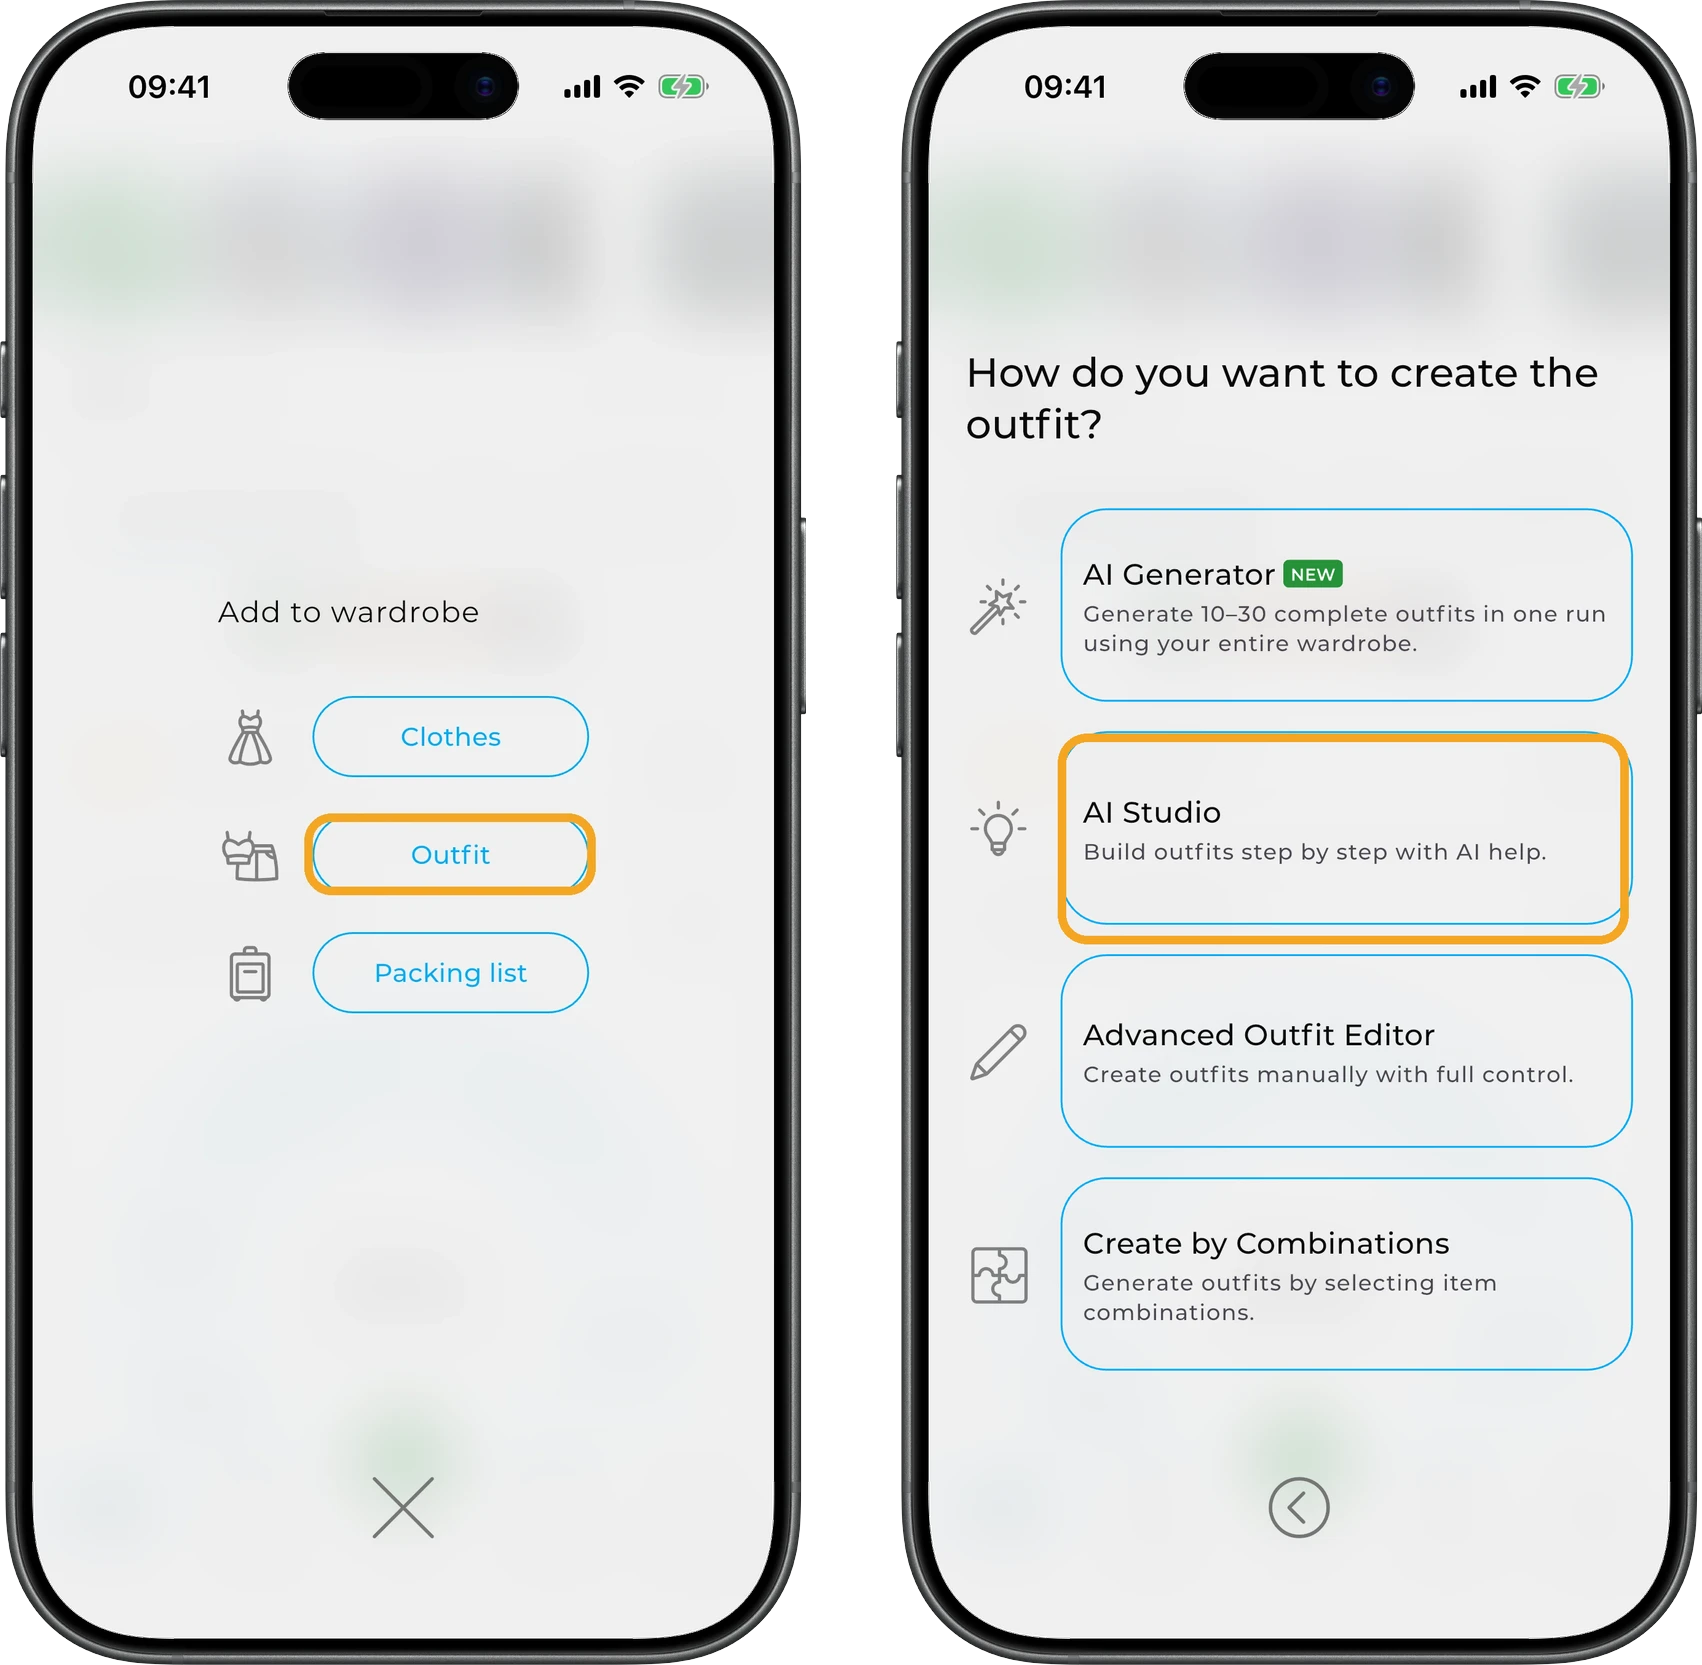
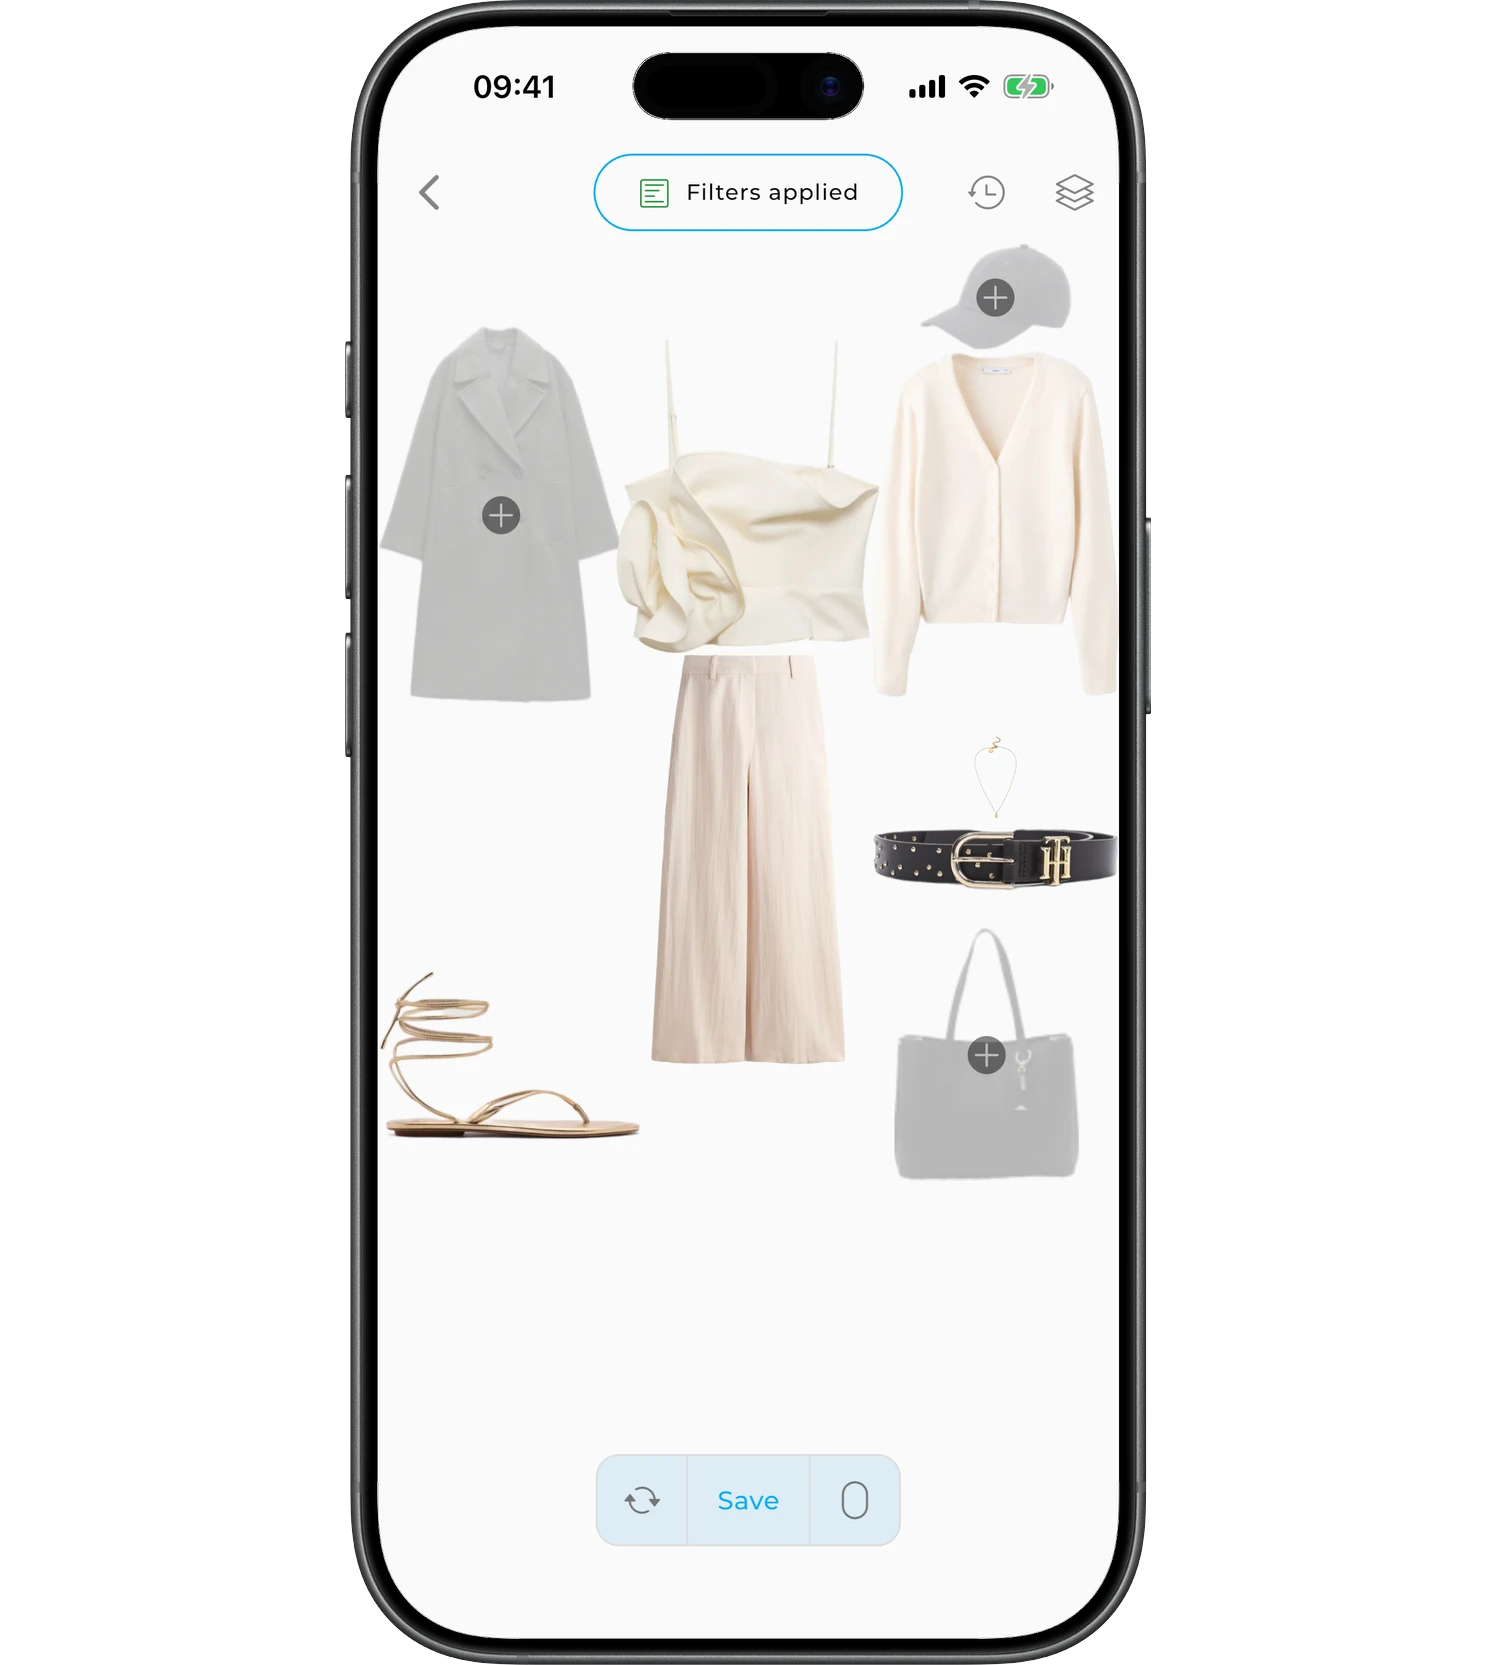
The AI will create your first outfit from suitable items in your wardrobe.
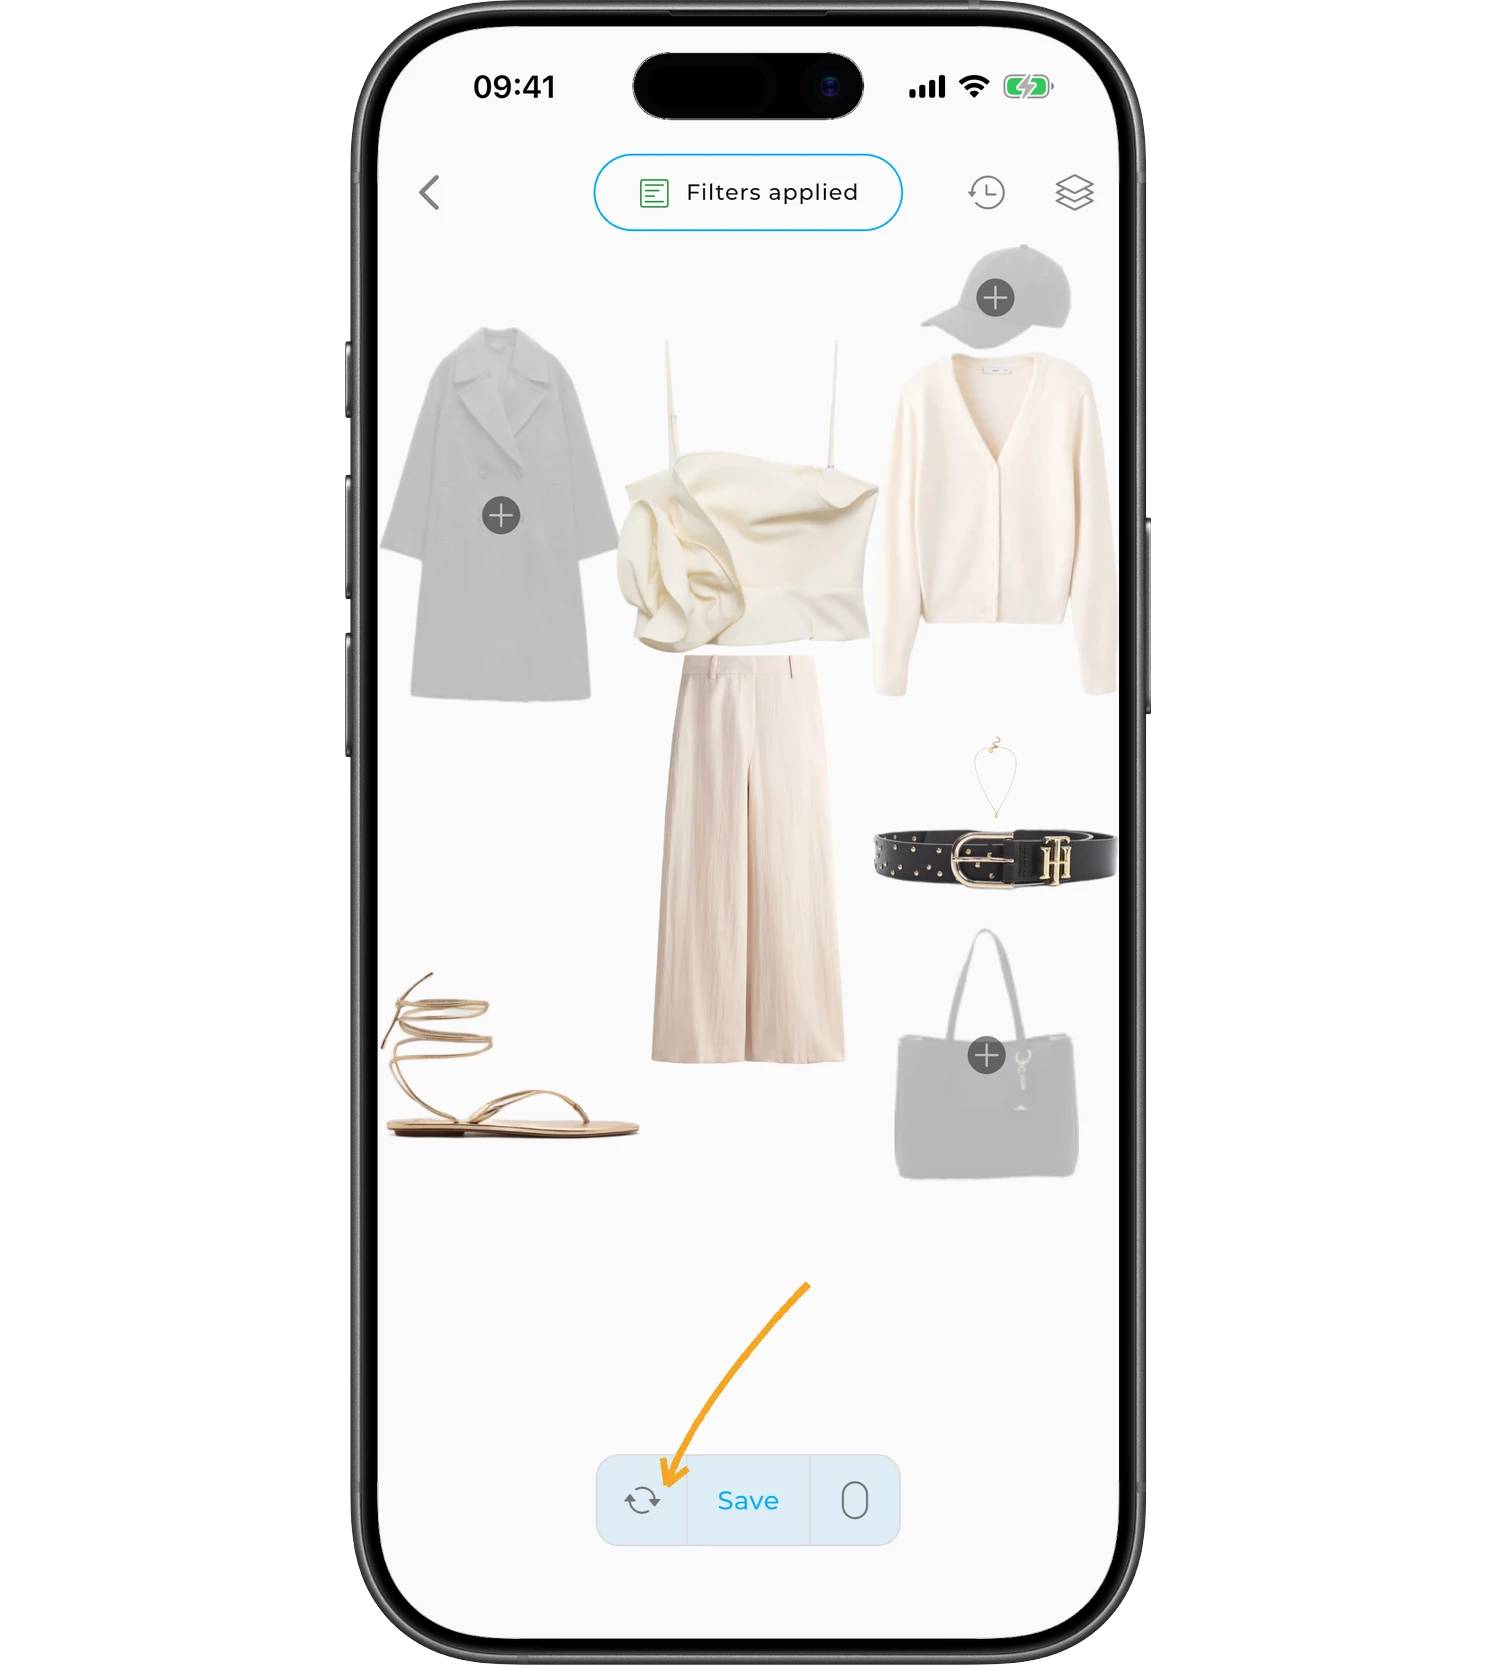
To get a new outfit, tap the "Refresh" icon.
How to start with a specific item
When you already know which item you want to use, you can create an outfit around it right away.
On the items screen, press and hold an item, then choose "Create outfit with AI" from the pop-up menu. The chosen item becomes the main element the outfit is built around.
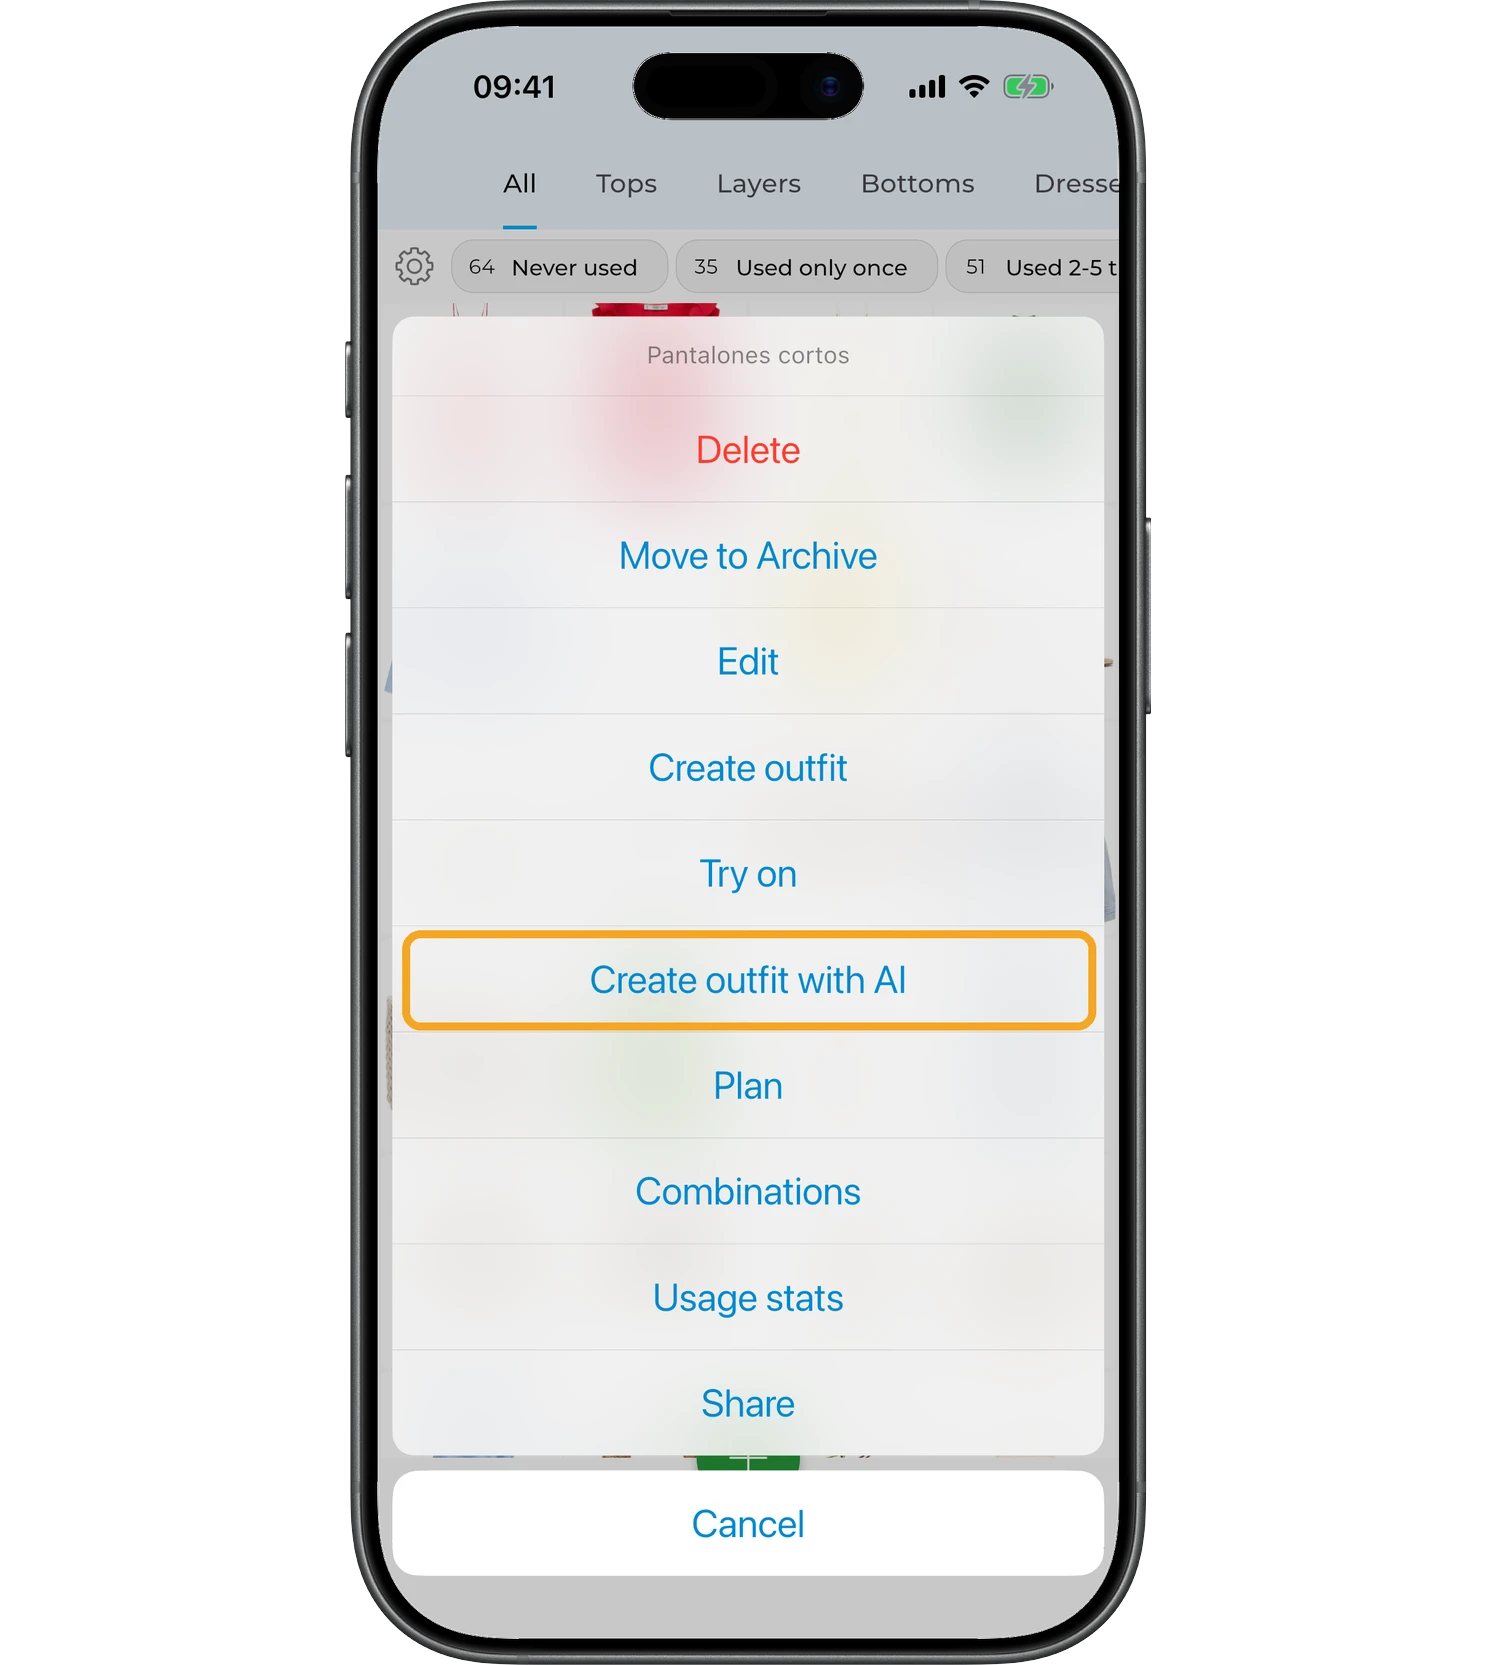
To start with several items at once, select them in bulk edit mode and choose "Create outfit with AI".
Info
Creating an outfit with several chosen items at once is available in the Premium subscription.
Use filters
Filters let you narrow the selection and create outfits using only the part of your wardrobe you want.
For example, you can use:
- items with the "Summer 2026" tag;
- clothes from a packing list for a trip;
- items of a specific season;
- clothes of a specific family member;
- only items of the size you need;
- specific categories, colors, or brands.
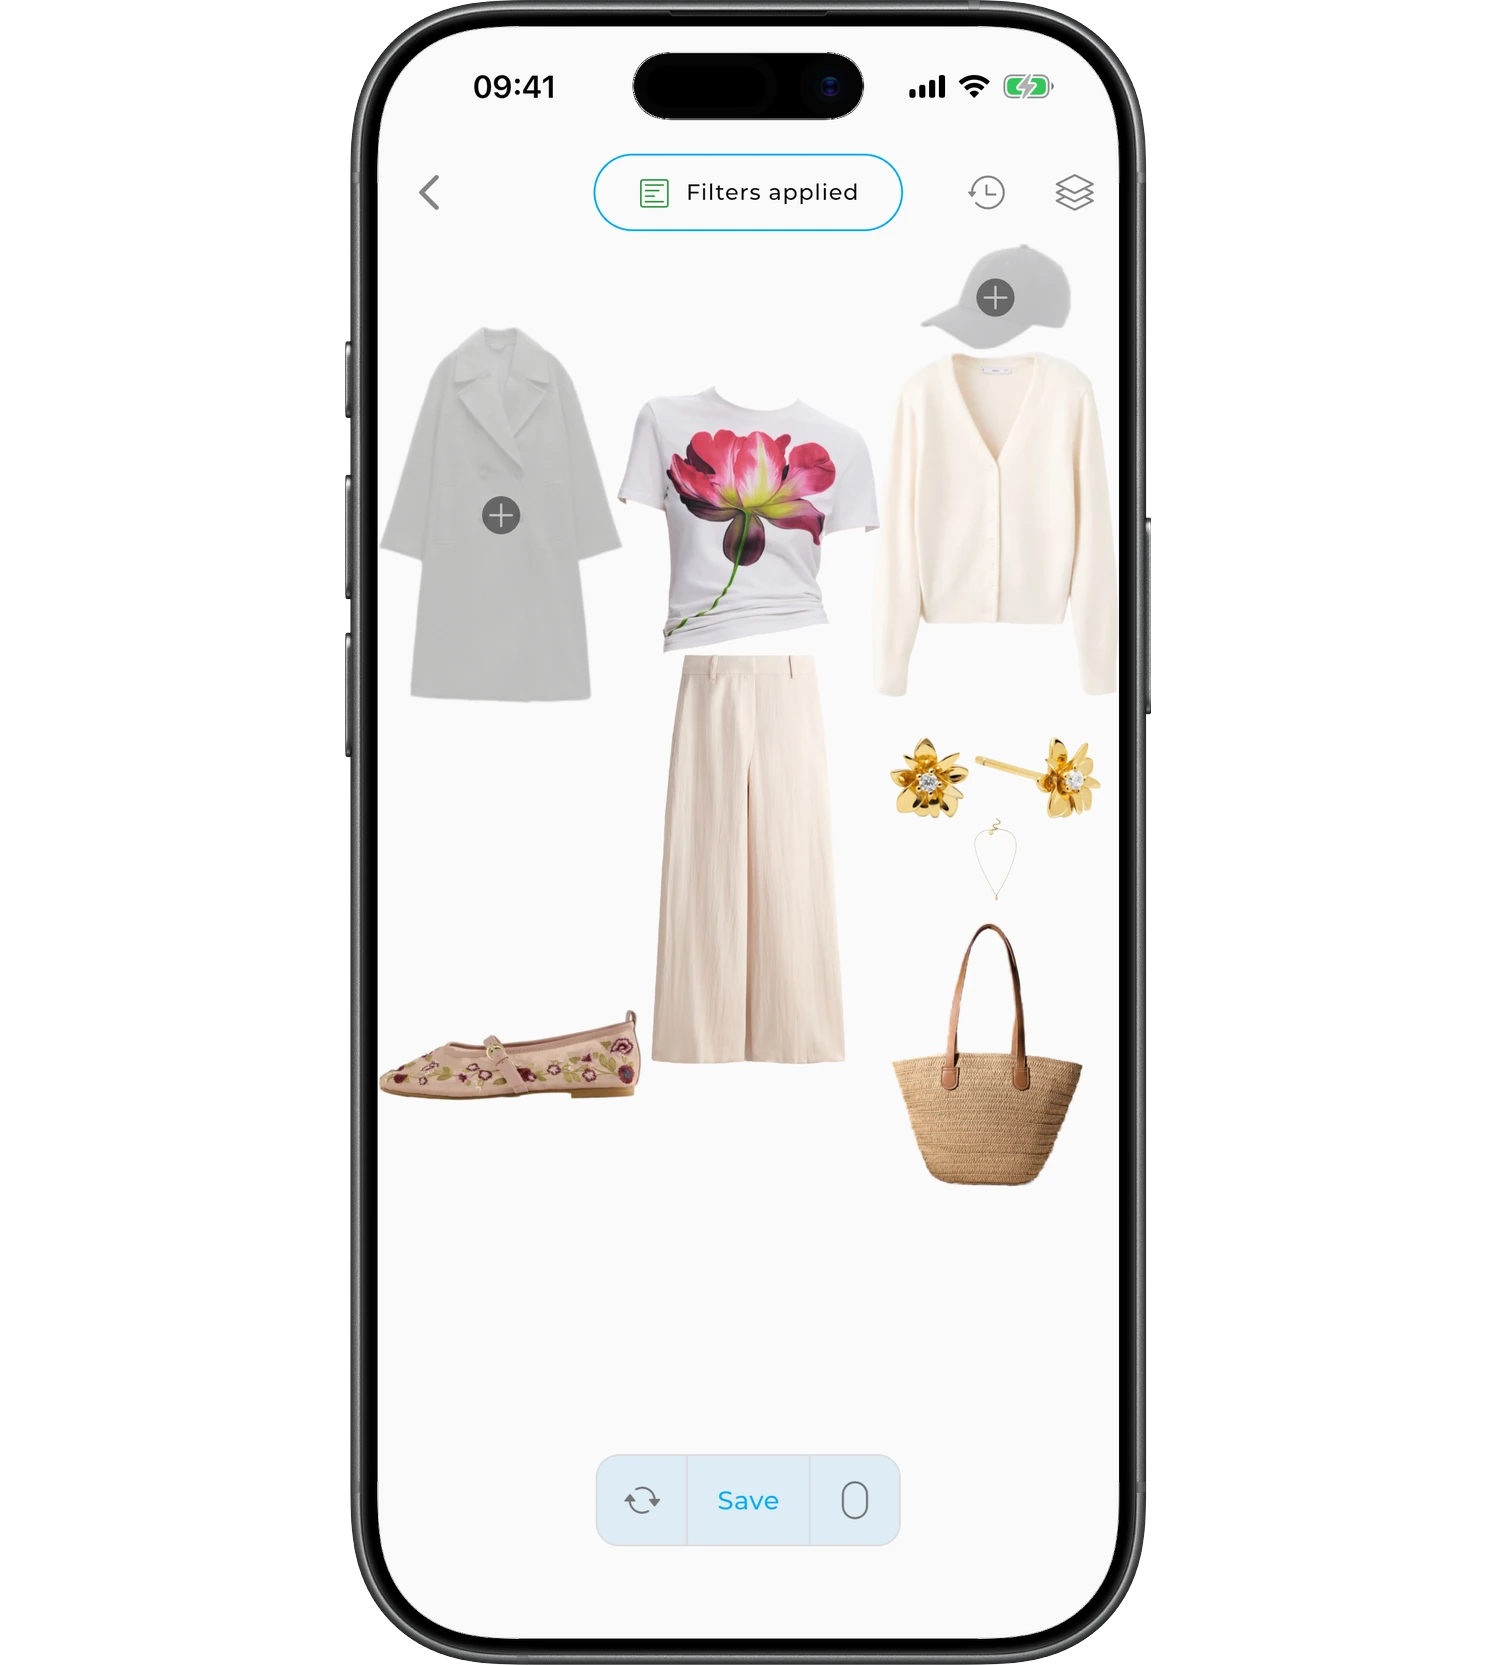
To set up the selection, tap the filters button at the top of the screen. By default a filter by item status is already on, so the button reads "Filters applied".
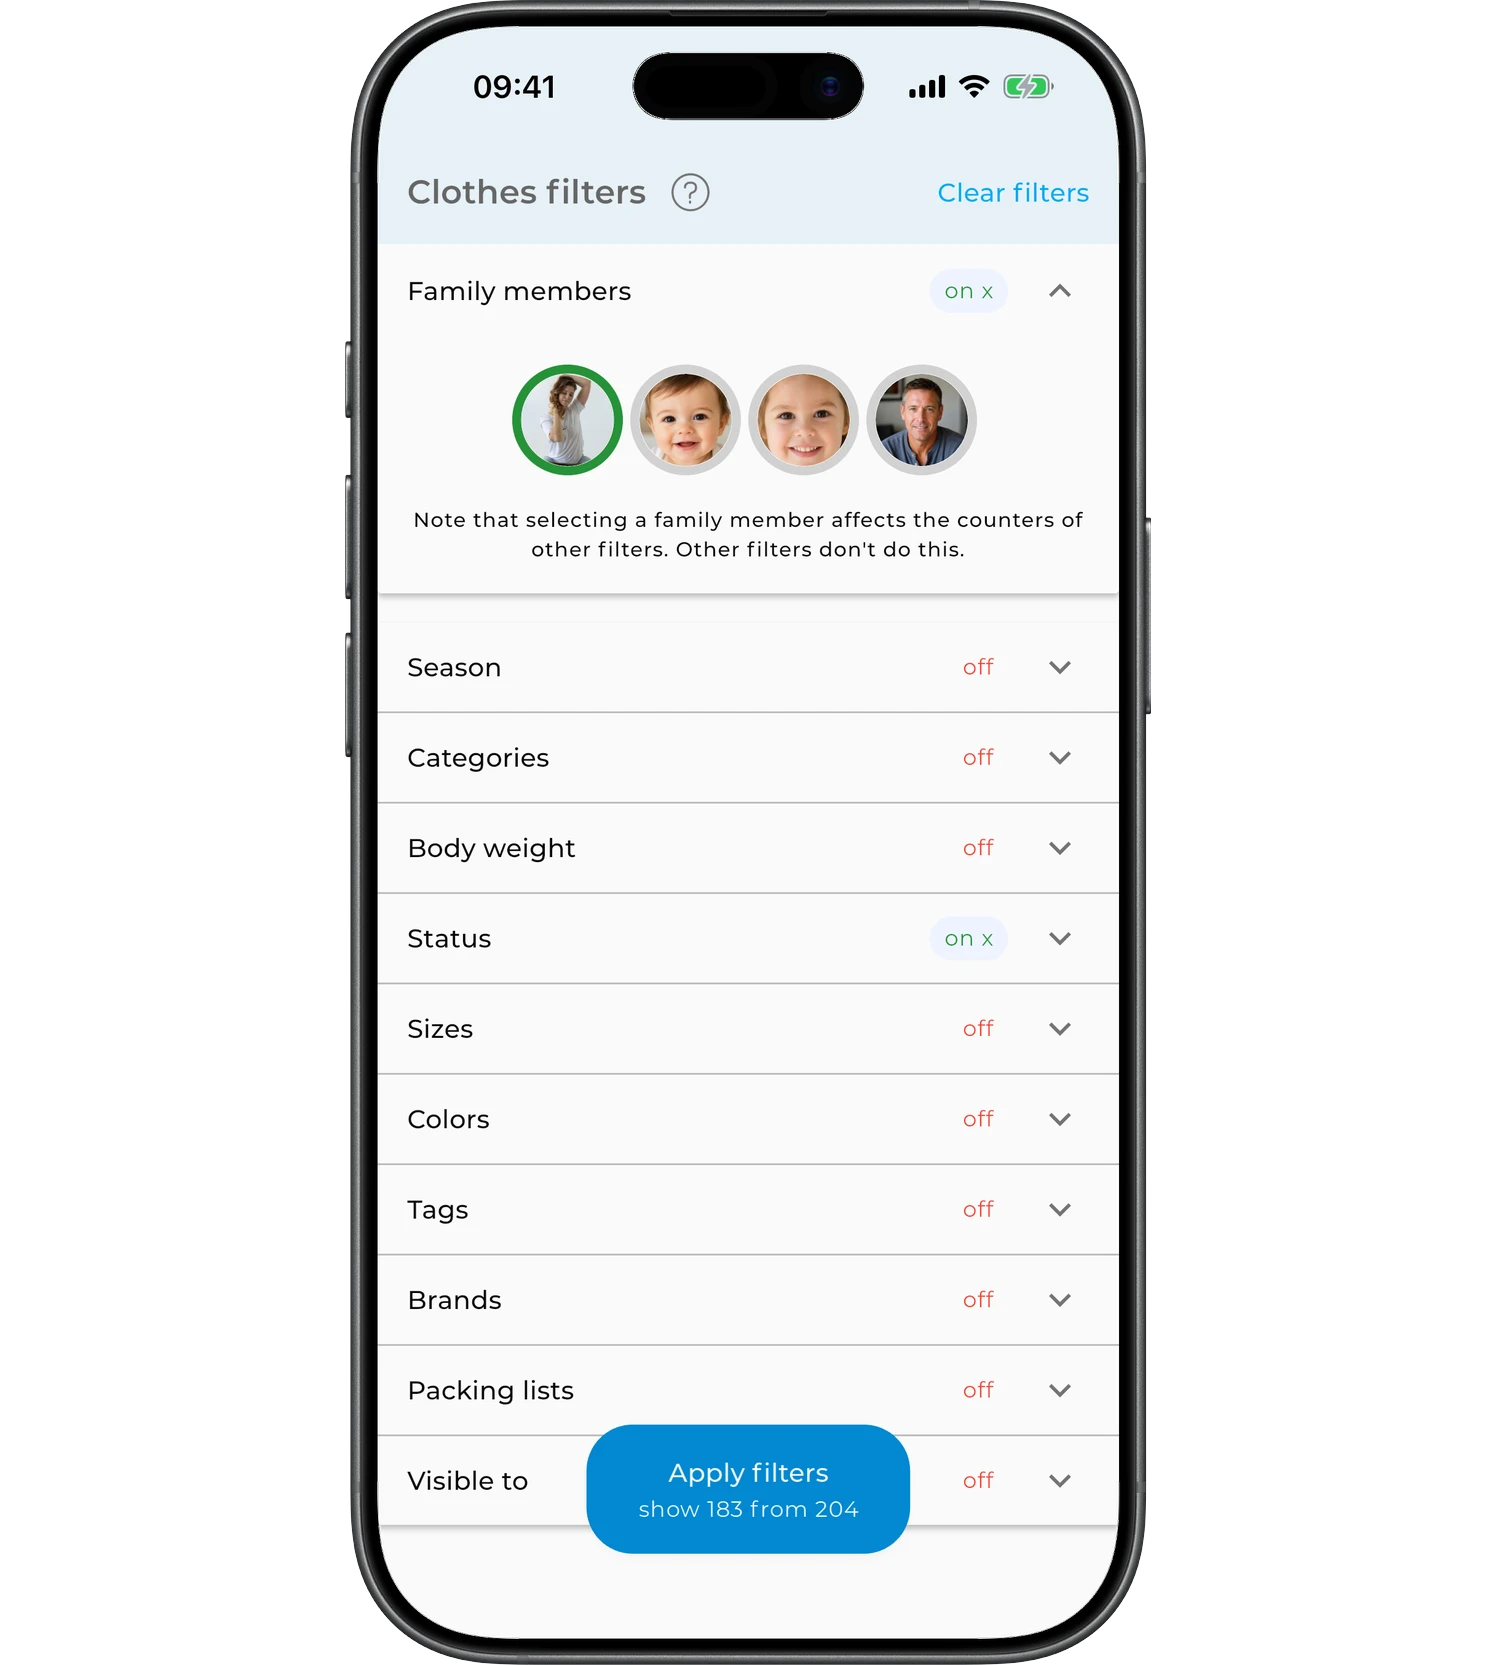
AI Studio offers the following filters:
- Family members;
- Season;
- Categories;
- Body weight;
- Status;
- Sizes;
- Colors;
- Tags;
- Brands;
- Packing lists;
- Visible to.
After adjusting, tap "Apply filters". The button shows how many items match the selected conditions.
When filters are active, the "Filters applied" button appears at the top of the screen. Tap it to change or reset the settings.
Info
The "Family members" and "Packing lists" filters are available in the Premium subscription.
Set up outfit layers
Layers define which categories of items the AI will use when creating an outfit. For example, outerwear, shoes, bags, jewelry, or hats.
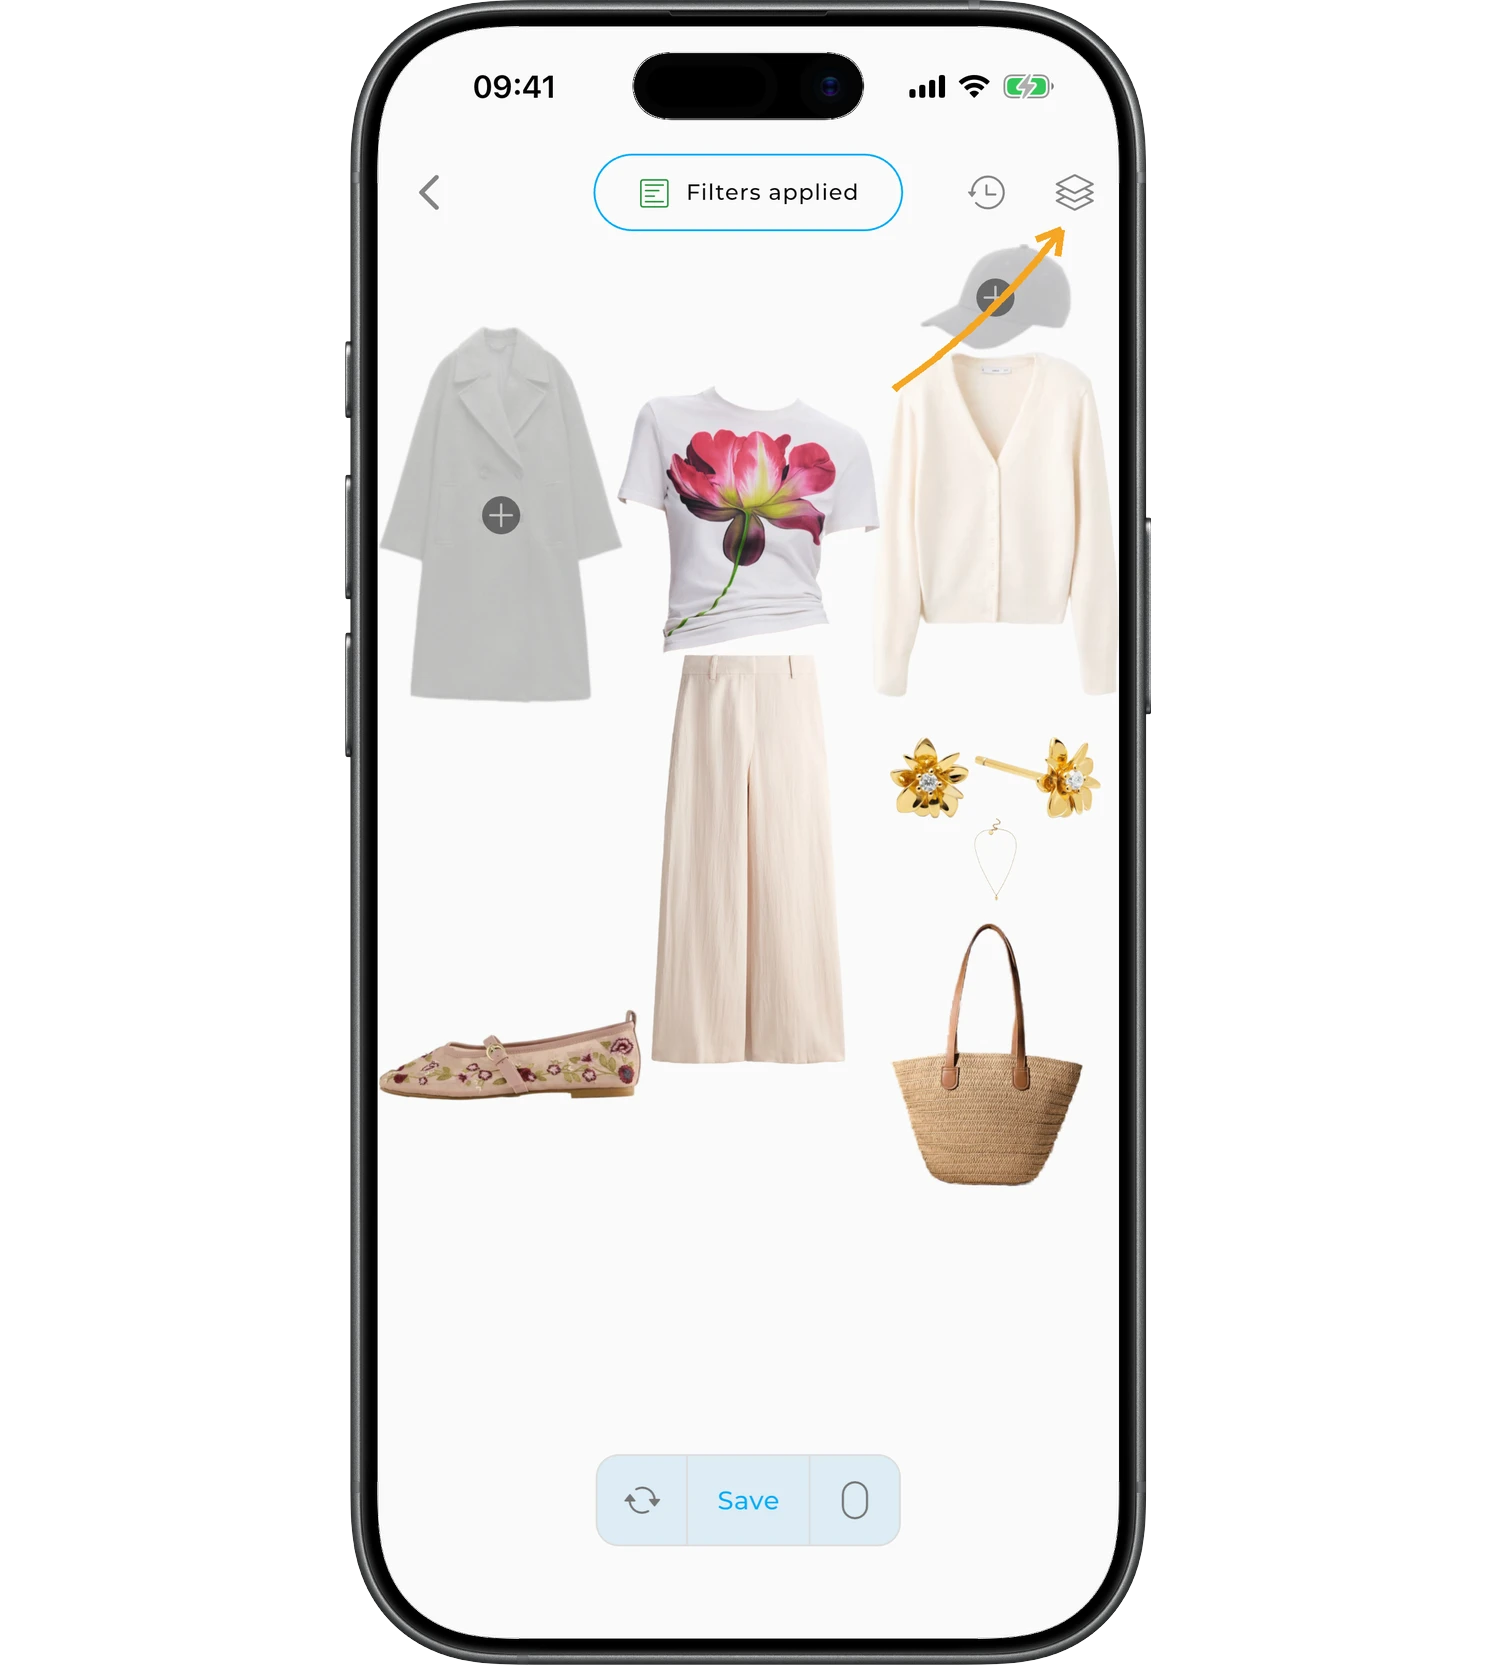
Tap the "Layers" icon in the top-right corner and turn on only the layers you want to see in the outfit.
For example, you can:
- turn off outerwear for summer outfits;
- remove hats;
- skip bags or jewelry.
Tap a layer to activate or deactivate it.
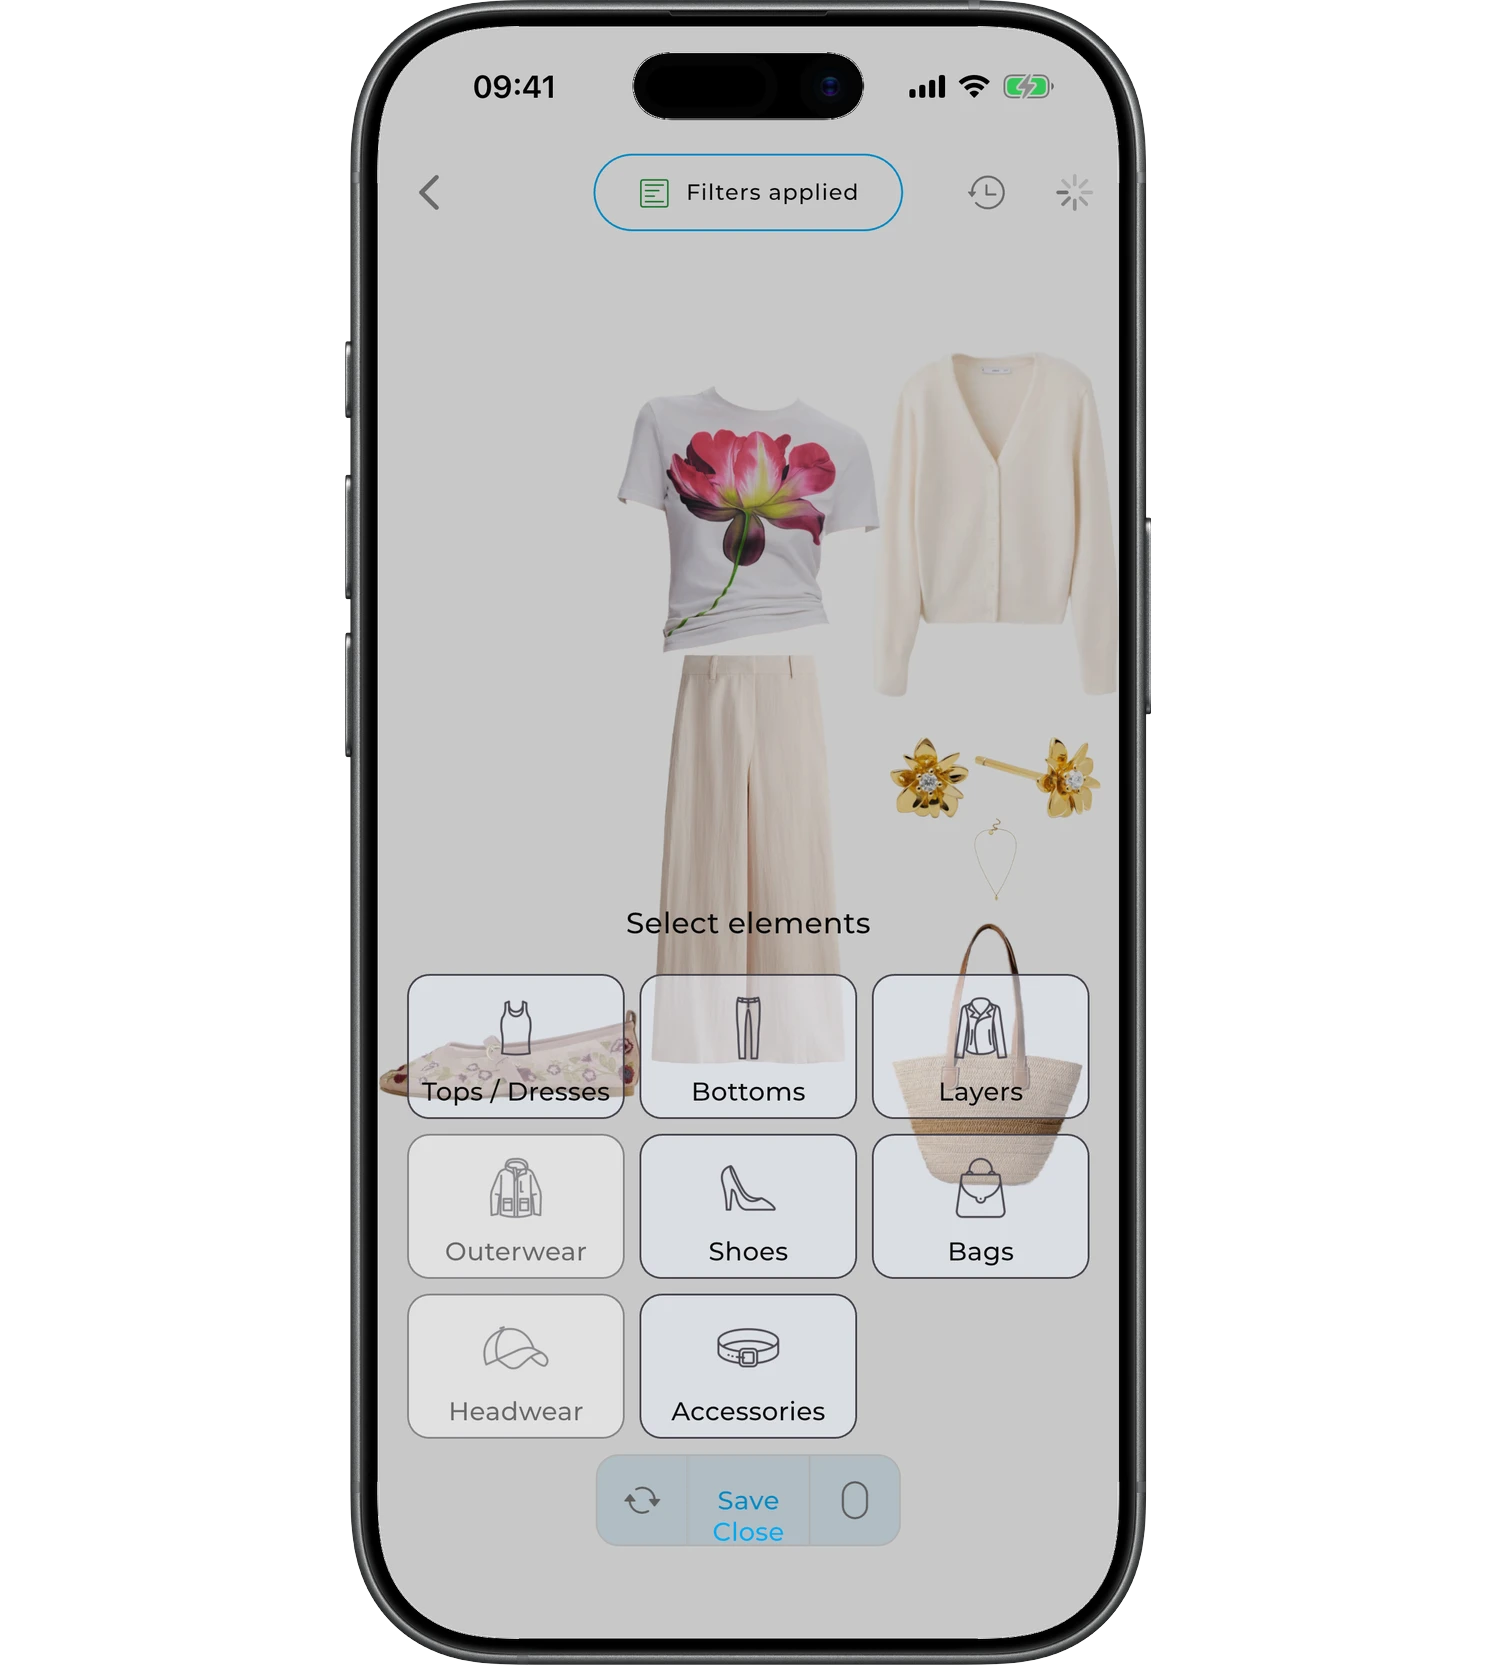
After adjusting the layers, tap "Close" or tap any part of the screen above the layer selection.
Refine the outfit
Tap an item in the outfit to:
- Replace it with another item from your wardrobe.
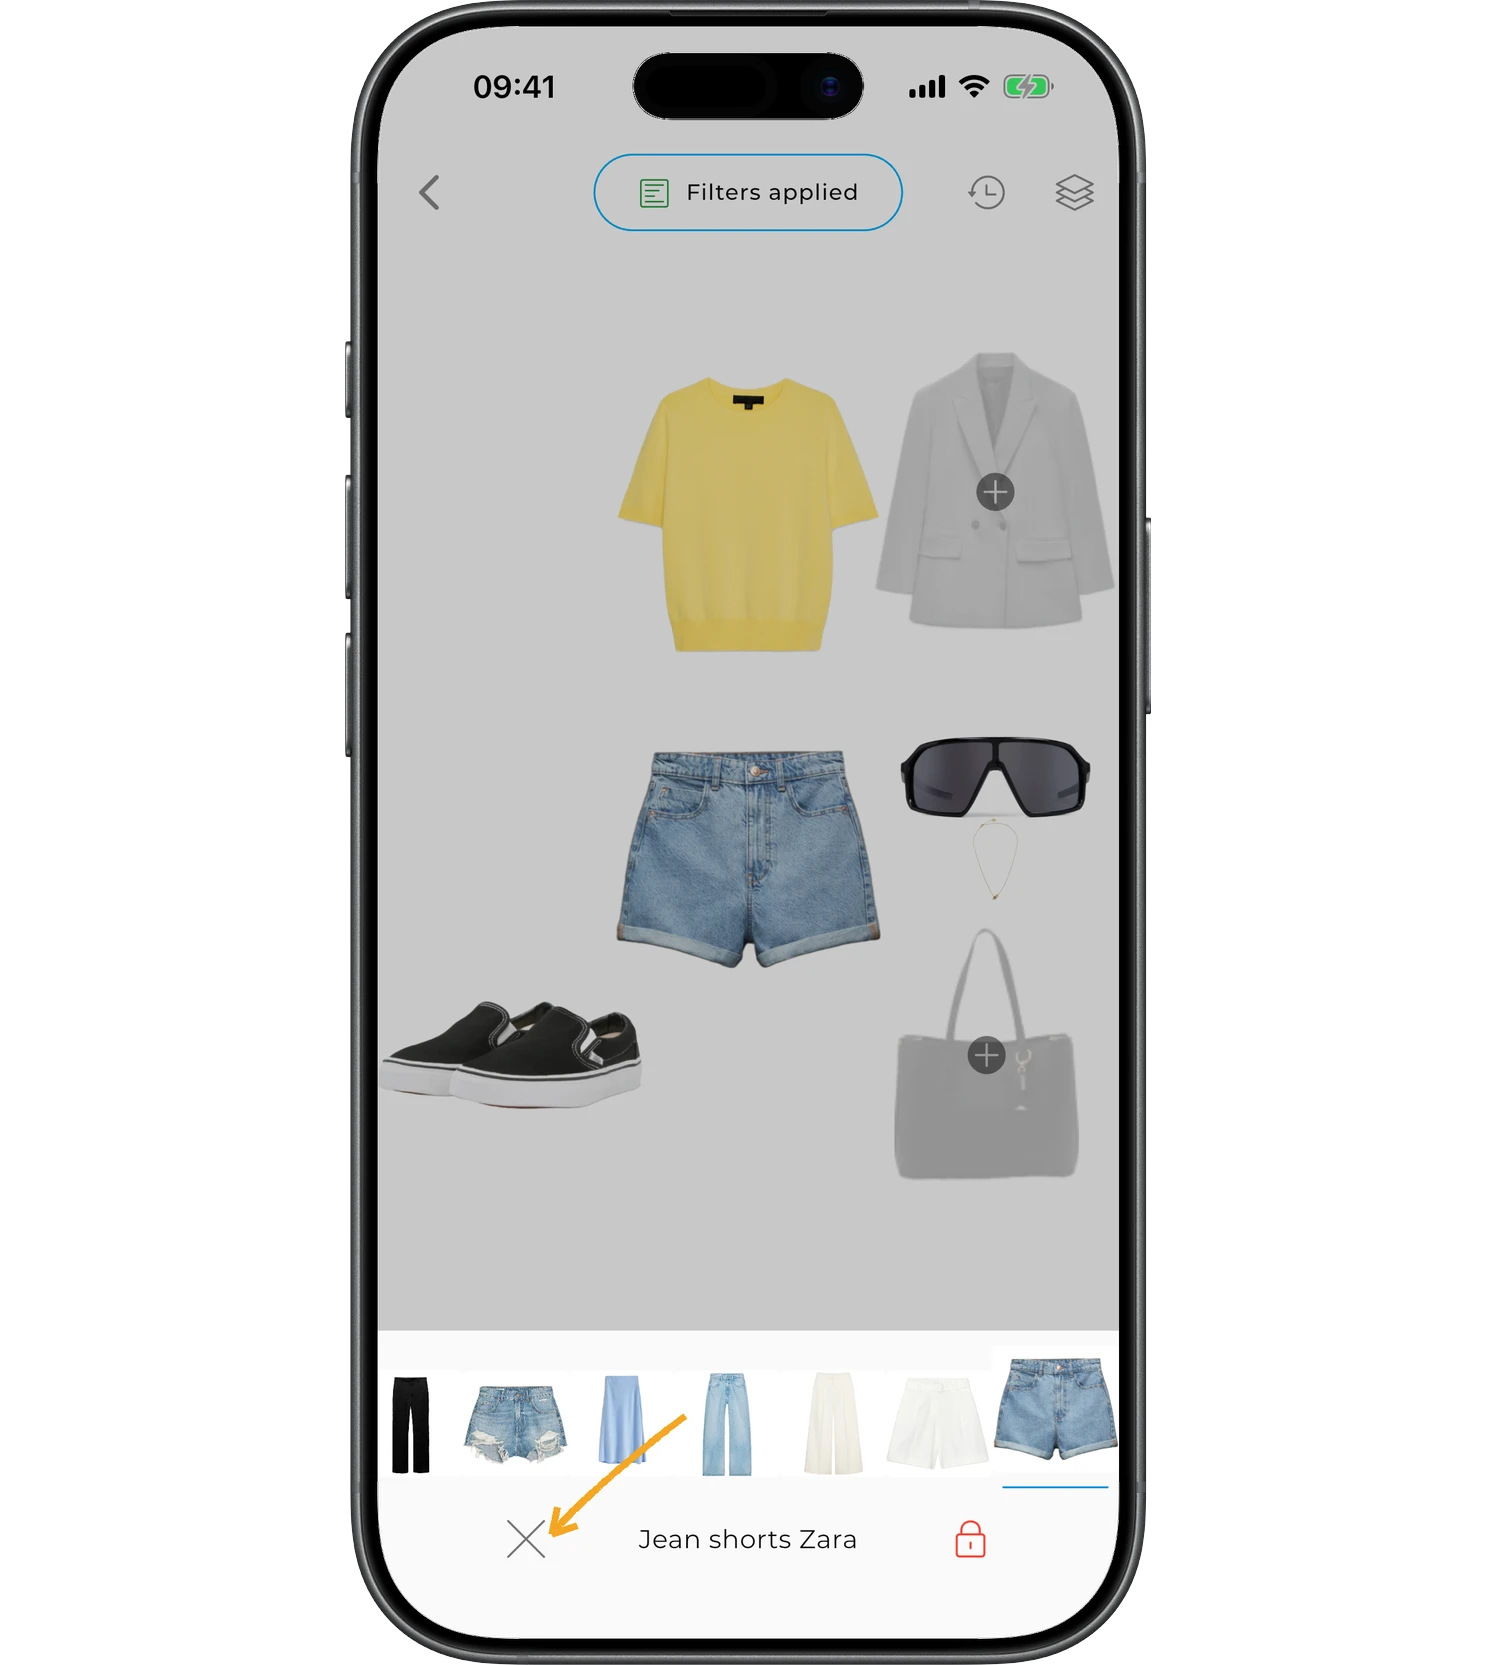
- Remove it from the outfit.
- Keep it in the outfit for future refreshes.
Press and hold an item to open its details and edit it.
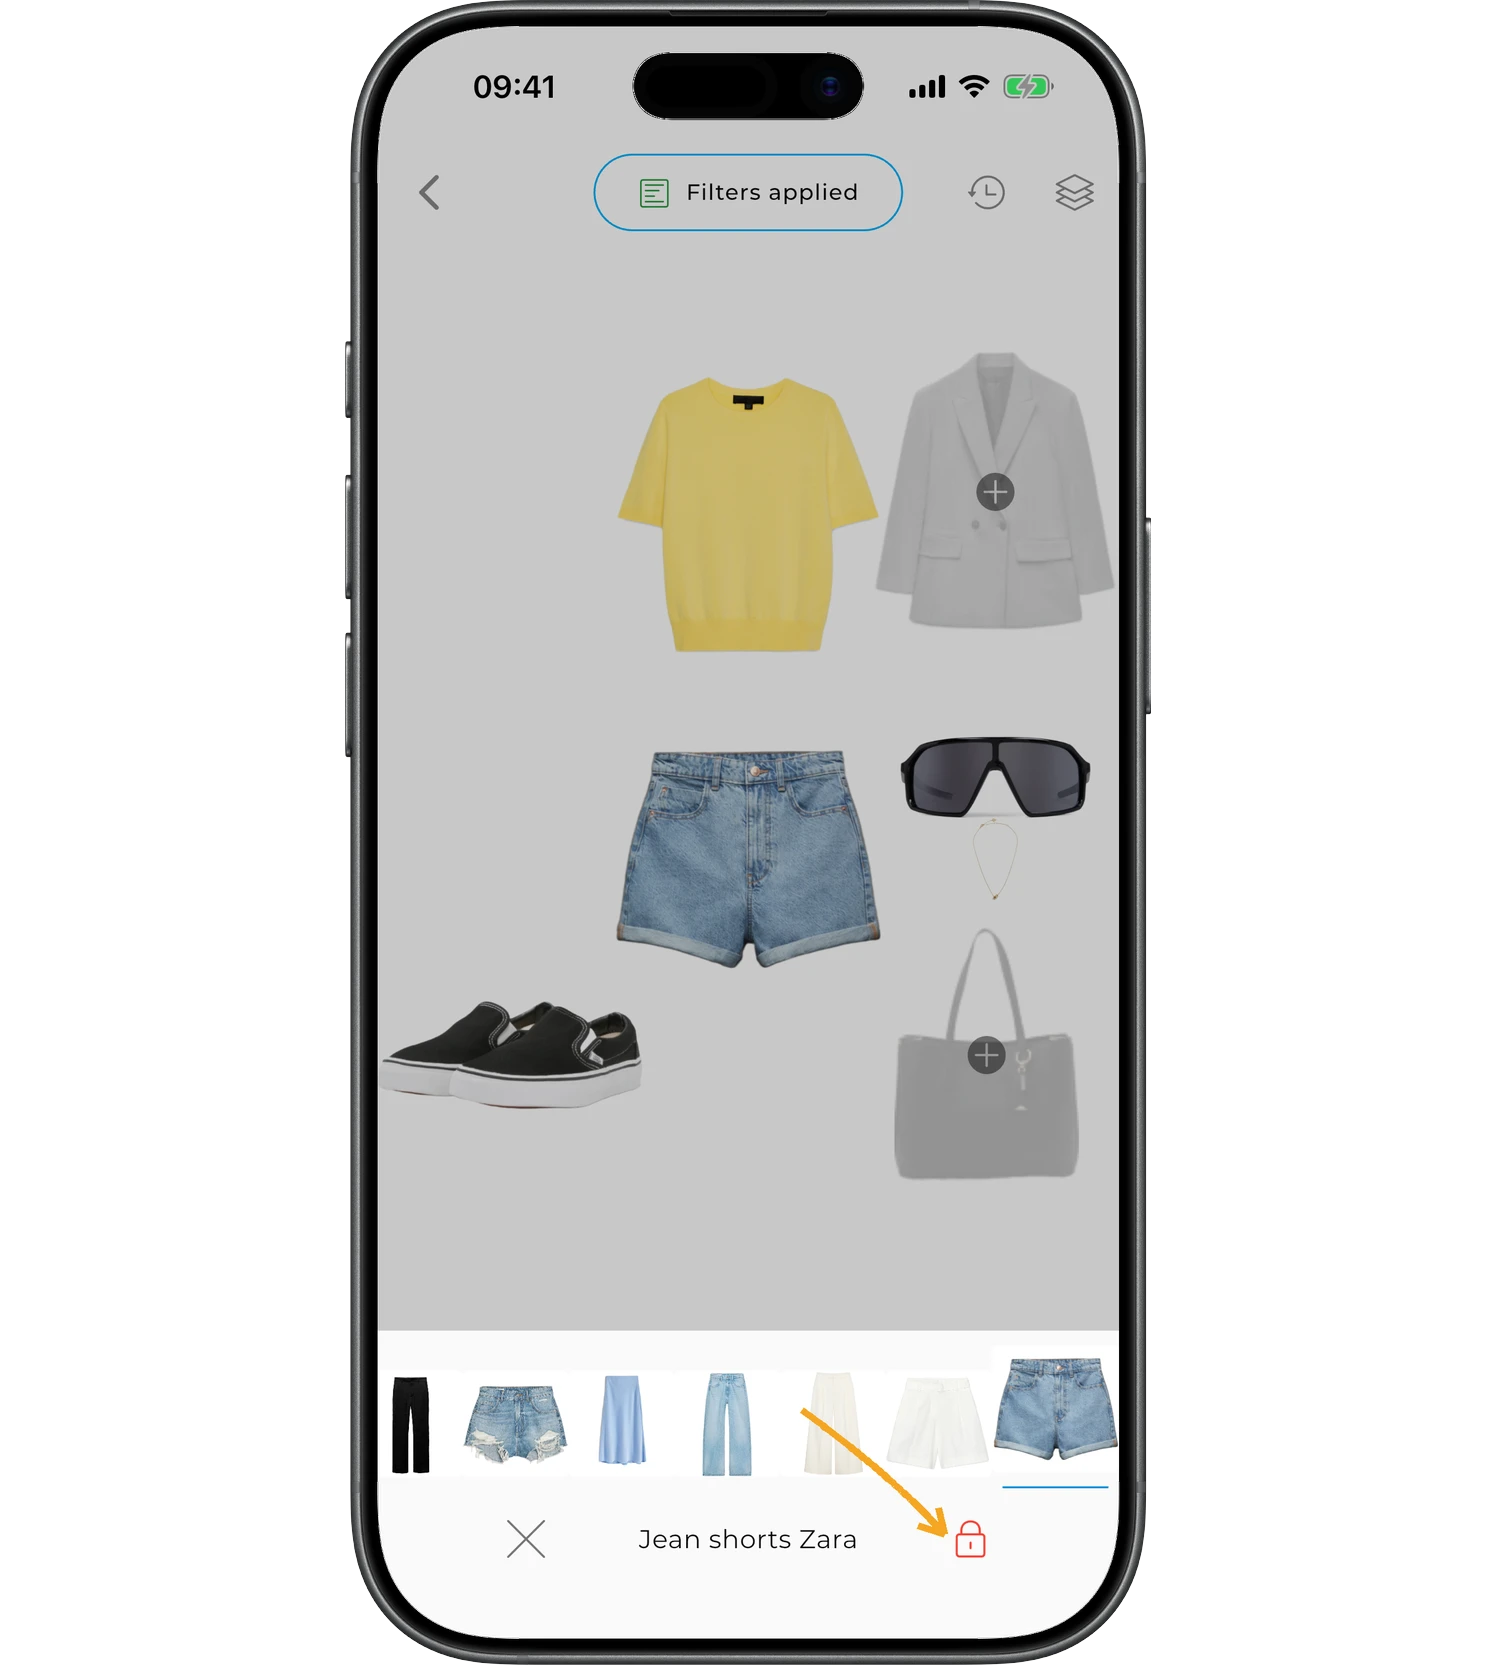
For example, if you like the top and trousers but the shoes don't fit, keep the items you like in the outfit with the lock icon and tap "Refresh" again. The AI will keep these elements and suggest a new combination for the rest of the outfit.
To replace an item, tap it briefly and choose any other item from the row at the bottom of the screen.
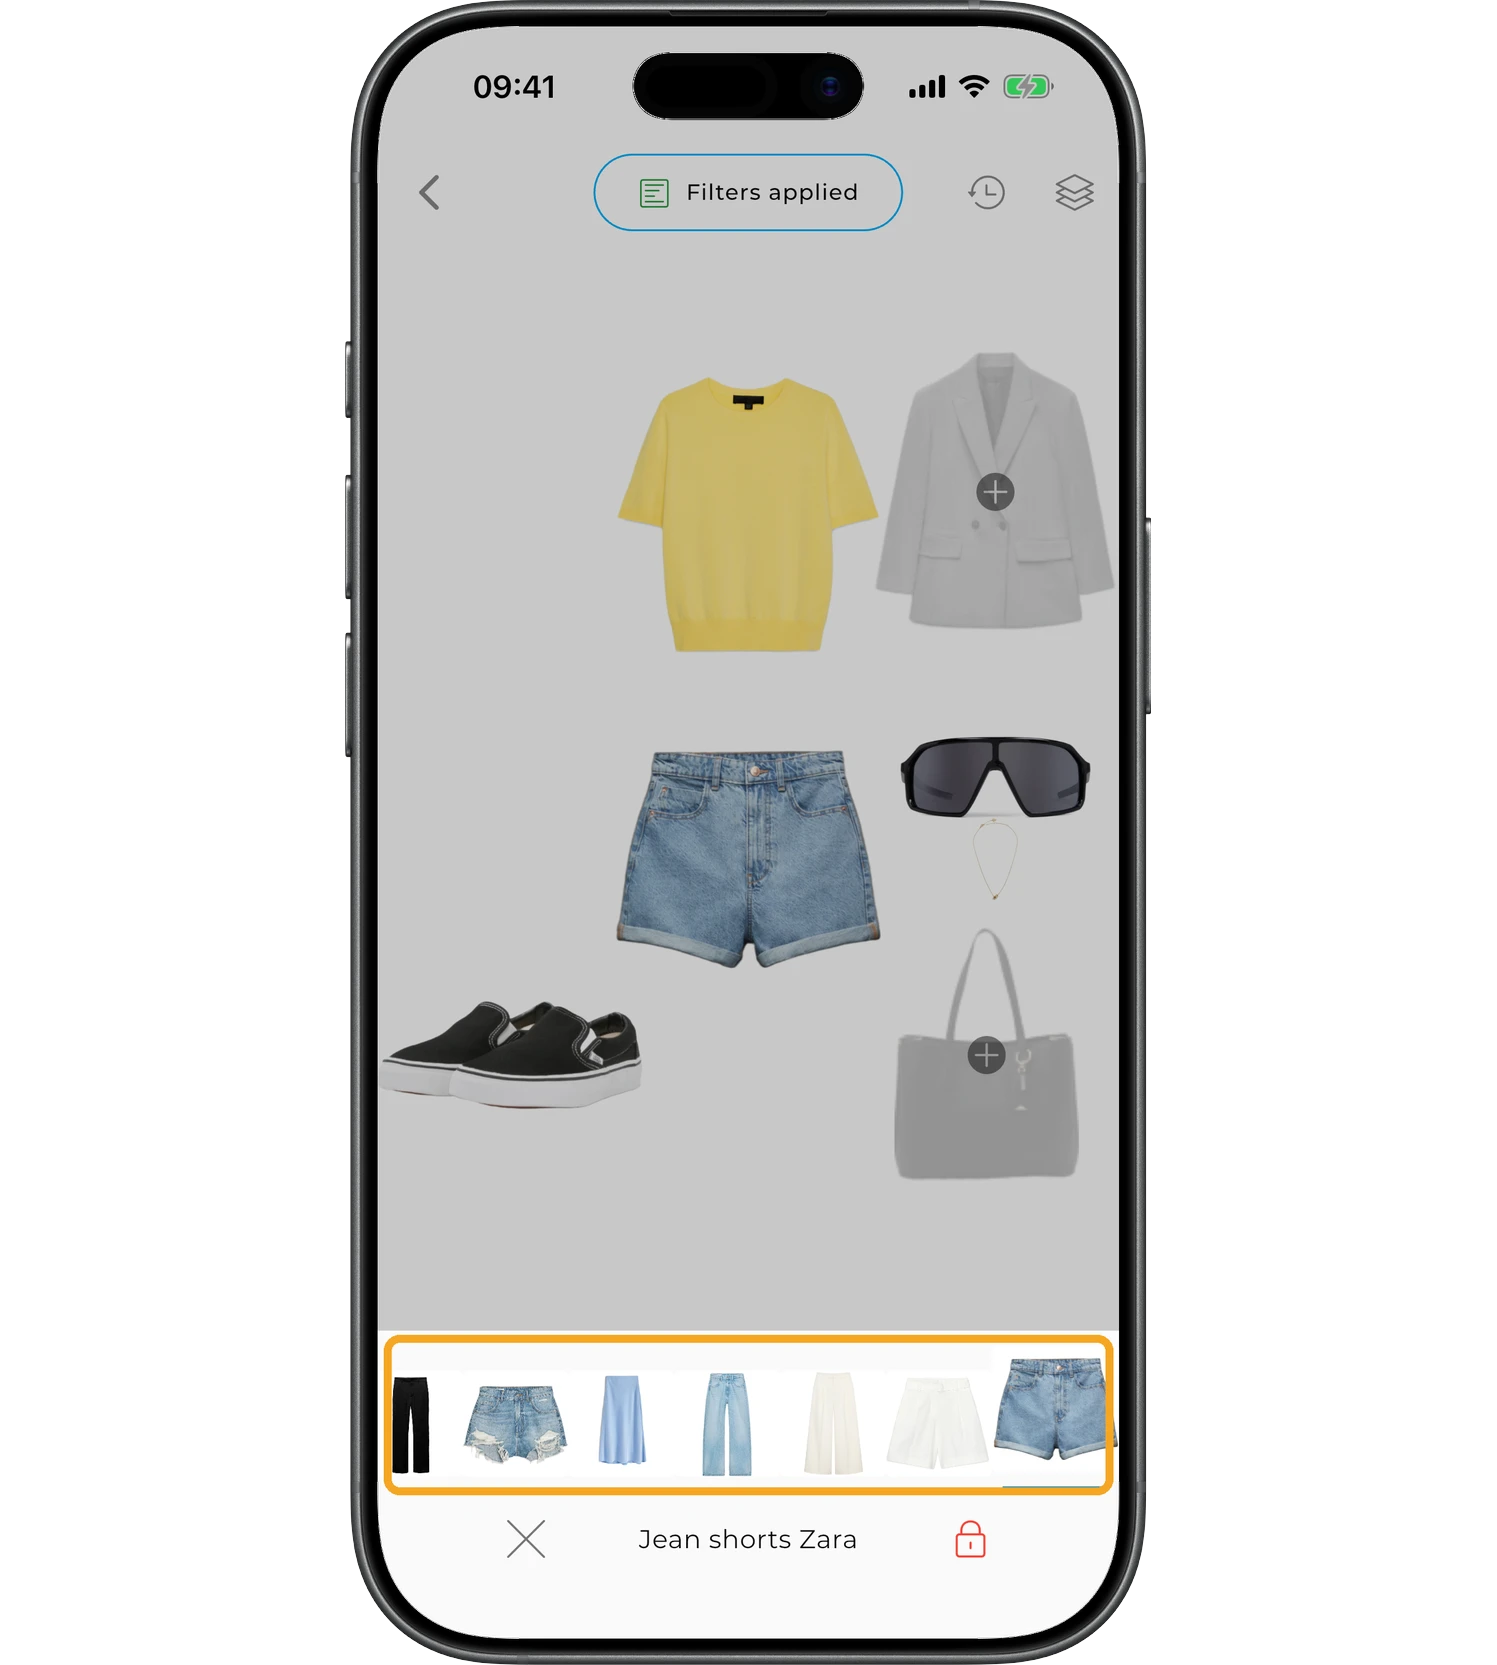
To keep an item in the outfit for future refreshes, tap it briefly and tap the lock icon.
To remove an item, tap it briefly and then tap "x".
View your outfit history
AI Studio saves previously created outfits in the history.
To open the outfit creation history, tap the clock icon in the top-right corner.
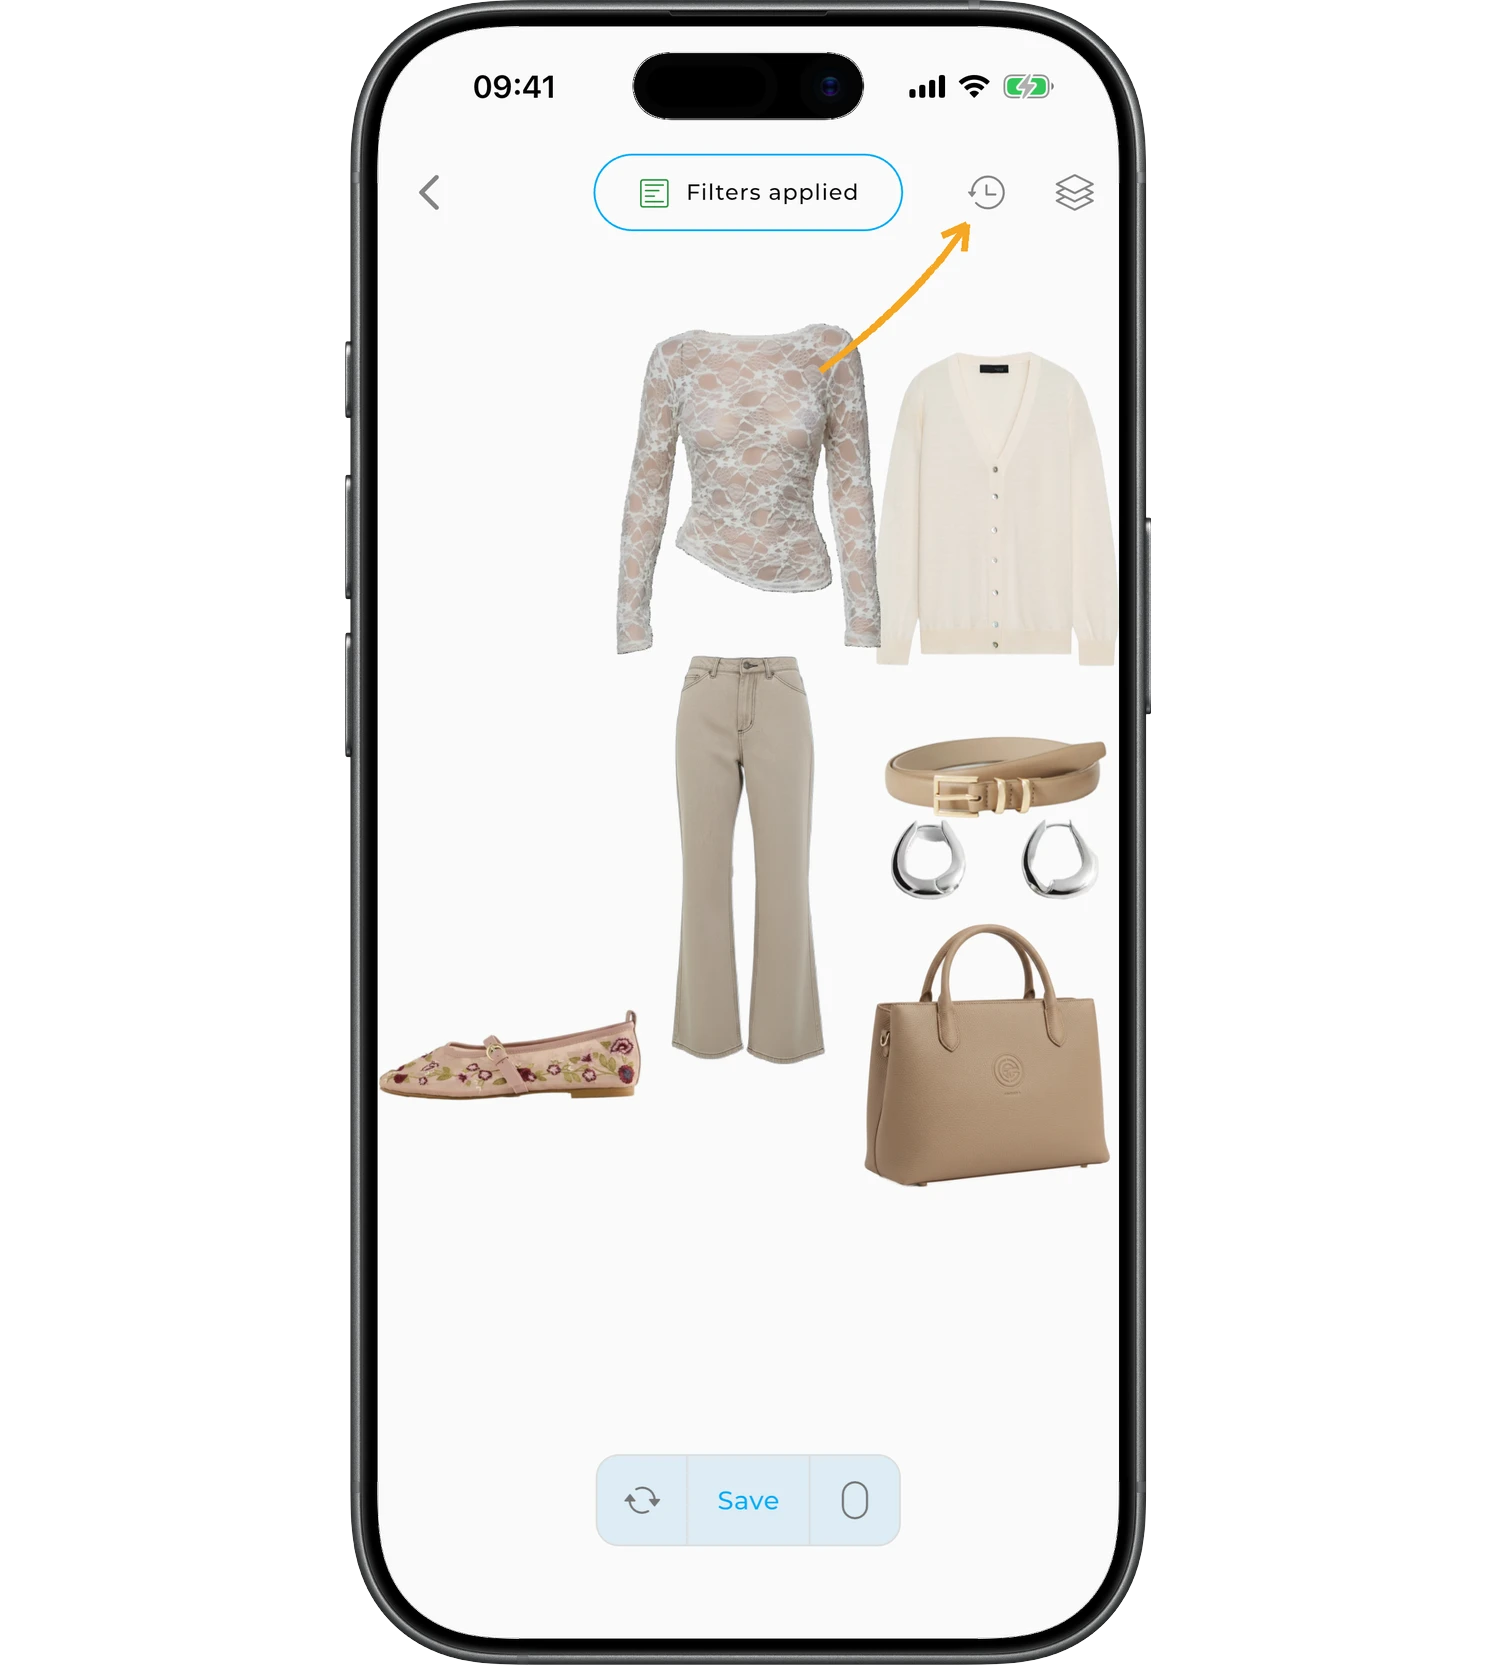
The history shows the created outfits and the items in them. Select the outfit you want to open and continue working.
The history is especially useful if you want to go back to a previous combination after several updates.
Try on the outfit
See how the outfit looks on you with virtual try-on.
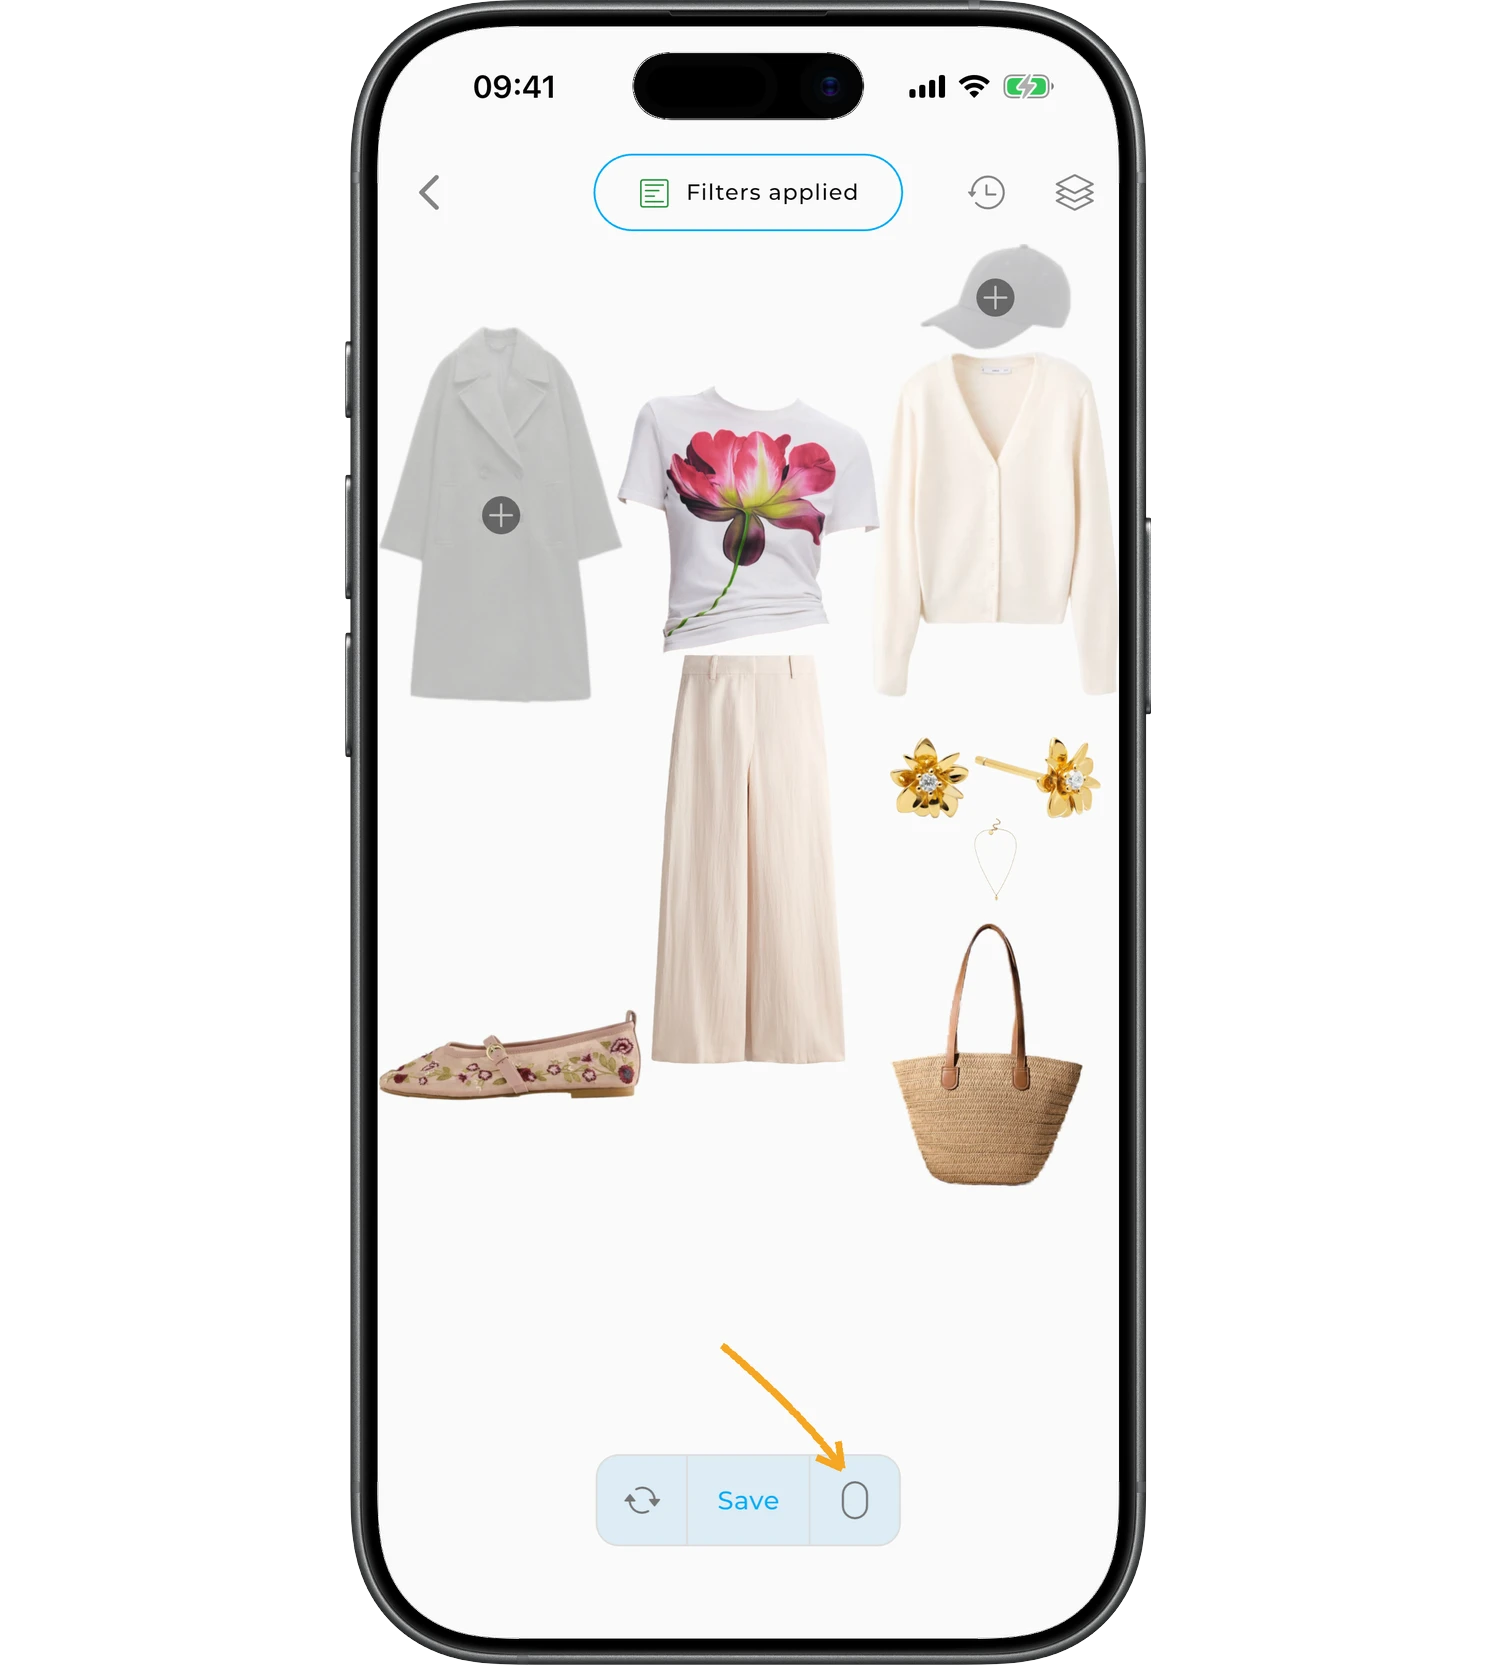
Tap the "Mirror" icon next to the "Save" button at the bottom of the screen. This opens the virtual try-on feature.
Save the outfit
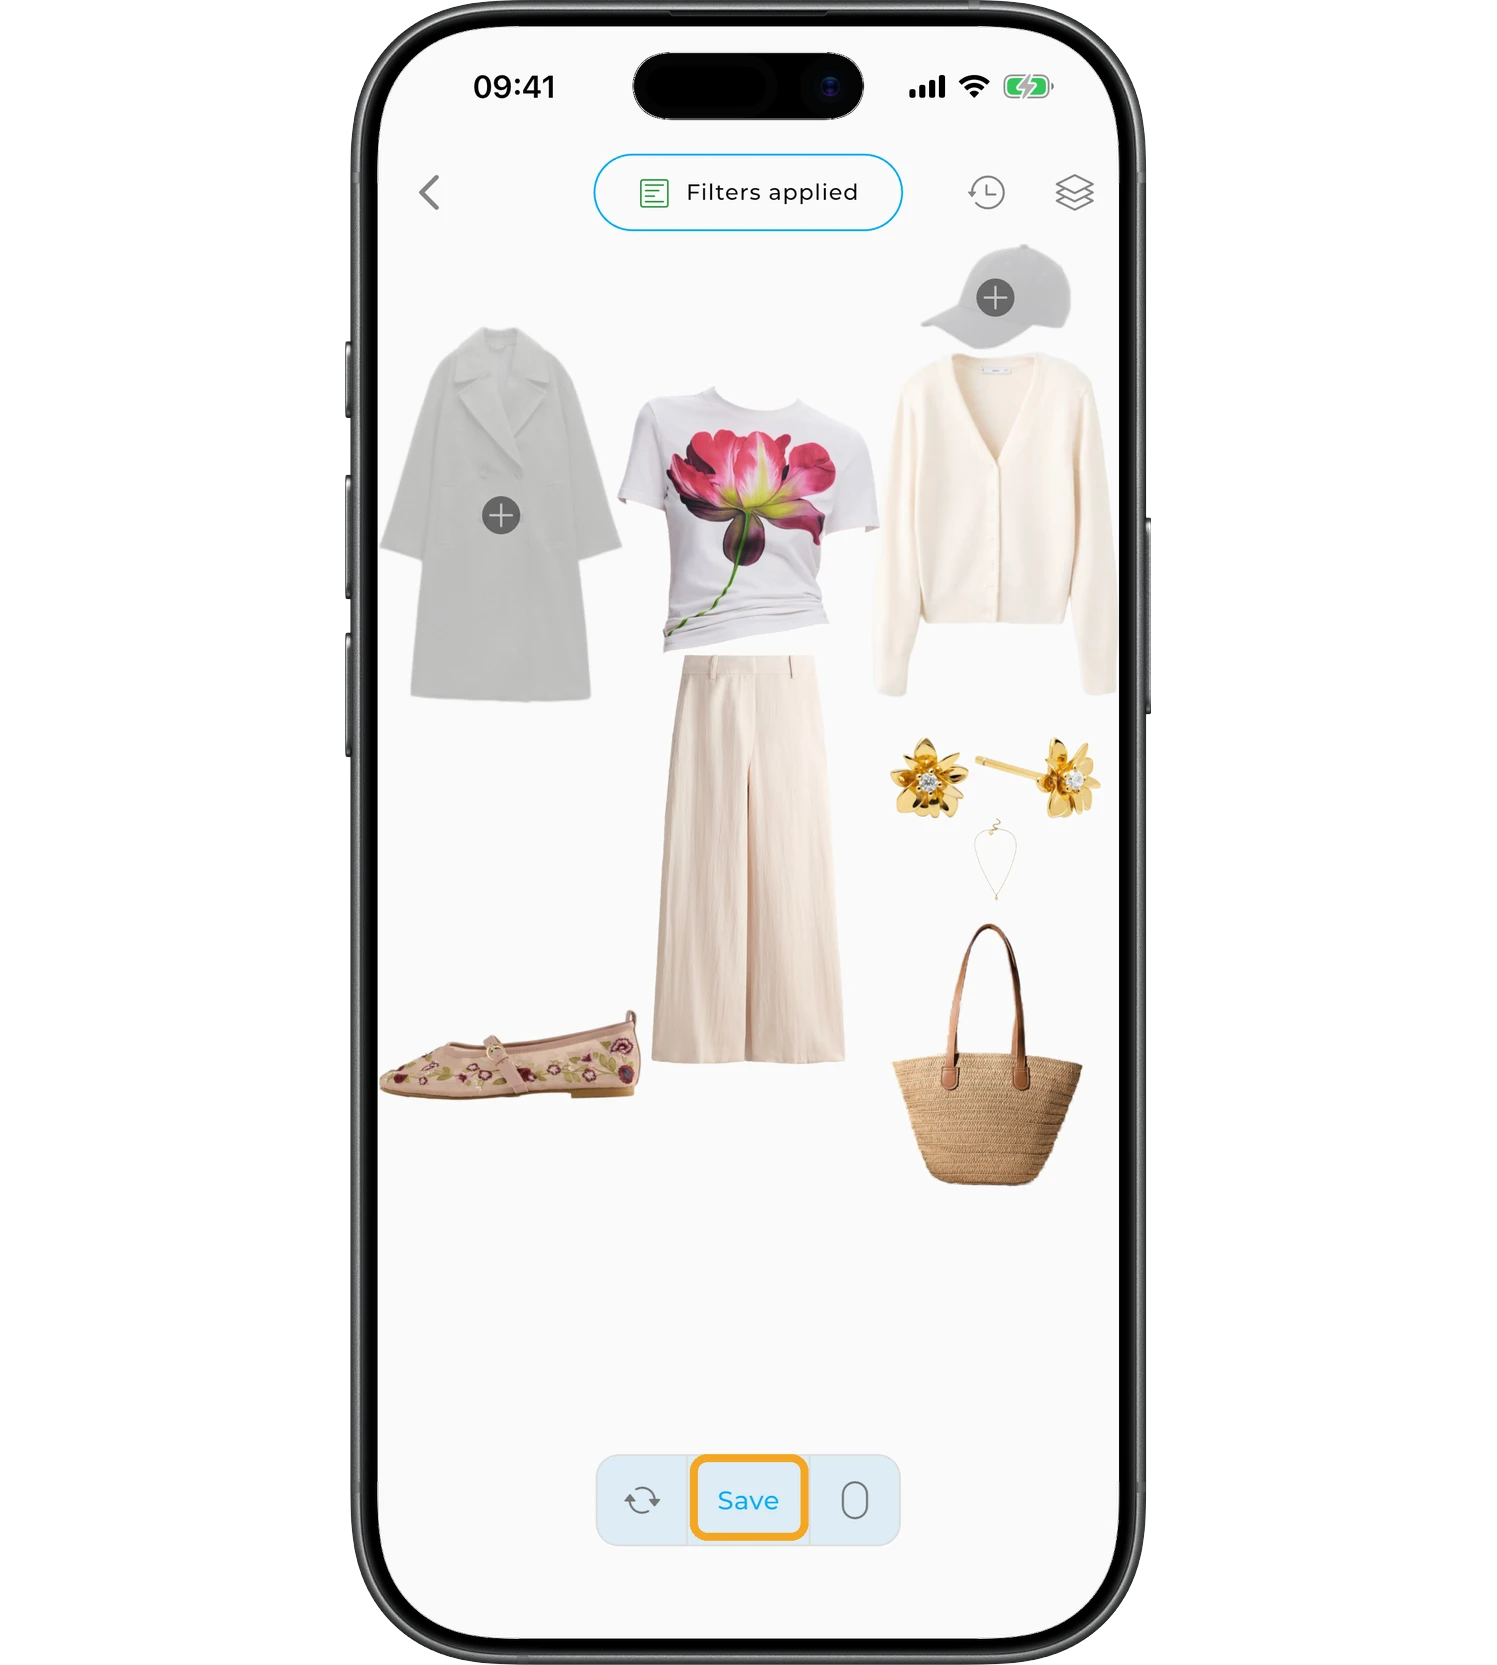
When you're happy with the outfit, tap "Save".
The saved outfit appears in the Outfit editor, where you can arrange the items, resize them, and continue editing.
See also
- AI Generator — creates several ready outfits at once.
- Outfit editor — helps you refine a saved outfit manually.
- Virtual try-on — lets you try a created outfit on yourself.
- Explore Combinations — helps you find matching items for a selected piece of clothing.
Need help?
Contact us at support@getwardrobe.com